DIY Talkbox Gives You More Bounce To The Ounce

Back in the 70s, you couldn’t swing a macrame plant hanger around a record store without knocking over numerous displays of albums featuring talkboxes. They were all over 70s music, kind of like how almost every 80s song has a sax solo and/or Michael McDonald on backing vocals. Not sure you’ve heard one being used? Trust us, you definitely have and just don’t realize it.

Talkboxes are essentially an amplifier and a speaker contained in a box. The speaker is the acoustic diaphragm type used in bullhorns and civil defense sirens. You run your guitar, keyboard, or electrified hurdy gurdy into the box, and instead of driving a horn, the sound travels up a clear plastic tube and into your mouth. Your mouth, fine resonant cavity that it is, becomes the final effect pedal. Any way you can manipulate it will shape the sound coming from the instrument. Flap those lips, and suddenly you’re talking like a robot. Who wouldn’t want one of these?

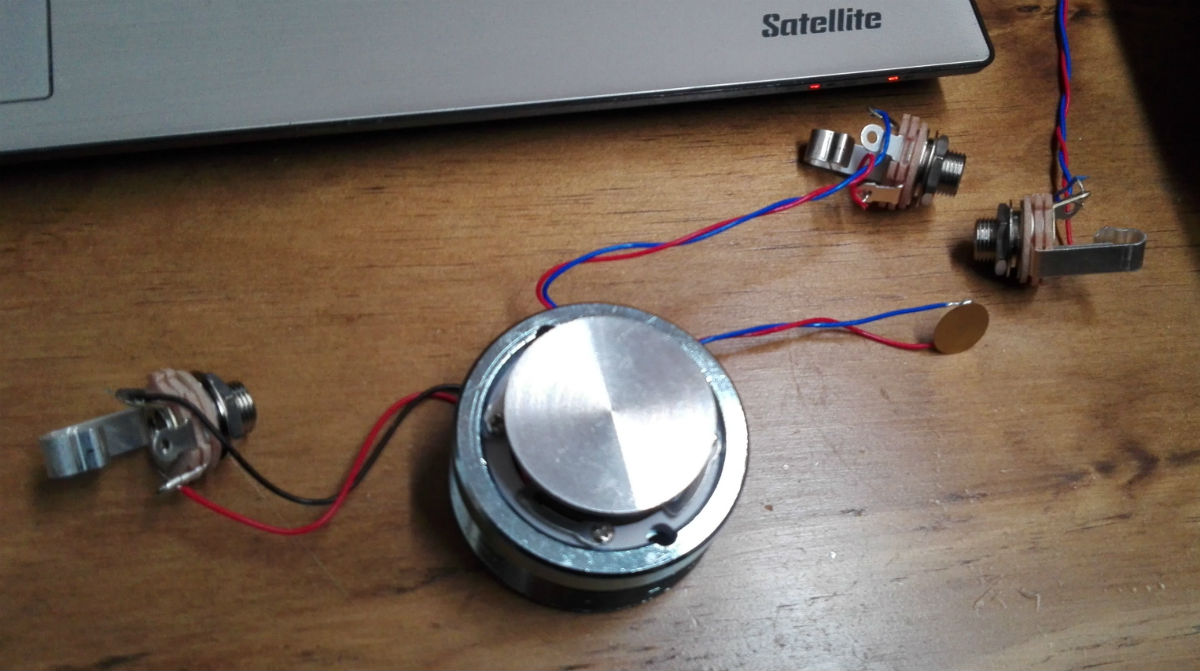
So they aren’t complicated, but you wouldn’t know it from the price of commercial ones. [mosivers] really digs the sound and wanted to build one, so he scoured the internet to figure out how to do so properly and shared his findings in this Instructable. The most important bit is the compression driver. The drivers that featured in the original talkboxes aren’t made anymore, but there are suitable replacements for ~$40.

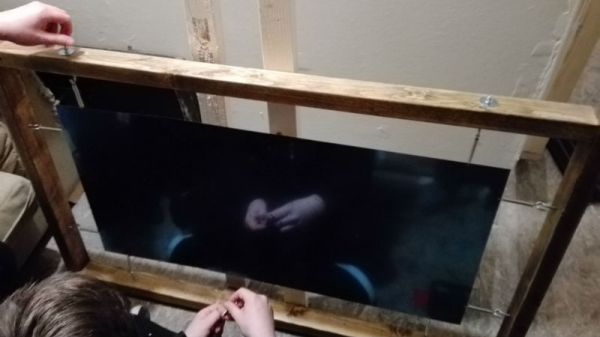
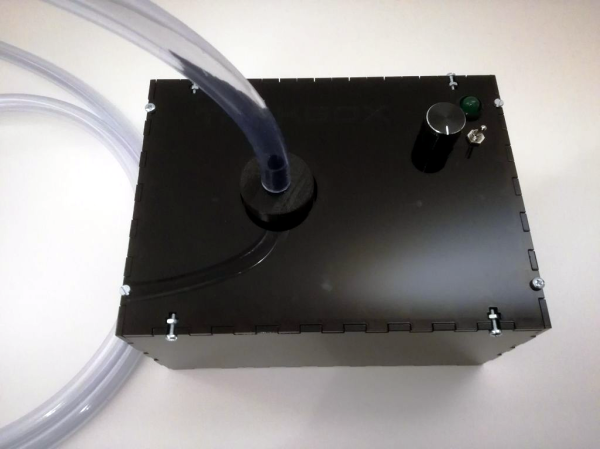
The next most important part is a high-pass filter to keep really low frequencies from damaging the driver. After that it’s down to the amplifier, some passives, and the all-important tube. You could laser cut an enclosure as [mosivers] did, or be the first person in history to reuse a Danish butter cookie tin for something other than sewing supplies. Boogie on down past the break and let’s groove tonight.

Speaking of the 80s, here’s a DIY talkbox built on a Game Boy.

Continue reading “DIY Talkbox Gives You More Bounce To The Ounce”

Building A Plate Reverb On The Cheap

For those who don’t spend their free time creating music with experimental audio effects, a plate reverb is essentially a speaker. It just happens to be, by design, a rather poor one. Rather than using a paper cone for a diaphragm like a traditional speaker, the plate reverb uses as you might guess, a metal plate. As the plate vibrates along with the source audio, a set of piezoelectric pickups convert that to an output. The end result is that audio fed into the plate reverb comes out with a nice echo effect.

But despite their relative simplicity, a plate reverb costs thousands of dollars. They’re so expensive that the majority of people just emulate the effect in software. But it doesn’t have to be that way. [Sammartino] and an audio engineer friend recently came up with a detailed guide for building a plate reverb that cost about 10% of commercially available models.

The construction is fairly simple. A wooden frame is built, and eight hooks are installed around the edges. The plate is suspended between these hooks using guitar strings, which holds it tight but with enough give to vibrate along with the tunes. Another board is attached across the center of the frame to support the electronics: a transducer to vibrate the plate, and two piezo pickups to convert that to an audio signal, and a couple jacks and some wiring to tie it all together.

For a different take on the DIY plate reverb, check out this one we covered all the way back in 2013. If you’re in the market for something a bit larger, we’ve got you covered there as well.

Mangling Images With Audio Effects

Ever wonder what those snapshots you took of your trip to Paris would look like if you ran them through a Proco RAT or a Boss Overdrive? How about a BF-3 flanger? [Robert Foss] wrote in with this nifty little script (GitHub) that processes images as if they were audio files so that you can try it out without investing in a rack of analog pedals. Test your audio/visual DSP intuition and see if you can name the images without looking at the effects.

If you know your Linux command-line utilities, there’s really not much to it — scroll down to the very bottom of the script to see how it’s done. ffmpeg converts the images to YUV format, which works much better than RGB for audio processing, and then sox adds the audio effects. Another trip through ffmpeg gets you back to an image or video.

OK, it’s cheating because it’s applying the audio effects inside the computer, but nothing’s stopping you from actually taking the audio out and running it through that dusty Small Stone. Of course, once you’ve got audio outside of the computer, the world is your oyster. Relive the glorious 70’s when video artists made works using souped-up audio synthesizers. If you haven’t seen the Sandin Image Processor or the Scanimate in action, you’ve got some YouTubing to do.

Good Old-Fashioned Circuit Bending With Patient Alpha

For a lot of us some sort of audio circuit was our first endeavor into electronics. Speak and Spell, atari punk console, LM386 in a mint tin, sound familiar? If not, you should do yourself a favor and knock out a couple of those simple projects. For those of us who have done a bit of what the kids are calling circuit bending, [Nickolas Peter] brings us a familiar hack with his Patient Alpha project. You can see a time-lapse video of the build process and a short demo in the video after the break.

[Nickolas] did a few mods to his 2013 Executor key fob; the obligatory potentiometer for resistor swap is always a crowd pleaser. Adding an audio out via 3.5 mm jack is something that some of us wouldn’t have thought to include, but it lets the Executor scream into your serious audio gear for maximum eargasms. It’s worth mentioning that [Nickolas] does a good job with this hack’s finished look, albeit he started with a product in an enclosure he still goes to the trouble of custom fitting all his bits in an aesthetically pleasing way. And then he made a second.

We have covered circuit bent projects aplenty: from an old school take on circuit bending to one with a ratking of wires built on a proper bit of audio kit. Dig out your soldering iron and dig in.

Continue reading “Good Old-Fashioned Circuit Bending With Patient Alpha”

Hackaday Prize Entry: DIY Guitar Multieffects

Guitar effects and other musical circuits are a great introduction to electronics. There’s a reason for this: with audio circuits you’re dealing with analog signals and not just the ones and zeros of blinking a LED. Add in the DSP aspects of audio effects, and you have several classes of an EE degree wrapped up in one project.

For his Hackaday Prize entry, [randy.day] is building a guitar multieffect. Instead of just a single distortion, fuzz, or chorus circuit, this tiny little PCB is going to have several flavors of pitch shifting, a flanger, chorus, echo, harmony, and stranger ‘digital-ish’ effects like bitcrushing.

This effects unit is built around a PIC32 and a TI audio codec which processes the audio at 64k 32-bit samples/second. This takes care of all the audio processing, but the hard work for a guitar pedal is actually the enclosure and mechanicals – it’s a hard life for stage equipment. For the foot pedal input, [randy] is using a magnetic position sensor, but there’s no word if he’ll be using a fancy die-cast enclosure or a plastic injection molded unit.

The 2015 Hackaday Prize is sponsored by: