Hands-Free Compass Uses Haptic Feedback

If you’ve never experienced it before, getting turned around on a cloudy day in the woods or getting lost during an event like a snowstorm can be extremely disorienting and stressful — not to mention dangerous. In situations where travel goes outside the beaten path, it’s a good idea to have some survival gear around, including a good compass. But if you need your hands for other things, or simply don’t want to have to stop often to check a compass, you might want to try out something like this belt-mounted haptic feedback compass.

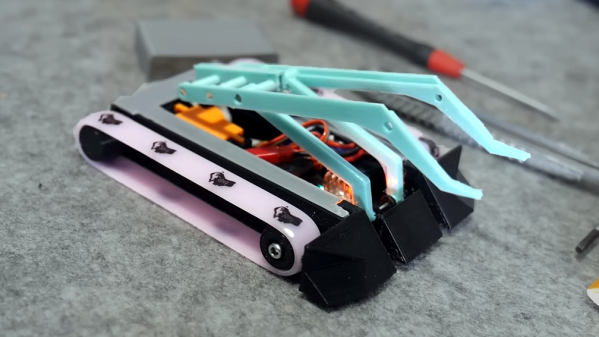
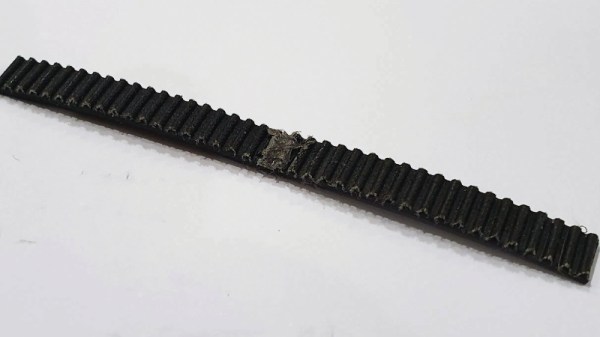
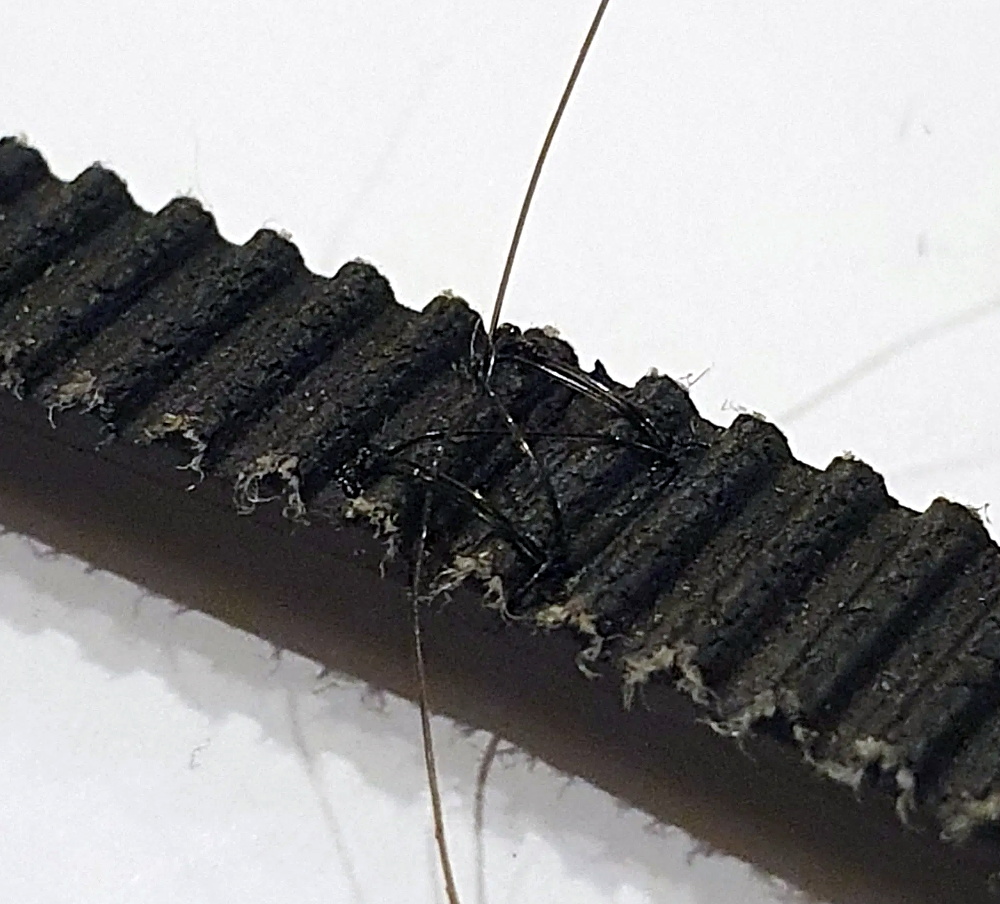
The compass is based around a Raspberry Pi Pico microcontroller and uses a ULN2803a transistor array chip to control a series of motors. The motors are mounted all along a belt using custom 3D printed clips with wires woven to each through the holes in the belt. The firmware running on the belt communicates with an Android app via USB to control each of the motor’s vibration based on the direction the wearer is traveling and their desired heading. With certain patterns, the wearer can get their correct heading based on the vibrations they feel through the belt.

While it does rely on having a functioning phone, a modern smartphone’s built-in compass doesn’t require a signal to work. We would still recommend having a good simple compass in your pack as backup if you’re going to be far off the beaten path, though. There are other ways of navigation besides by compass, map, or GPS too. Have a shot at inertial navigation if you want a challenge.

Thanks to [Peter] for the tip!

A Crowned Pulley Keeps Robot’s Treads On Track

[Angus] at Maker’s Muse recently created a new and tiny antweight combat robot (video, embedded below) and it has some wonderfully clever design elements we’d like to highlight. In particular: how to keep a tracked robot’s wheel belt where it belongs, and prevent it from slipping or becoming dislodged. In a way, this problem was elegantly solved during the era of the steam engine and industrial revolution. The solution? A crowned pulley.

Silicone bracelet and crowned pulley result in a self-centering belt with a minimum of parts.

A crowned pulley is a way of automatically keeping a flat belt centered by having a slight hump in the center of the pulley, which tapers off on either side. Back when steam engines ran everything, spinning axles along the ceiling transferred their power to machinery on the shop floor via flat belts on pulleys. Crowned pulleys kept those flat belts centered without any need for rims or similar additions.

The reason this worked so well for [Angus]’s robot is partly its simplicity, and partly the fact that it works fantastically with the silicone wrist bracelets he uses as treads. These bracelets are like thick rubber bands, and make excellent wheel substitutes. They have great grip, are cheap and plentiful, and work beautifully with crowned pulleys as the hubs. It’s a great solution for a tiny robot, and you can how it self-centers in the image here.

Antweight robots are limited to 150 grams which means every bit counts, and that constraint leads to some pretty inventive design choices. For example, [Angus]’s new robot also has a clever lifter mechanism that uses a 4-bar linkage designed to lever opponents up using only a single motor for power. Watch [Angus] explain and demonstrate everything in his usual concise and clear manner in the video, embedded below.

Continue reading “A Crowned Pulley Keeps Robot’s Treads On Track”

Electric BMX With Friction Drive

Electric bikes have increased in popularity dramatically over the past few years, and while you can easily buy one from a reputable bicycle manufacturer, most of us around here might be inclined to at least buy a kit and strap it to a bike we already have. There aren’t kits available for every bike geometry, though, so if you want an electric BMX bike you might want to try out something custom like [Shea Nyquist] did with his latest build. (Video, embedded below.)

BMX frames have a smaller front triangle than most bikes, so his build needed to be extremely compact. To that end, it uses two small-sized motors connected together with a belt, which together power a friction drive which clamps against the rear tire to spin it directly. This keeps the weight distribution of the bike more balanced as well when compared to a hub drive, where the motor is installed in the rear wheel. It also uses a more compact lithium polymer battery pack instead of the typical 18650 lithium ion packs most e-bikes use, and although it only has a range of around three miles it’s more than enough charge to propel it around a skate park.

The build boasts impressive numbers too, at 2.5 kW peak power per motor. This puts it in electric motorcycle territory, and it’s indeed fast despite its small stature. For a true high speed e-bike experience, though, you’ll need a slightly larger frame and motor even if it means tossing safety out of the window. Continue reading “Electric BMX With Friction Drive”

Beer Pong Difficulty Level: 10

Beer pong is a fun enough game for those of a certain age, but one thing that it lacks is a way of cranking up the difficulty setting independent of the amount of beer one has consumed. At least, that was the idea [Ty] had when he came up with this automated beer pong table which allows the players to increase the challenge of this game by sliding the cups around the top of the table.

The build uses a belt-driven platform under a clear cover with a set of magnets attached. Each of the cups on the table has a corresponding magnet, which allows them to slide fairly easily back and forth on the table. The contraption is controlled by an Arudino Nano with a small screen and dial that allows the players to select a difficulty level from 1 to 10. The difficulty levels increase the speed that the cups oscillate on the table, which certainly adds another layer of complexity to this already challenging game.

While we hope to eventually see a beer pong table that can automatically arrange the cups as the game is played, we do appreciate the effort to make an already difficult game even more difficult. Of course, if you have problems with the difficulty level you might want to pick up a PongMate CyberCannon Mark III to help with those clutch beer pong shots.

Continue reading “Beer Pong Difficulty Level: 10”

Sliding Screen Has Wheels, Will Travel

For a recent event, [MakerMan] was tasked with creating an interactive display that could move back and forth along an image of the Moscow skyline to highlight different points of interest. The end result is certainly gorgeous, but since this is Hackaday, we were more excited to see all the behind the scenes video of how it was built.

As with many of his projects, this one started with little more than scrap parts. Two metal I-beams were welded together to make a track, and a wheeled cart was fashioned to ride on it. Using a belt and pulley system that’s not unlike a scaled up version of what you might see on a desktop 3D printer, the motor in the cart is able to move the arrangement back and forth with minimal slop.

Installing the motor and pulley in the cart.

The cart actually holds all of the electronics in the project, including the power supplies, MA860H motor controller, a pair of endstop switches, and the Arduino that pulls it all together. A drag chain is used to keep the wires tight to the side of the rail without getting tangled up in anything.

[MakerMan] doesn’t explain much of the software side of this one, though we suppose he might only have been contracted to develop the hardware. But towards the end of the video you can see how the cart, now with large touch screen display mounted on top, moves back and forth when the appropriate commands are sent to the Arduino.

We’re not really sure what application such a contraption would have for the average hacker, but that doesn’t mean we can’t be jealous. There’s just something about huge illuminated screens that just speaks to us.

Continue reading “Sliding Screen Has Wheels, Will Travel”

Stitching Up Custom Belts

If you’ve got a 3D printer, you’re probably familiar with the reinforced belts that are commonly used on the X and Y axis. These belts either come as long lengths that you attach to the machine on either end, or as a pre-sized loop. Traditional wisdom says you can’t just take a long length of belt and make your own custom loops out of it, but [Marcel Varallo] had his doubts about that.

This is a simple tip, but one that could get you out of a bind one day. Through experimentation, [Marcel] has found that you can use a length of so-called GT2 belt and make your own bespoke loop. The trick is, you need to attach the ends with something very strong that won’t hinder the normal operation of the belt. Anything hard or inflexible is right out the window, since the belt would bind up as soon as it had to go around a pulley.

It seems the key is to cut both ends of the belt very flat, making sure the belt pattern matches perfectly. Once they’ve been trimmed and aligned properly, you stitch them together with nylon thread. You want the stitches to be as tight as possible, and the more you do, the stronger the end result will be.

[Marcel] likes to follow this up with a bit of hot glue, being careful to make sure the hardened glue takes the shape of the belt’s teeth. The back side won’t be as important, but a thin layer is still best. The end result is a belt strong enough for most applications in just a few minutes.

Would we build a 3D printer using hand-stitched GT2 belts? Probably not. But during a global pandemic, when shipments of non-essential components are often being delayed, we could certainly see ourselves running some stitched together belts while we wait for the proper replacement to come in. Gotta keep those face shields printing.

Belt Up With A Redundant Car Part

The toothed belt that turns the camshaft in synchronization with the crankshaft on many motor vehicle engines is something of an under-appreciated component. Unless you are unlucky enough to ave had one fail and destroy your engine, it’s probably something you’ve never given a second thought to outside of periodic service intervals.

For something to perform such a task over so many thousands of miles of motoring it must be made of pretty strong stuff. Even when a belt is life-expired it is still in good physical shape, and [Crispyjones] saw the potential in a used Subaru belt to make a different type of belt. After keeping his engine in sync for so long it would serve no less vital a purpose, and keep his pants from falling down.

You can of course buy the hardware for a belt from a decent crafting store, but he chose to recycle a buckle from a worn-out leather belt. Cleaning the timing belt and cutting it carefully so that the Subaru logo would be on show to the outside world in the finished article, he secured it round the buckle with some epoxy glue and a bit of stitching. The original leather retaining loop is not really appropriate, so one is fashioned from wire. Finally we see the process for measuring where the holes should be placed, followed by their creation with a hole punch.

Hackaday isn’t a crafting site, so we don’t often feature projects like this one. But the humble timing belt is a component that we’ve probably all replaced and thrown away more than once without really thinking what the properties of the thing we’re throwing away are. So we like this relatively simple project for its re-use of something few of us would otherwise keep, as well as for its delivering rather a cool belt. We’ve featured plenty of cambelts here doing their traditional job, but this is the first time we’ve had one as an item of clothing. We’ll leave you with a glimpse of a future without cambelts at all.