Iron Pipe Makes A Great Workbench

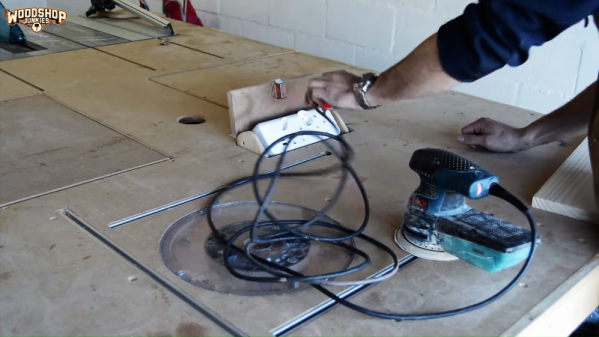
It’s a frequently encountered problem in any workshop; how do you make a bench? And once you’ve made a bench, how do you put it on wheels to move it about? [Eric Strebel] needed a cart for his laser cutter, so he designed his own in an unexpected material: malleable iron pipe.

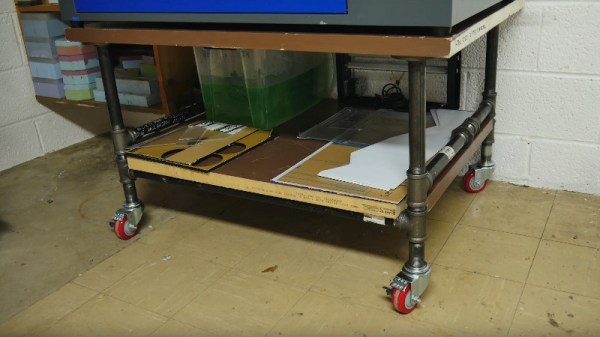
The attraction of iron pipe is its ready availability and ease of assembly. [Eric] created a sturdy table complete with a worktop made from a solid door in a very short time. T pieces and joiners were used, along with a hefty set of flanges for the tabletop itself. The casters are the expanding stem variety, with a compressed rubber insert expanding to hold them securely in place.

The result as can be seen in the video below is a really neat trolley for the cutter, followed quickly by another workbench. It would be interesting to know more about this material, parameters such as its wall thickness and lateral strength, because in a table without any cross-bracing it becomes important to avoid an untimely collapse.

The most common material for benches seems still to be wood, indicating that for such a technophile community we can be surprisingly conservative in our choices. Sometimes though, benches are made from the most surprising things.

Continue reading “Iron Pipe Makes A Great Workbench”

Pop-Up Outlet Helps Make The Most Of A Tiny Shop

You’ve got to admire the steps some people take to squeeze a shop into a small space. Finding ways to pack in ever more tools and to work on bigger and bigger projects become ends to themselves for some, and the neat little tricks they find to do so can be really instructive.

Take this workbench pop-up outlet strip for example. The shop that [Woodshop Junkies] occupies appears to be a single-car garage, on the smallish size in the first place, that is almost entirely filled with a multipurpose workbench. It provides tons of storage underneath and a massive work surface on top, but working with small power tools means stretching extension cords across the already limited floor space and creating a tripping hazard. So he claimed a little space on the benchtop for a clever trap door concealing a small tray holding an outlet strip.

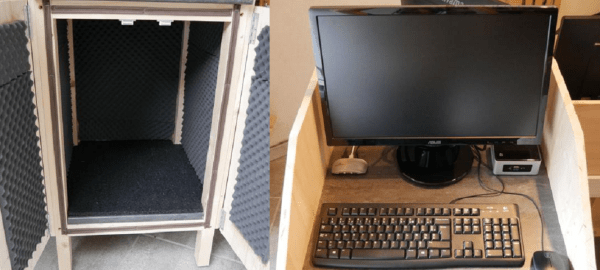
The tray rides on short drawer glides and, thanks to a small pneumatic spring, pops up when the door is unlatched. There was a little trouble with some slop in the glides causing the tray to jam, but that was taken care of with a simple roller bearing. The video below shows its construction and how it stays entirely out of the way until needed.

As cool as this build is, it’s just icing on the small shop cake when compared to the workbench. [Woodshop Junkies] has a complete playlist covering the build which is worth watching. And you might want to refer to our tiny shop roundup for more tips on getting a lot done in a little space.

Continue reading “Pop-Up Outlet Helps Make The Most Of A Tiny Shop”

Beats An Extension Cord

What does your benchtop power supply have that [Pete Marchetto]’s does not? Answer: an extension cord draped across the floor. How often have you said to yourself, “I just need to energize this doodad for a couple seconds,” then you start daisy chaining every battery in the junk drawer to reach the necessary voltage? It is not uncommon to see battery packs with a single voltage output, but [Pete] could not find an adjustable one, so he built his own and put it on Tindie.

Presumably, the internals are not going to surprise anyone: an 18650 battery, charging circuit, a voltage converter, display, adjustment knob, and a dedicated USB charging port. The complexity is not what intrigues us, it is the fact that we do not see more of them and still wind up taping nine-volt batteries together. [Editor’s note: we use one made from an old laptop battery.]

This should not replace your benchtop power supply, it does not have the bells and whistles, like current regulation, but a mobile source of arbitrary voltage does most of the job most of the time. And it’s what this build hasn’t got (a cord) that makes it most useful.

Not Your Typical ATX Bench PSU

We know what you’re thinking — yet another scrap PC power supply turned into a bench PSU. But look a little closer and you’ll see a nicely designed linear bench supply that just fits inside a gutted ATX case.

A lot of the items on [Medzik]’s BOM for this build are straight from the scrap bin. The aforementioned ATX supply case is one, as is the power transformer donated by a friend. Modules such as the 30V/2A regulator, the digital volt/ammeter, and a thermostat module to control the fan at higher power settings were all sourced via the usual suspects. The PSU boasts two outputs — an adjustable 0-22 volt supply, and a fixed 12-volt output. An unusual design feature is a secondary input which uses the 22-VAC supply from a Weller soldering station to give the PSU a little more oomph. This boosts the maximum output to 30 volts; one wonders why [Medzik] didn’t just source a bigger transformer, but you work with what you have sometimes. There are some nice touches, too, like custom-printed vinyl overlays for the case.

It’s a good-looking and compact unit with a decent suite of features, and you could do a lot worse when building your next bench supply. If it’s not your cup of tea though, just take your pick — tiny and yellow, built to last, or ensconced in Ultrasuede.

The Textile Bench

What’s on your bench? Mine’s mostly filled with electronic test equipment, soldering kit, and computers. I’m an electronic engineer by trade when I’m not writing for Hackaday, so that’s hardly surprising. Perhaps yours is like mine, or maybe you’ve added a 3D printer to the mix, a bunch of woodworking tools, or maybe power tools.

So that’s my bench. But is it my only bench? On the other side of the room from the electronics bench is a sturdy folding dining table that houses the tools and supplies of my other bench. I’m probably not alone in having more than one bench for different activities, indeed like many of you I also have a messy bench elsewhere for dismantling parts of 1960s cars, or making clay ovens.

My textile bench, with a selection of the equipment used on it.

The other bench in question though is not for messy work, in fact the diametric opposite. This is my textile bench, and it houses the various sewing machines and other equipment that allow me to tackle all sorts of projects involving fabric. On it I’ve made, modified, and repaired all sorts of clothing, I’ve made not-very-successful kites, passable sandals, and adventurous tent designs among countless other projects.

Some of you might wonder why my textile bench is Hackaday fodder, after all it’s probably safe to assume that few readers have ever considered fabricating their own taffeta ball gown. But to concentrate only on one aspect of textile work misses the point, because the potential is there for so much cross-over between these different threads of the maker world. So I’m going to take you through my textile bench and introduce you to its main tools. With luck this will demystify some of them, and maybe encourage you to have a go.

Continue reading “The Textile Bench”

3D Printer Enclosure Is Pleasant On The Eyes And Ears

There’s a lot going on in the 3D printing world. Huge printing beds, unique materials like concrete, and more accessible, inexpensive printers for us regular folk. The only thing that’s often overlooked with these smaller printers is the ruckus that they can make. The sounds of all those motors can get tiresome after a while, which was likely the inspiration for [Fabien]’s home 3D printer workstation. (Google Translate from French)
After acquiring a new printer, [Fabien] needed a place to put it and created his own piece of furniture for it. The stand is made out of spruce and is lined with insulation. He uses a combination of cork, foam, and recycled rubber tile to help with heat, sound, and vibration respectively. Don’t worry, though, he did install a ventilation system for the fumes! After the printer housing is squared away, he place a webcam inside so that the user can monitor the print without disturbing it. Everything, including the current print, is managed with a computer on the top of the cabinet.
Having a good workspace is just as important as having a quality tool, and [Fabien] has certainly accomplished that for his new 3D printer. There have been a lot of good workspace builds over the years, too, including electronics labs in a portable box and this masterpiece workbench. If you’ve ever experienced the frustration of working in an area that wasn’t designed for the task at hand, you’ll easily be able to appreciate any of these custom solutions.

Taking The Converted PC PSU Bench Supply A Step Further

A quality bench power supply is essential for electronics work. Nobody wants to go through the trouble of digging through their electronics bin just to find a wall wart with the right output. And, even if you were so inclined, it would be folly to assume that its output would actually be clean.

You could, of course, purchase a purpose-built bench power supply. But, this is Hackaday, and I’m sure many of you would rather build one yourself from an inexpensive PC power supply. Normally, you’d do this by separating out the different voltage lines into useful groups, such as 12V, 5V, and 3.3V. [Supercap2f] wanted to take this a step further, both to get a more useful unit and to practice his PCB-making.

His design uses a custom circuit design to fuse the circuits, and to provide some basic logic. Using the LCD display, you can see which lines are powered on. There is even a simple 3D printed cover to keep everything neat and tidy. [Supercap2f] has posted all of the design files, so you can build one of these yourself. We’ve seen similar builds in the past, but this is another nice one that anyone with the ability to etch PCBs can build.