Hands-on The AND!XOR Unofficial DEF CON Badge

DEF CON 24 is still about two weeks away but we managed to get our hands on a hardware badge early. This is not the official hardware — there’s no way they’d let us leak that early. Although it may be unofficial in the sense that it won’t get you into the con, I’m declaring the AND!XOR badge to be officially awesome. I’ll walk you through it. There’s also a video below.

Over the past several years, building your own electronic badge has become an impromptu event. People who met at DEF CON and have been returning year after year spend the time in between coming up with great ideas and building as many badges as they can leading up to the event. This is how I met the trio who built this badge — AND!XORAndrew Riley, and Jorge Lacoste — last year they invited me up to their room where they were assembling the last of the Crypto Badges. Go check out my guide to 2015 Unofficial DEF CON badges for more on that story (and a video of the AM transmissions that badge was capable of).

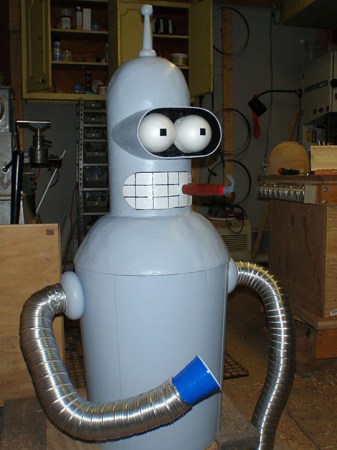
The outline is this year’s badge is of course Bender from Futurama. Both eyes are RGB LEDs, with another half dozen located at different points around his head. The microcontroller, an STM32F103 ARM Cortex-M0 Cortex-M3, sits in a diamond pattern between his eyes. Above the eyes you’ll find 16 Mbit of flash, a 128×64 OLED screen, and a reset button. The user inputs are five switches and the badge is powered by three AA batteries found on the flip side.

bender's-nose-closeup

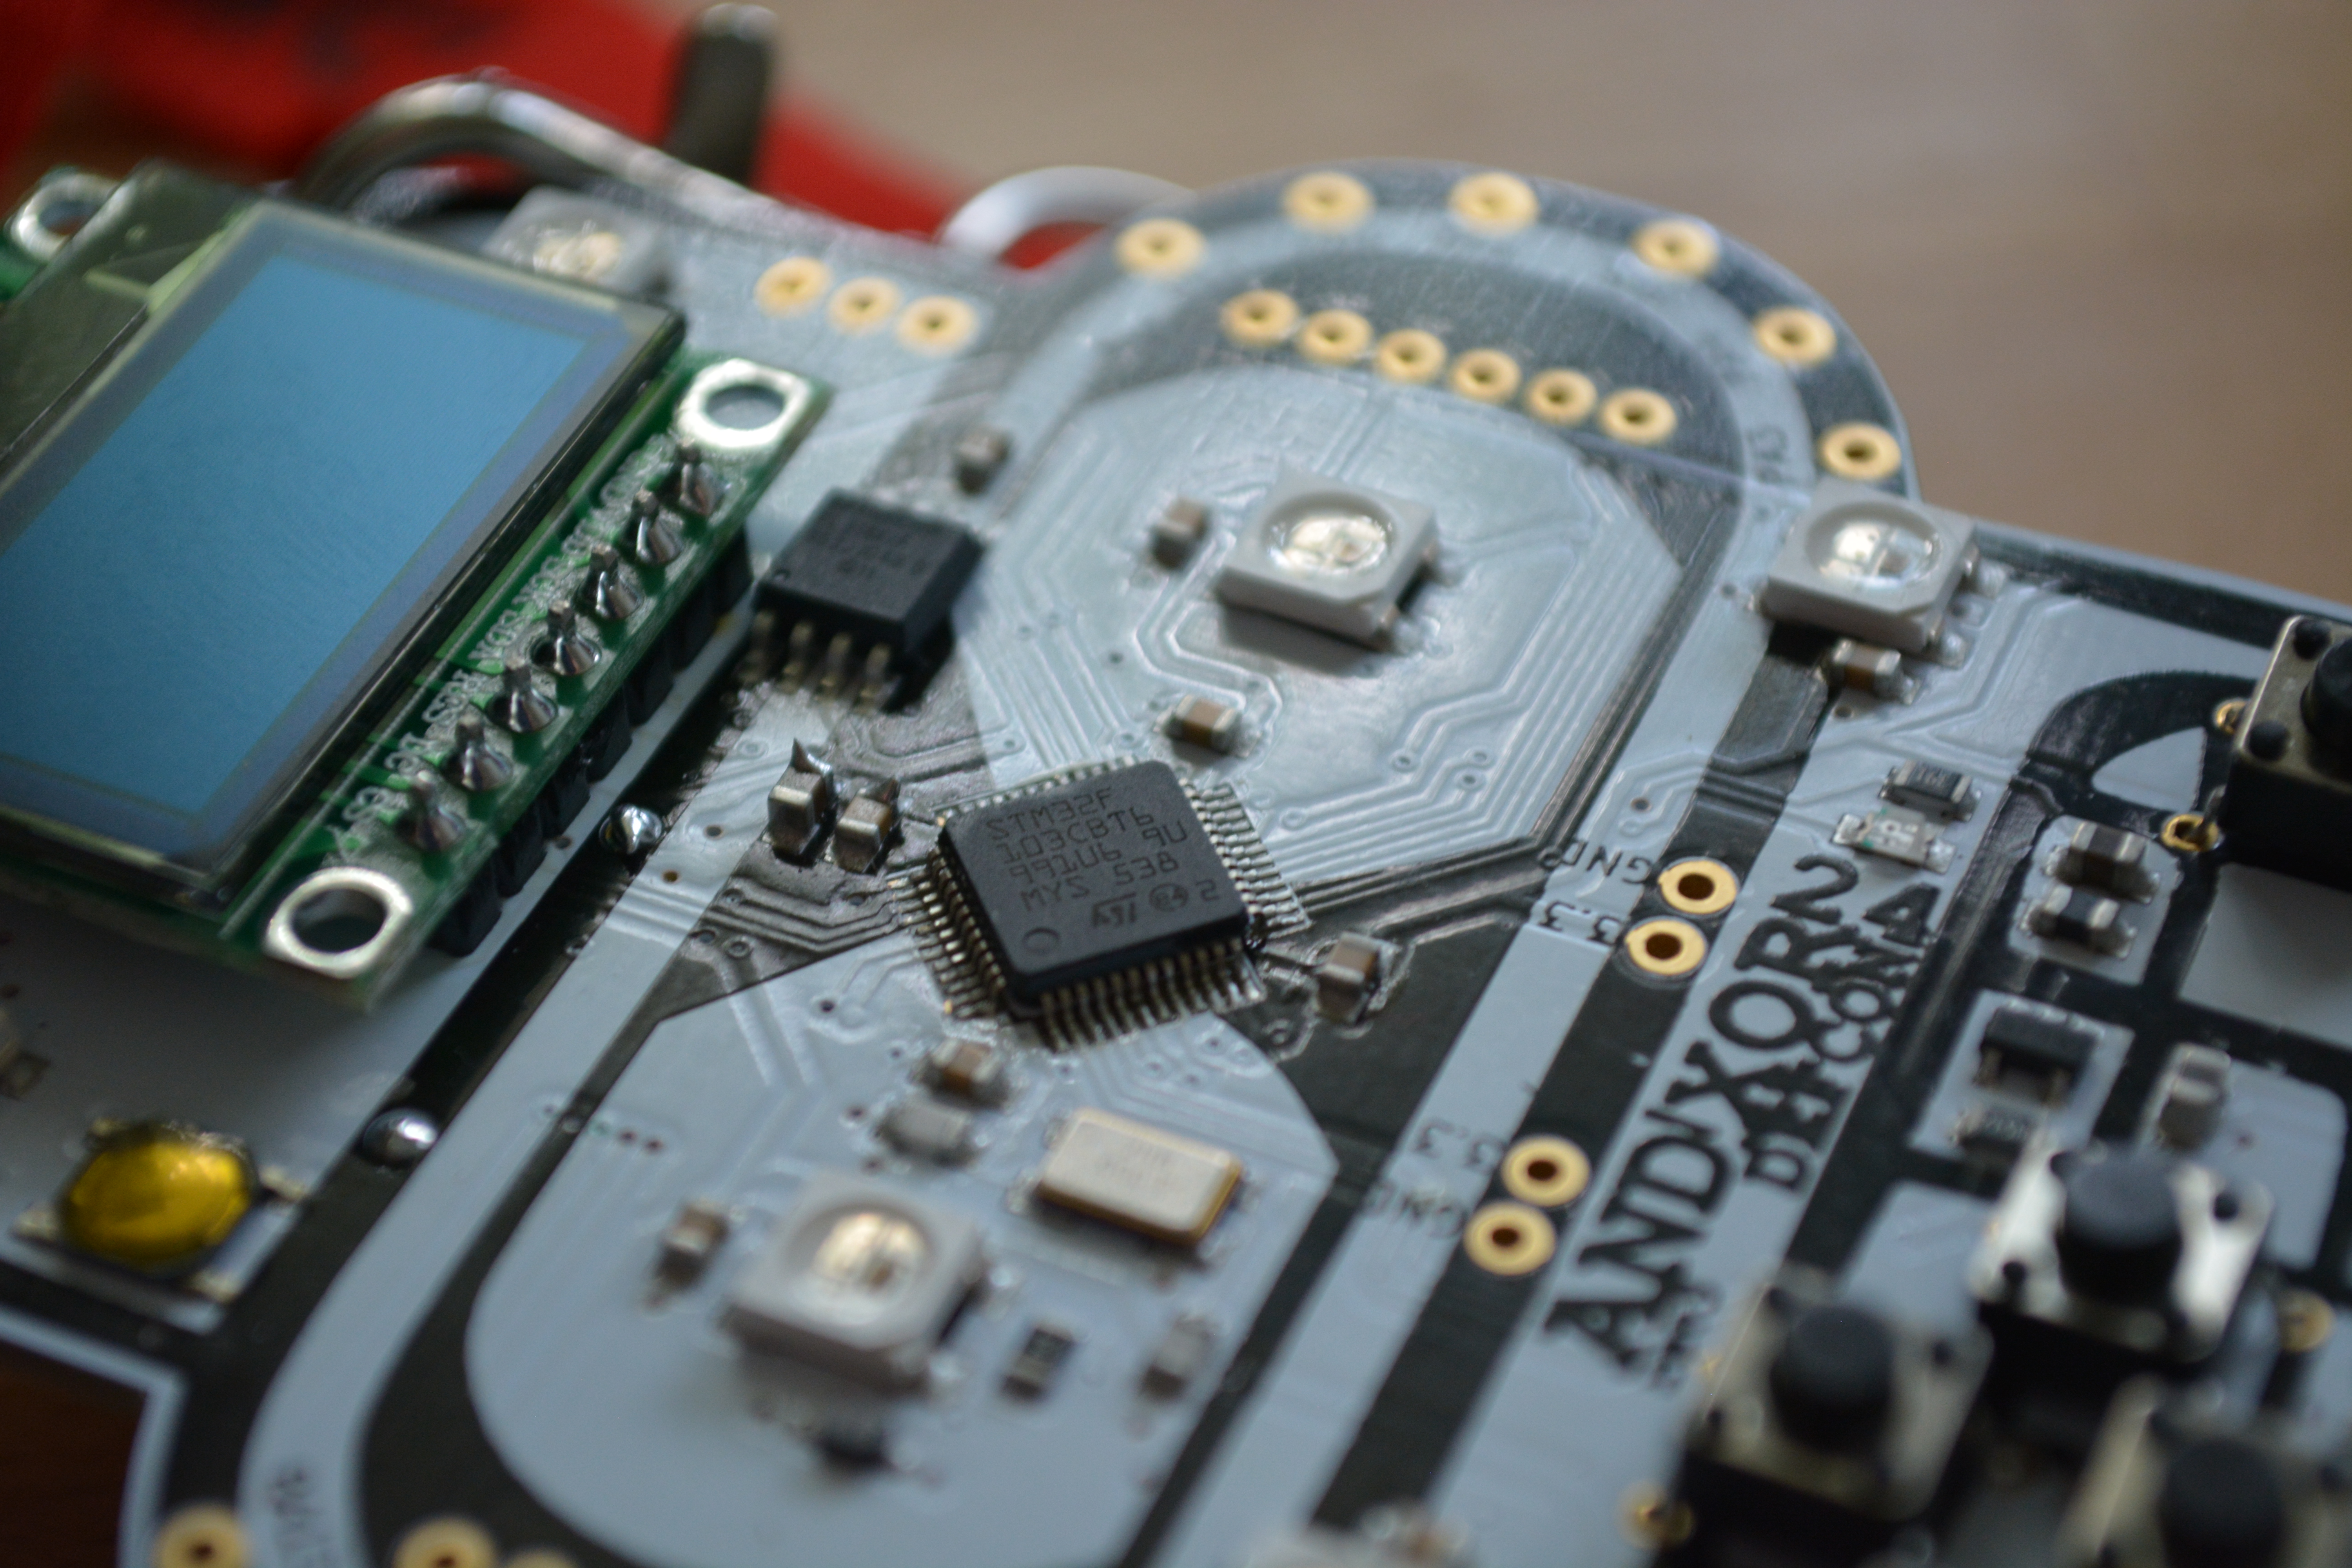
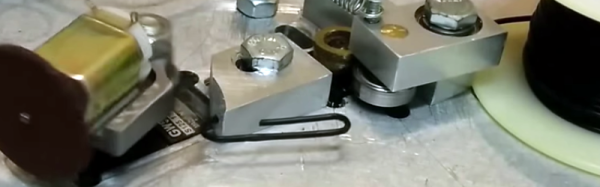
That alone makes an interesting piece of hardware, but the RFM69W module makes all of the badges interactive. The spring coming off the top of Bender’s dome is a coil antenna for the 433 MHz communications. I only have the one badge on hand so I couldn’t delve too deeply what interactive tricks a large pool of badges will perform, but the menu hints at a structure in place for some very fun and interesting applications.

Continue reading “Hands-on The AND!XOR Unofficial DEF CON Badge”

On-Demand Paper Clips

3D Printers are great for printing out parts or items you need, but can they really help if you run out of paper clips? Yes, the all important and extremely overlooked bent metal fastener can put a serious damper on your day if not readily available. There is a solution to this problem, it’s called the Paper Clip Maximizer 1.0. The only consequence of using such a machine may be the destruction of mankind.

The machine takes a spool of wire and methodically bends it into a paper clip shape. Just like an extruder on a 3D Printer, there is a knurled drive wheel with a spring-loaded bearing pinching the wire. This drive wheel is powered by an RC servo that has been modified for continuous rotation. After the drive mechanism, the wire passes through a sturdy guide block. Upon exit, the wire finds the bending head, also powered by a servo. There is a bearing on the end of the bending head that is used to bend the wire around the guide block. After making several bends to form the paper clip, the bending head swings around to cut off the newly manufactured clip with an abrasive wheel. Unfortunately, this part of the process doesn’t work well. The cutoff wheel motor is powered directly by the Arduino that controls the entire machine, the power output of which is not enough to easily cut the wire. It can also leave a sharp burr on the cut wire which is not a great feature for paper clips to have. But we just see these as future fodder for hacking sessions!

Continue reading “On-Demand Paper Clips”

Roll Bender

Vise Reborn As A Roll Bender

Have you ever tried bending a metal rod into a consistent curve? Maybe you bent it over your knee or broke out a bucket or something. Doing it by hand never really gets the arc perfect. Handyman [Joe] found himself needing to bend a bunch of 1/4″ metal rod into various diameter rings. He didn’t have any tools to bend or roll metal and instead of fretting about it, he put on his ingenuity hat and built a perfect tool for the job.

That perfect tool is called a Roll Bender and it uses 3 rollers to bend metal into an arc of consistent radius. The straight piece of metal is passed by the rollers many times. The distance between the rollers is continually adjusted to reduce the radius of the arc of the metal until it reaches the correct size.

[Joe] started out with an old drill press vise. A piece of plate steel was welded to the  stationary vise jaw to provide a platform for a grooved pulley to be mounted. On the clamping jaw, a piece of angle iron was attached to support two very large bearings. The metal rod is clamped between the two bearings and the grooved pulley. A key made from a socket and some scrap metal as a handle allow the user to rotate the pulley by hand while the distance between the rollers is adjusted by the vise’s crank. Doing this moves the rod back and forth between all 3 rollers to gradually mold the once-straight rod into a full ring.

We’ve always been fond of machines that do the bending for you. Even if they haven’t been invented yet.

A Closer Looks Helps You Build Your Own DiWire Bender

Whether or not you’re actually going to build this CNC wire bender, we think you’ll love getting a closer look at how it’s put together. The team over at PENSA got such a strong response from a look at the original machine that they decided to film a video (embedded after the break) showing how the thing was put together. They’ve also posted a repository with code, bom, etc.

In the image above [Marco] shows off the portion that actually does the bending. It’s designed to mount on the pipe through which the straightened wire is fed. The 3d printed mounting bracket really makes this a lot easier. The assembly provides a place to attach the solenoid which moves a bearing in and out of position. That bearing presses against the wire to do the bending, but must be moved from one side of the wire to the other depending on the direction of the next bend. This is a lot easier to understand after watching the demo video which is also embedded after the break.

Continue reading “A Closer Looks Helps You Build Your Own DiWire Bender”

Balancing Cube Looks More Like A Star

[youtube=http://www.youtube.com/watch?v=gbT_XoSIlEo]

This art-meets-robot has the grueling task of standing on one foot all day long while other robots get to bend to their heart’s content. It balances on that single point by adjusting its center of gravity with six pendulum-like appendages. To make the system more like the Borg, each of those six modules shares sensor data with the rest and work together to keep the unit upright. Give in to loving the design because resistance is futile.

[Via BotJunkie]

Twittering Pub Hanging

There’s nothing groundbreaking about this hack, called the TweetWall, but the craftsmanship is gorgeous! [Yergacheffe] had access to the right tools; an epilog laser and a thermoplastic bender (an item we didn’t know we needed until now… thanks a lot). It has the usual bits you’d expect in a Twitter ticker, an LED matrix and an Arduino. There is also an OLED screen that displays the avatar of the current Twitter feed. Because data is transferred over a serial connection the SD slot on that screen is used to cache images which helps to keeps the messages coming without delay. The end product is quite good, we’d expect to see it hanging on the wall of the pub down the street.

Bender Keg Cooler

What? Another Bender project? This almost went in the trash since it looks so much like the bender brewer from earlier this week, we thought it was the same tip. This isn’t a brewer though. This is a keg cooler, made to look like Bender. You can follow the build process to see exactly how they constructed it. They did a great job, the tap is in his cigar, and the keg resides in his body. Fantastic job guys, now you need some Benderbrau to dispense.

[thanks hexmonkey]