Useful Build Tips For Making LED Panel Frames

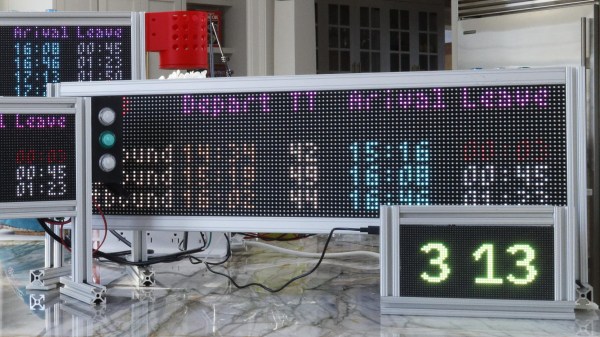
[NotLikeALeafOnTheWind] has created many LED-based display projects, and shares his method for making attractive LED panel frames and mounts. At first glance it may look as though slapping a rectangle of aluminum extrusion around a display is all it takes, there is also the mounting and management of wiring, power supply, and possibly a Raspberry Pi to deal with. The process of building an attractive frame also has a few hidden gotchas that can be avoided with a bit of careful planning.
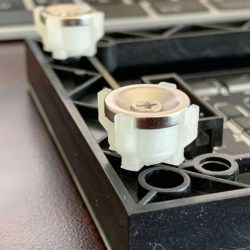
Magnetic feet on the LED panels makes mounting much easier and more flexible.

Here is one tip that will resonate with some readers: don’t rely on specified dimensions of parts; measure the actual parts yourself. There can be small differences between what a data sheet says to expect, and the dimensions of the actual part in one’s hands. It may not be much, but it can be the difference between an ideal fit, and something that looks like a bit of a hack job.

[NotLikeALeafOnTheWind] provides some basic frame layouts, and suggests using two- or three-channel extrusions to provide a flat bezel around the display edge if desired. Mounting the LED panel itself is done with magnetic feet and providing a length of steel bar to which the display can attach. This can provide a flush mount while avoiding the whole issue of screw-mounting the display panels themselves, or sliding them into channels. For mounting all the other hardware, a piece of DIN rail and some 3D-printed parts takes care of that.

The result looks slick and sturdy, and some of the tips are sure to be useful even if the whole process isn’t applied. We like the way the basic design scales and is flexible about the thickness and size of the LED panels themselves, making it a promising way to accommodate perfectly functional oddball panels that end up in the trash.

Send Your Nexus 7 Back… To Tighten One Screw?

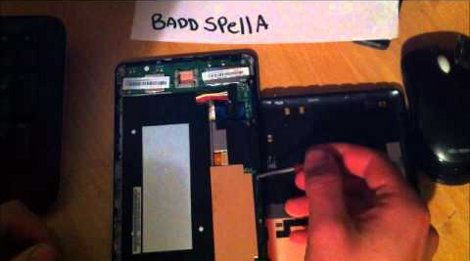
It seems that some of the Nexus 7 models have an assembly issue that makes the bezel uneven with the screen. It’s just in one spot but your shiny new toy shouldn’t have this kind of problem. Of course it comes as no surprise that Google wants you to send it back for service. What is a surprise is that the fix involves tightening just one screw. Now we can’t stand for shipping something round trip when it comes to this low-skill fix. Luckily neither can [Baddspella]. He shows us just how easy it is to repair the Nexus 7 yourself.

The only tools you need are a guitar pick (or other thin plastic prying device) and a very small Phillips screwdriver. Starting at the top of the tablet he uses the plastic pick to pry off the back of the case. This exposes the screws which hold the bezel in place. Find the loose one, and give the screwdriver a turn. Now just snap the back cover in place and you’re done. We’ve embedded the video after the break for your convenience.

It’s super simple…. so don’t be afraid to crack that thing open.

Continue reading “Send Your Nexus 7 Back… To Tighten One Screw?”

Converting A Laptop Computer Into A Desktop Machine

[Michael Chen] found himself in possession of a thoroughly broken laptop. The hinges connecting the screen to the body of the computer were shot, and the battery was non-functional. After a bit of thinking he decided that it wouldn’t take much to resurrect the hardware by turning it into a desktop machine.

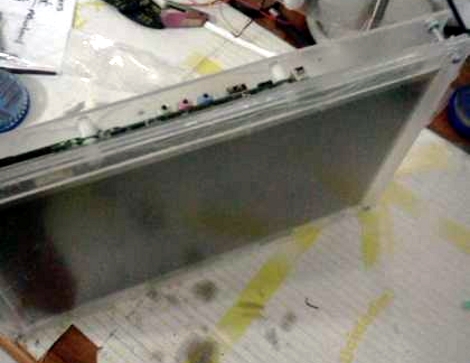
At the core of this hack is the hardware that you must keep for the computer to function. That is, the LCD screen, the motherboard, hard drive, and the AC/DC brick that powers it. [Michael] ditched everything else; the case, keyboard, trackpad, webcam, etc. Next he started building his own enclsure out of acrylic. First he sandwiched the LCD screen between a full sheet of acrylic and a bezel that was one inch wide on each side. Next, another full sheet was used to mount the motherboard and hard drive. You can see how the three sheets are connected by nuts and bolts in the image above. It looks like the only other alteration he made was to relocate the power button to a more convenient spot.

Once a USB keyboard and mouse are added he’s back up and running. We’ve got our eye on an old XP laptop that might end up seeing this conversion to become a dedicated shop computer. We just need to build in some more dust protection.

Add-on Panel Brings Automated Vents Flaps To A PC

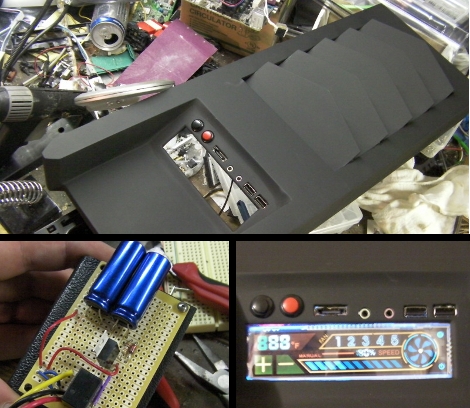
[SXRguyinMA] built a replacement top bezel for his computer case. He wanted to add vents that would automatically open or close based on the cooling needs of the computer. With some careful measurements he modeled the parts in Sketchup and sent out for them to be cut from styrene with a water jet cutter. The parts came back looking great and the assembly of the shutters went swimmingly. The bezel also includes a lighted screen for temperature information, as well as the front USB ports, headphone and mic jacks, etc. Hidden underneath is an Arduino board and servo motor. The Arduino polls the temperature and drives the servo to adjust the fins accordingly. There’s even a supercap in the circuit that will close the vents when the PC powers down or when power is unexpectedly lost. See it in action after the break.

Continue reading “Add-on Panel Brings Automated Vents Flaps To A PC”

MakerBotWatch

If you didn’t get the geeky watch you wanted for Christmas you should consider building yourself a MakerBotWatch. The watch is an Arduino, using an ATmega328 microcontroller running the bootloader. The watch has two concentric circles of LEDs for minutes and hours. A vertical row of four LEDs adds in the additional resolution needed to get 60 minutes on the watch face.

The schematic and board layout are available from an SVN repository so you can make your own board. The device will go into production as a kit but currently the laser-cut bezel will not be part of it.

[via Adafruit]

RGB Keylock Shield

Hackaday alum [Will O’Brien] cleaned up his messy breadboard with an RGB keylock Arduino shield. You may remember this two-part project from last year. It uses buttons backlit by an RGB LED to operate a door lock.

[Will] is still mulling over what type of kit options he will offer. We’re happy to see if the most important part, a laser-cut key bezel, will be available. This makes for a professional looking finish that made the original project difficult to replicate.