Getting To Know Every Bit Of An ATtiny13

We recently heard it said of a hacker who pulled off a particularly nice VGA hack on an 8-bit microcontroller: “He knows all the bits, personally.” High praise, indeed. If you want to get on a first-name basis with a ton of transistors, then have a look at [Heinz D]’s Vacation Course in ATtiny13 Assembler (original in German, translated into English by robots here).

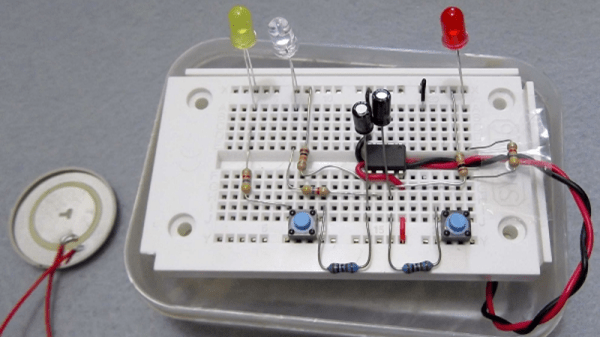
But be warned, this isn’t the easy way to learn AVRs. Not content with simply stripping away every layer of abstraction, this month-long “course” in AVR assembly starts off programming the chip initially with just two pushbuttons in its native machine language of high and low voltages. But still, especially if you can get a few assignments done in one sitting, you’re writing in the relative splendor of assembly language and uploading code with a proper programmer before long, because there’s a real limit to how much code one can toggle in before going mad.

There’s a beautiful minimalism to this entirely ground-up approach, and maybe it’s an appropriate starting point for learning how the machine works at its lowest level. At any rate, you’ll be able to lord it over the Arduino crew that you were able to get blink.ino up and running with just a pair of mechanical contacts and a battery. Real programmers

And once you’ve mastered AVR assembly language, you can recycle those two buttons to learn I2C or SPI. What other protocols are there that don’t have prohibitive timeouts? What’s the craziest code that you’ve ever entered bit by bit?

PS/2 Keyboard For Raspberry Pi

A lot of people can bake a cake. Sort of. Most of us can bake a cake if we have a cake mix. Making a cake from scratch is a different proposition. Sure, you know it is possible, but in real life, most of us just get a box of cake mix. The Raspberry Pi isn’t a cake (or even a pie), but you could make the same observation about it. You know the Raspberry Pi is just an ARM computer, you could program it without running an available operating system, but realistically you won’t. This is what makes it fun to watch those that are taking on this challenge.

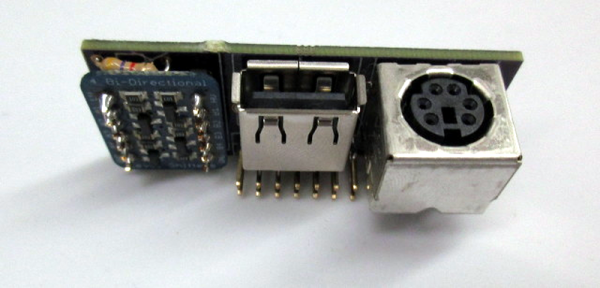
[Deater] is writing his own Pi operating system and he faced a daunting problem: keyboard input. Usually, you plug a USB keyboard into the Pi (or a hub connected to the Pi). But this only works because of the Linux USB stack and drivers exist. That’s a lot of code to get working just to get simple keyboard input working for testing and debugging. That’s why [Deater] created a PS/2 keyboard interface for the Pi.

Even if you aren’t writing your own OS, you might find it useful to use a PS/2 keyboard to free up a USB port, or maybe you want to connect that beautiful Model-M keyboard without a USB adapter. The PS/2 keyboard uses a relatively simple clock and data protocol that is well-understood. The only real issue is converting the 5V PS/2 signals to 3.3V for the Pi (and vice versa, of course).

Continue reading “PS/2 Keyboard For Raspberry Pi”

Spit Out VGA With Non-Programmable Logic Chips

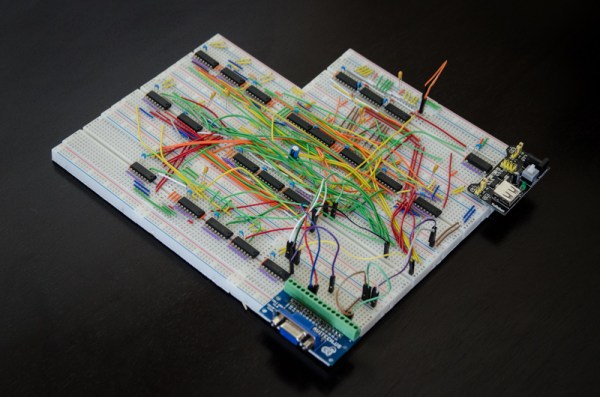
It’s not uncommon to bitbang a protocol with a microcontroller in a pinch. I2C is frequently crunched from scratch, same with simple serial protocols, occasionally complex systems like Ethernet, and a whole host of other communication standards. But VGA gets pretty tricky because of the timing requirements, so it’s less common to bitbang. [Sven] completely threw caution to the wind. He didn’t just bitbang VGA on an Arduino, but he went one step further and configured an array of 7400 logic chips to output a VGA signal.

[Sven]’s project is in two parts. In part one, he discusses choosing a resolution and setting up the timing signal. He proceeds to output a simple(-ish) VGA signal that can be displayed on a monitor using a single gate. At that point only a red image was displayed, but getting signal lock from the monitor is a great proof of concept and [Sven] moved on to more intricate display tricks.

With the next iteration of the project [Sven] talks about adding in more circuitry to handle things like frame counting, geometry, and color. The graphics that are displayed were planned out in a simulator first, then used to design the 7400 chip configuration for that particular graphic display. It made us chuckle that [Sven] reports his monitor managed to survive this latest project!

We don’t remember seeing non-programmable integrated circuits used for VGA generation before. But bitbanging the signal on an Arduino or from an SD card slot is a great test of your ability to calculate and implement precise timings with an embedded system. Give it a try!

Continue reading “Spit Out VGA With Non-Programmable Logic Chips”

Bitbanging I2C By Hand

I2C

Play around with electronics long enough, and eventually you’ll run into I2C devices. These chips – everything from sensors and memory to DACs and ADCs – use a standardized interface that consists of only two wires. Interacting with these devices is usually done with a microcontroller and an I2C library, but [Kevin] wanted to take that one step further. He’s bitbanging I2C devices by hand and getting a great education in the I2C protocol in the process.

Every I2C device is controlled by two connections to a microcontroller, a data line and a clock line. [Kevin] connected these lines to tact switches through a pair of transistors, allowing him to manually key in I2C commands one bit at a time.

[Kevin] is using a 24LC256 EEPROM for this demonstration, and by entering a control byte and two address bytes, he can enter a single byte of data by hand that will be saved for many, many years in this tiny chip.

Of course getting data into a chip is only half of the problem. By altering the control byte at the beginning of an I2C message by one bit, [Kevin] can also read data out of the chip.

This isn’t [Kevin]’s first experimentation in controlling chips solely with buttons. Earlier, we saw him play around with a 595 shift register using five push buttons. It’s a great way to intuit how these chips actually work, and would be an exceptional learning exercise for tinkerers young and old,

Continue reading “Bitbanging I2C By Hand”

Adding USB Connectivity To Old Benchtop Tools

frequency_counter_hacked_for_usb_connectivity

[Scott] was recently given a frequency counter, and once he brought it home, he started contemplating how he could possibly make it better. While the counter worked well as-is, he wanted to find a way to record data readings over a reasonably long period of time. He figured that interfacing it with his computer would be the best way to do this, but he had to find a way to connect the devices first.

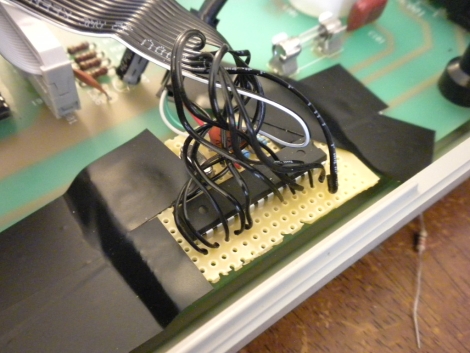
He started poking around inside the frequency counter and stumbled upon a possible data source when taking a closer look at the display board. He found that he could read the frequency data as it was being written to the display, and send that data to his computer. He used an ATMega48 to intercept the data and code from the V-USB project to bit-bang the data to his PC over USB.

Now, anything he sees on the frequency counter can be easily collected and graphed on his computer with little fuss.

Stick around to see a quick video demonstration of his hack in action.

Continue reading “Adding USB Connectivity To Old Benchtop Tools”

Introduction To FTDI Bitbang Mode

It was an interface that launched a thousand hacks. Near trivial to program, enough I/O lines for useful work, and sufficiently fast for a multitude of applications: homebrew logic analyzers, chip programmers, LCD interfaces and LED light shows, to name a few.

Today the parallel printer port is on the brink of extinction (and good riddance, some would say). Largely rendered obsolete by USB, few (if any) new peripherals even include a parallel connector, and today’s shrinking computers — nettops, netbooks, media center PCs — wouldn’t have space for it anyway. That’s great for tidy desks, but not so good if you enjoyed the dirt-cheap hacks that the legacy parallel port made possible.

Fear not, for there’s a viable USB alternative that can resurrect many of these classic hacks! And if you’ve done much work with Arduino, there’s a good chance it’s already lurking in your parts drawer.

Continue reading “Introduction To FTDI Bitbang Mode”