Game Boy Replica Built In Brass

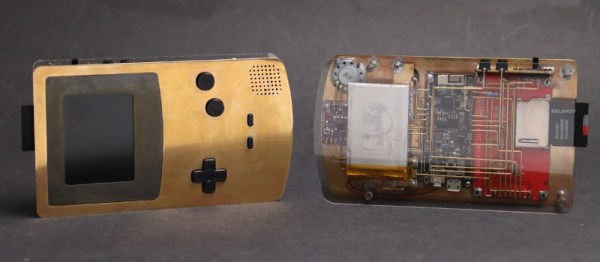
Nintendo’s Game Boy is legendary for being the meat in the handheld gaming revolution, as well as being nigh-on indestructible whether in the custody of children or soldiers in the Gulf War. However, [Jiri] decided to see if he could whip up a tribute of his own, in brass instead of plastic.

The hardware is based on the Odroid GO emulator firmware for the ESP32, running on a 2.2″ color TFT screen. It’s a great base for a custom build, which avoids gutting any precious classic hardware. It’s then assembled behind front plate milled out of brass, with delicate point-to-point brass wires giving it an artistic circuit sculpture look. The brass did prove difficult to work with at times, acting as a heat sink which prevented easy soldering of the standoffs in place. To get around this, [Jiri] used a hotplate to heat the plate from below, keeping it warm enough so that a hand iron could do the job.

The final result is a fun Game Boy emulator in a stylish case – though one you shouldn’t throw in a back pack lest it short out the exposed conductors. It would make a great gift for any lifelong Nintendo fan. [Jiri] is no strange to circuit sculpture, as we well know – we’ve featured his tools and methods before. Video after the break.

Continue reading “Game Boy Replica Built In Brass”

Bad Idea For Desoldering Actually Might Be Pretty Smart

This video on building a DIY desoldering iron says it all right up front: this is stupid and dangerous, and you shouldn’t do it. But that doesn’t mean it doesn’t work, or that it doesn’t have potential to be turned into something else.

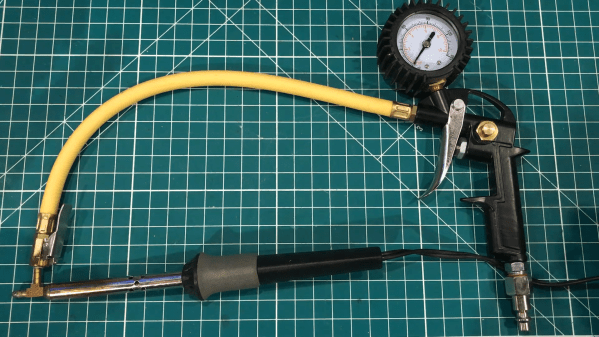
The story begins, as it often does these days, on the pages of Amazon as [AnotherMaker] shopped for a real desoldering setup. Despite a case of sticker shock, he took the plunge on a nice Hakko vacuum desolderer, but as is also often the case, it failed to arrive. Rather than accept defeat, [AnotherMaker] purchased a cheap-o soldering iron and a brass tee fitting for small-bore tubing that would chuck nicely into the spot where the stock tip once lived, giving him a way to both melt solder and move air.

Unfortunately, rather than applying a vacuum, he chose to blast 100 PSI compressed air through the tip, which certainly moves a lot of solder, perhaps at the cost of burns and eye injuries. The potential for accidental short circuits is pretty high too, but c’mon — it’s not like we all haven’t flicked or dropped a board to desolder something. Is this really much different?

As fraught with peril as this method may be, [AnotherMaker] is onto something here. Perhaps adding a 3D-printed venturi generator could turn that blast of air into a vacuum. Or maybe a vacuum pump for a manual pick-and-place would do the trick too.

Continue reading “Bad Idea For Desoldering Actually Might Be Pretty Smart”

For Your Holiday Relaxation: The Clickspring Sundial Build Megacut

The fortunate among us may very well have a bit of time off from work coming up, and while most of that time will likely be filled with family obligations and festivities, there’s probably going to be some downtime. And if you should happen to find yourself with a half hour free, you might want to check out the Clickspring Byzantine Calendar-Sundial mega edit. And we’ll gladly accept your gratitude in advance.

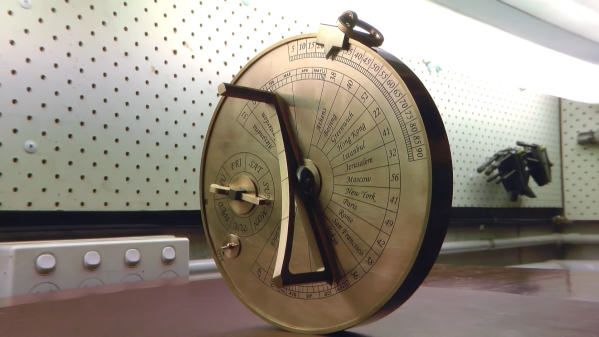
Fans of machining videos will no doubt already be familiar with Clickspring, aka [Chris], the amateur horologist who, through a combination of amazing craftsmanship and top-notch production values, managed to make clockmaking a spectator sport. We first caught the Clickspring bug with his open-frame clock build, which ended up as a legitimate work of art. [Chris] then undertook two builds at once: a reproduction of the famous Antikythera mechanism, and the calendar-sundial seen in the video below.

The cut condenses 1,000 hours of machining, turning, casting, heat-treating, and even hand-engraving of brass and steel into an incredibly relaxing video. There’s no narration, no exposition — nothing but the sounds of metal being shaped into dozens of parts that eventually fit perfectly together into an instrument worthy of a prince of Byzantium. This video really whets our appetite for more Antikythera build details, but we understand that [Chris] has been busy lately, so we’ll be patient.

Continue reading “For Your Holiday Relaxation: The Clickspring Sundial Build Megacut”

Gorgeous Mini-Lathe Makes The Most Out Of Wood And Metal

It’s a cliche that the only machine tool that can make copies of itself is the lathe. It’s not exactly true, but it’s a useful adage in that it points out that the ability to make big round things into smaller round things, and to make unround things into round things, is a critical process in so many precision operations. That said, making a lathe primarily out of wood presents some unique challenges in the precision department

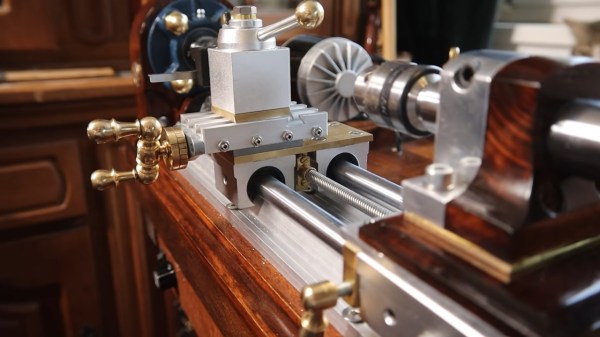
This isn’t [Uri Tuchman]’s first foray into lathe-building. Readers may recall the quirky creator’s hybrid treadle-powered and electric lathe, also primarily an exercise in woodworking. That lathe has seen plenty of use in [Uri]’s projects, turning both wood and metal stock into parts for his builds. It wasn’t really optimal for traditional metal turning, though, so Mini-Lathe 2 was undertaken. While the bed, headstock, and tailstock “castings” are wood — gorgeously hand-detailed and finished, of course — the important bits, like the linear slides for the carriage and the bearings in the headstock, are all metal. There’s a cross-slide, a quick-change tool post, and a manual lead screw for the carriage. We love the finely detailed brass handcranks, which were made on the old lathe, and all of the lovely details [Uri] always builds into his projects.

Sadly, at the end of the video below we see that the lathe suffers from a fair amount of chatter when turning brass. That’s probably not unexpected — there’s not much substitute for sheer mass whenit comes to dampening vibration. We expect that [Uri] will be making improvements to the lathe in the coming months — he’s not exactly one to leave a job unfinished.

Continue reading “Gorgeous Mini-Lathe Makes The Most Out Of Wood And Metal”

Binary Calculator For All 0b10 Types

You know the old joke: There are 10 types of people in the world — those who understand binary, and those who don’t. Most of us on Hackaday are firmly in the former camp, which is why projects like this circuit sculpture binary calculator really tickle our fancies.

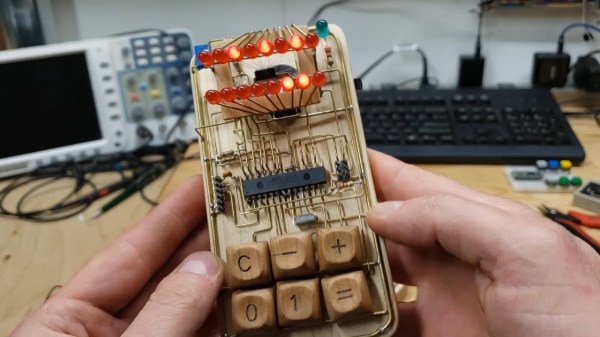
Inspired by the brass framework and floating component builds of [Mohit Bhoite], [dennis1a4] decided to take the plunge into circuit sculpture in an appropriately nerdy way. He wisely decided on a starter build, which was a simple 555 timer circuit, before diving into the calculator. Based on an ATMega328P in a 28-pin DIP, the calculator is built on an interesting hybrid platform of brass wire and CNC-routed wood. The combination of materials looks great, and we especially love the wooden keycaps on the six switches that make up the keyboard. There’s also some nice work involved in adapting the TLC5928 driver to the display of 16 discrete LEDs; suspended as it is by fine magnet wires, the SSOP chip looks a bit like a bug trapped in a spider web.

Hats off to [dennis1a4] for a great entry into our soon-to-conclude Circuit Sculpture Contest. The entry deadline is (today!) November 10, so it might be a bit too late for this year. But rest assured we’ll be doing this again, so take a look at all this year’s entries and start thinking about your next circuit sculpture build.

Continue reading “Binary Calculator For All 0b10 Types”

Custom Tool Helps Hakko Set Threaded Inserts

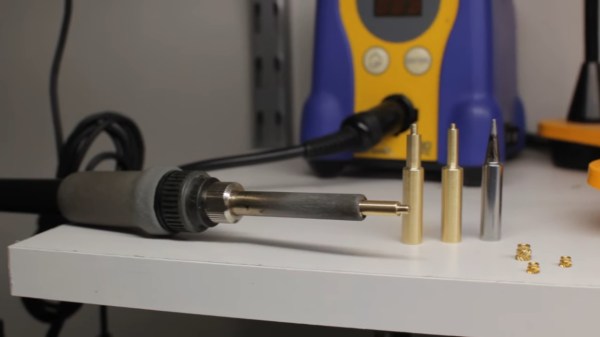
When the tool you need doesn’t exist, you have to make it yourself. Come to think of it, even if the tool exists, it’s often way more fun to make it yourself. The former situation, though, is one that [Sean Hodgins] found himself in with regard to threaded inserts. Rather than suffer from the wrong tool for the job, he machined his own custom threaded insert tool for his Hakko soldering iron.

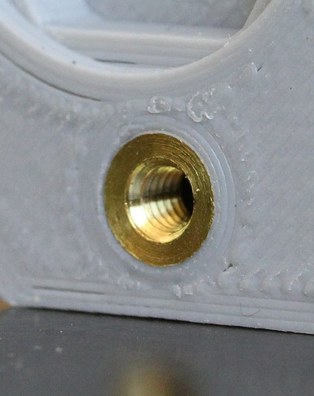
Like many of us, [Sean] has embraced the use of heat-set threaded inserts to beef up the mechanical connections on his 3D-printed parts. [Sean] dedicated a soldering iron to the task, equipping it with a tip especially for the job. But it was the flavor of iron proverbially known as a “fire stick” and he found that this iron was too hot for PLA prints. As the new owner of a lathe, he was able to make quick work of the job using a piece of brass rod stock. Luckily, Hakko tips just slip on the heating element, so no threading operations were needed. [Sean] made insert tips for multiple sized inserts, and the results speak for themselves.
If you haven’t tried these out yet, check out [Joshua Vasquez’s] excellent guide on heat-set inserts. You’ll find this guide to the relative merits of the different types useful when ordering inserts. And if you’ve got the itch to buy a lathe now, we’ve got you covered there too.

Continue reading “Custom Tool Helps Hakko Set Threaded Inserts”

Commodore SX-64 Keyboard Upgraded From Trash To Treasure

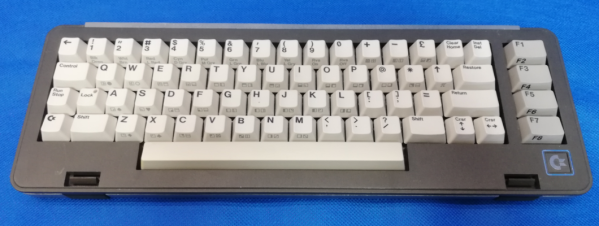
Released in 1984, the Commodore SX-64 Executive Computer was one of the first portable luggable color computers. It cost twice as much as a Commodore 64, had a tiny 5″ diagonal screen, and couldn’t actually support both 5¼” drives as advertised. On the upside, people say it had a slightly better keyboard than its classic cousin.

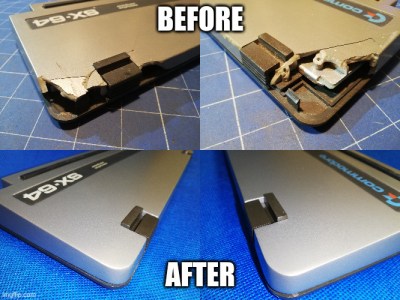
[Drygol] agreed to restore the keyboard from a friend’s Commodore SX-64 sight-unseen, and boy was this thing in bad shape. Most people would probably consider the condition a shame and write it off as a lost cause, since two of the corners were missing most of their plastic. But [Drygol] isn’t most people. [Drygol] had mad restoration skills to begin with, and this project honed them to a razor’s edge.

Plenty of the other vintage computer restorations [Drygol] has done required plastic welding, which uses heat or a lot of friction to smooth over cracks. Some of those have not stood the test of time, so he’s now in the habit of stabilizing cracks with brass mesh before filling them with fiberglass putty.

The best part is how [Drygol] managed to rebuild the corners using the same methods, soldering the brass mesh at the 90° joins, and reinforcing them with thick copper wire before beginning the painstaking putty/sand/putty process. The use of blank copper clad boards as straight edges and thickness gauges is genius.

There’s a whole lot to learn here, and the adventure beings with something that probably keeps a lot of people from trying stuff like this in the first place: how do you safely remove the badges?

You’re right, plastic welding is awesome. There even used to be a toy plastic welder. But there’s no need to troll the electronic auction bay to give it a try — just use a cheap soldering iron.