Otters Deliver A High Power Stationary Audio Experience

Our favorite raft of otters is back at it again with another display of open source audio prowess as they bring us the OtterCastAmp, the newest member of the OtterCast family of open source audio multitools. If you looked at the previous entry in the series – the OtterCastAudio – and thought it was nice but lacking in the pixel count or output power departments then this is the device for you.

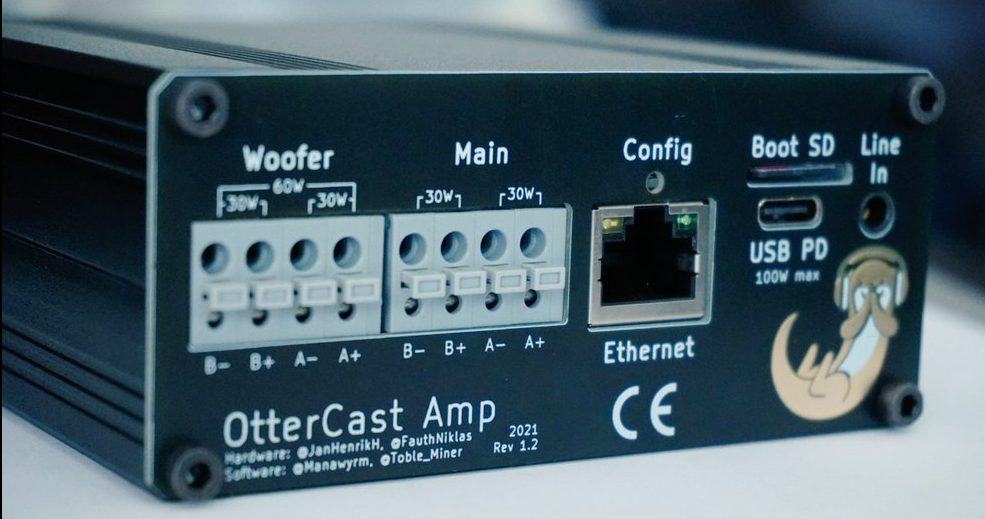
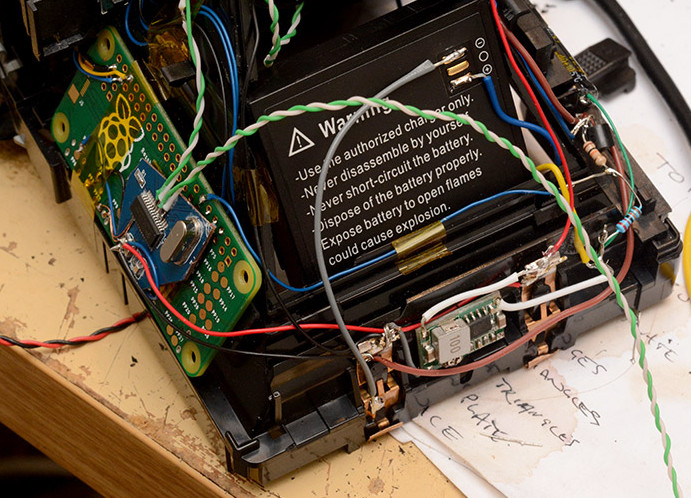
The Amp is fundamentally a very similar device to the OtterCastAudio. It shares the same Allwinner S3 Cortex-A application processor and runs the same embedded Linux build assembled with Buildroot. In turn it offers the same substantial set of features and audio protocol support. It can be targeted by Snapcast, Spotify Connect or AirPlay if those are your tools of choice, or act as a generic PulseAudio sink for your Linux audio needs. And there’s still a separate line in so it source audio as well.

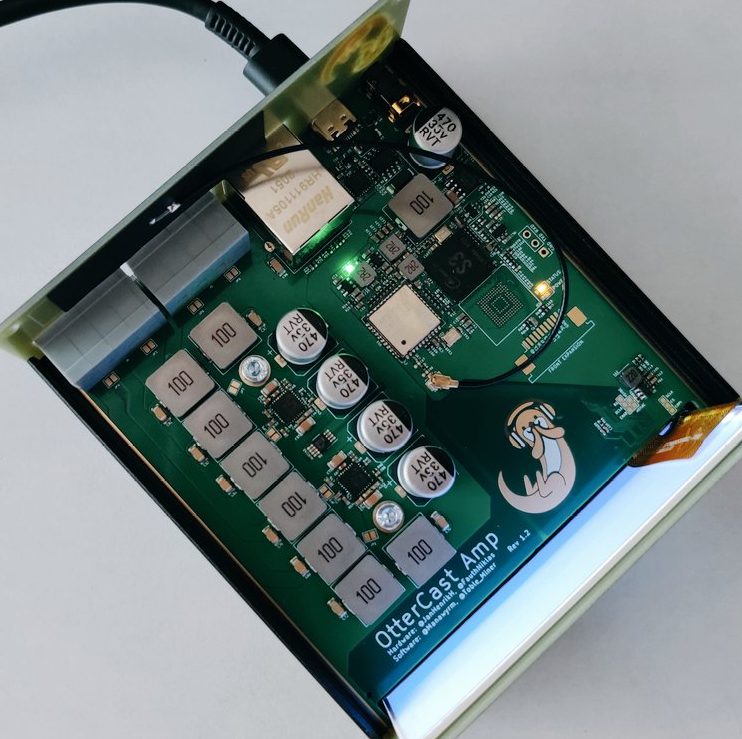
One look at the chassis and it’s clear that unlike the OtterCastAudio this is not a simple Chromecast Audio replacement. The face of the OtterCastAmp is graced by a luscious 340×800 LCD for all the cover art your listening ear can enjoy. And the raft of connectors in the back (and mountain of inductors on the PCBA) make it clear that this is a fully fledged class D amplifier, driving up to 120W of power across four channels. Though it may drive a theoretical 30W or 60W peak across its various outputs, with a maximum supply power of 100W (via USB-C power delivery, naturally) the true maximum output will be a little lower. Rounding out the feature set is an Ethernet jack and some wonderfully designed copper PCB otters to enjoy inside and out.

As before, it looks like this design is very close to ready for prime time but not quite there yet, so order at your own risk. Full fab files and some hints are linked in the repo mentioned above. If home fabrication is a little much it looks like there might be a small manufacturing run of these devices coming soon.

Polaroid Gets Thermal Printer And Raspberry Pi

Despite what you may have read in the comments, we here at Hackaday are not unaware that there’s something of a “Pi Fatigue” brewing. Similar to how “Arduino” was once a dirty word around these parts, projects that are built around the world’s most popular Linux SBC are occasionally getting dismissed as lazy. Hacker crams Raspberry Pi into an old electronic device, applies hot glue liberally, posts a gallery on Imgur, and boom! Lather, rinse, repeat.

We only mention this because the following project, despite featuring the Raspberry Pi Zero grafted into a vintage Polaroid camera, is anything but lazy. In the impeccably detailed and photographed write-up, [mitxela] explains how the Pi Zero and a thermal camera recreated the classic Polaroid experience of going from shutter button to physical picture in seconds. The workmanship and attention to detail on this build is simply phenomenal, and should quell any doubts our Dear Readers may have about Raspberry Pi projects. For now, anyway.

The video after the break will show you the modded camera in operation and goes over a few highlights of the build, but for this one you really should take the time to read the entire process start to finish. [mitxela] starts off by disassembling the Polaroid camera, complete with plenty of fantastic pictures that show how this legendary piece of consumer electronics was put together. If you’ve never seen the inside of one of these cameras, you might be surprised to see what kind of interesting hardware is lurking underneath that rather unassuming exterior. From the screw-less construction to the circuits with paper substrate, a lot of fascinating engineering went into getting this camera to a mass-market price. Frankly, the teardown alone is worth checking out.

But once the camera has been stripped down to the bare frame, the real fun begins. At the conceptual level, [mitxela] replaces the camera optics with a cheap webcam, the “brains” with a Raspberry Pi Zero, and the film mechanism with the type of thermal printer used for receipts. But how he got it all connected is why this project is so impressive. Nearly every decision made during the design and construction of this camera was for the purposes of reducing boot-time. Nobody wants a camera that takes 30, 15, or even 10 seconds to boot. It has to be available as soon as you need it.

Getting this Linux-powered camera boot up in as little as 2 seconds took a lot of clever software hacks that you’ll absolutely want to check out if you’ve ever considered building an embedded Linux device. You can’t just throw a stock Raspbian image on an SD card and hope for the best. [mitxela] used buildroot to craft a custom Linux image containing only what was needed for the camera to operate, plus a bunch of esoteric tweaks that the Junior Penguin Wrangler would likely never consider. Like shaving a full second off of the boot time by disabling dumping kernel messages to the serial port during startup.

[mitxela] brought his camera to show off at the recent Hackaday London meetup, but it was far from the first time we’ve come across his handiwork. From his servo-powered music box earlier this year to his penchant for tiny MIDI devices, he’s consistently impressed our cold robot hearts.

Continue reading “Polaroid Gets Thermal Printer And Raspberry Pi”

No Windows Drivers? Boot Up A Linux VM!

[Voltagex] was fed up with BSODs on his Windows machine due to a buggy PL2303 USB/serial device driver. The Linux PL2303 driver worked just fine, though. A weakling would simply reboot into Linux. Instead, [Voltagex] went for the obvious workaround: create a tiny Linux distro in a virtual machine, route the USB device over to the VM where the drivers work, and then Netcat the result back to Windows.

OK, not really obvious, but a cool hack. Using Buildroot, a Linux system cross-compilation tool, he got the size of the VM down to a 32Mb memory footprint which runs comfortably on even a small laptop. And everything you need to replicate the VM is posted up on Github.

Is this a ridiculous workaround? Yes indeed. But when you’ve got a string of tools like that, or you just want an excuse to learn them, why not? And who can pass up a novel use for Netcat?