Duck And Cover With This WiFi “Geiger Counter”

There’s perhaps no sound more recognizable than the frantic clicking of a Geiger counter. Not because this is some post-apocalyptic world in which everyone is personally acquainted with the operation of said devices, but because it’s such a common effect used in many movies, TV shows, and video games. If somebody hears that noise, even if it doesn’t really make sense in context, they know things are about to get serious.

Capitalizing on this phenomena, [Anton Haidai] has put together a quick hack which turns the ESP8266 into a “Geiger counter” for WiFi. Rather than detecting radiation, the gadget picks up on the strongest nearby WiFi signal and will start clicking in response to signal strength. As the signal gets stronger, so does the clicking. While primarily a novelty, it’s an interesting idea that could potentially be useful for things like fox hunting.

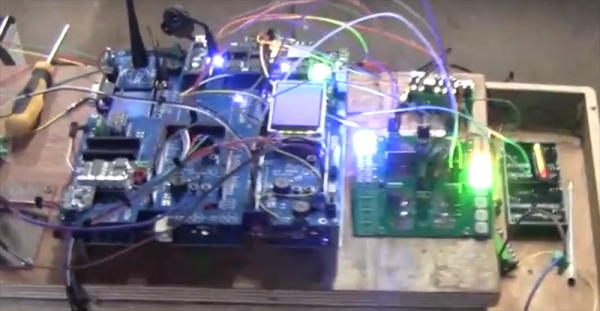
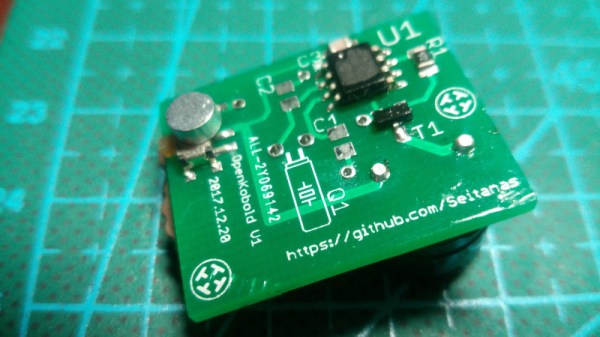
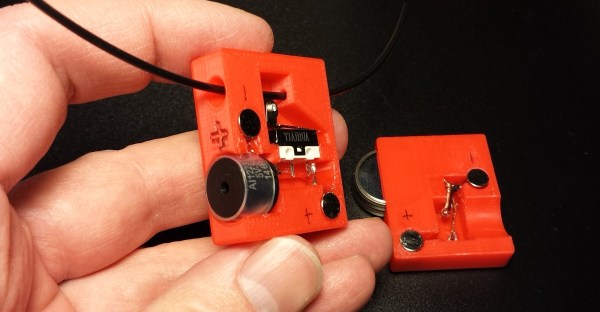
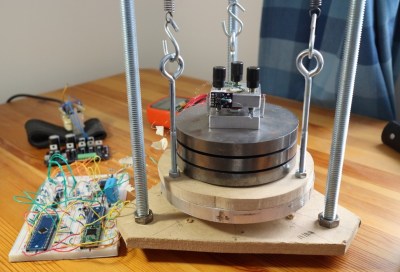
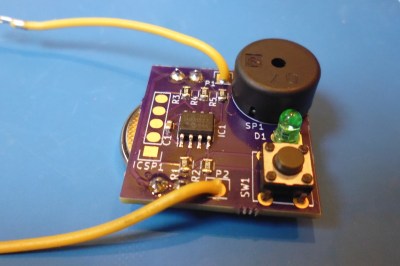
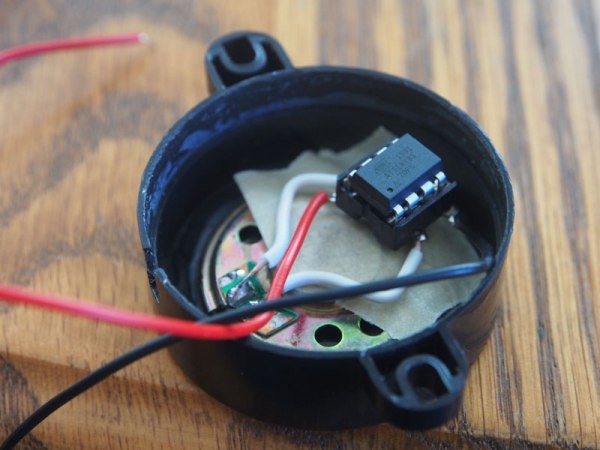
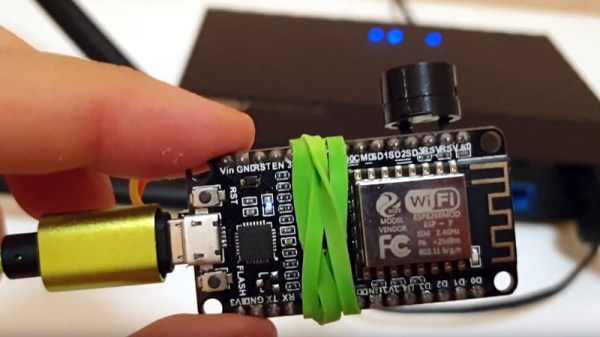
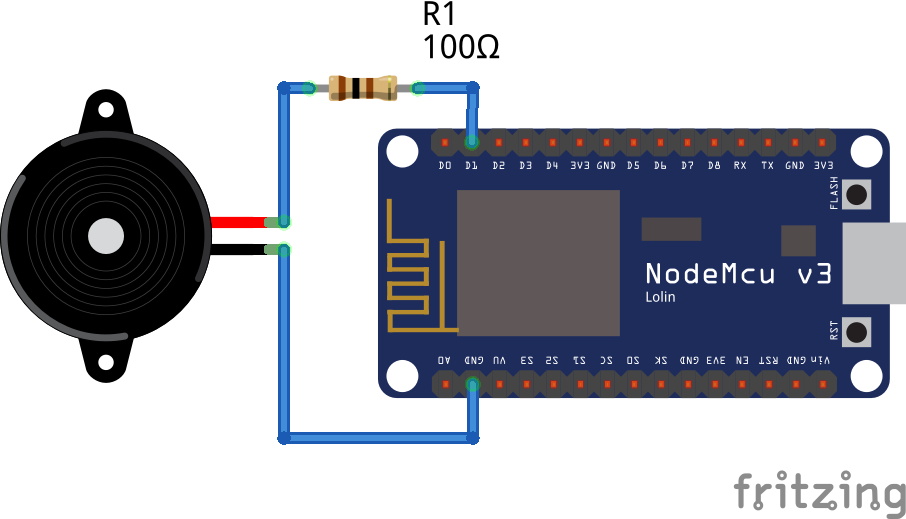
The hardware is really about as simple as it gets, just a basic buzzer attached to one of the digital pins on a NodeMCU development board. This project is more of a proof of concept, but if it were to be developed further it would be interesting to see the electronics placed into a 3D printed replica of one of the old Civil Defense Geiger counters. Perhaps even integrating an analog gauge that can bounce around in response to signal strength.

Software-wise there is the option of locking onto one single network SSID or allowing the device to find the strongest network in the area. Even if you’re not in the market for a chirping WiFi detector, the code is a good example of how you can detect signal RSSI and act on it accordingly; a neat trick which might come in handy in a future project.

If you’re more interested in the real thing, we’ve got plenty of DIY Geiger counters in the archive for you to check out. From diminutive builds that can be mounted to the top of a 9V battery to high-tech solid state versions with touch screen interfaces, you should have plenty of inspiration if you’re looking to kit yourself out before your next drive through the Chernobyl Exclusion Zone.

Continue reading “Duck And Cover With This WiFi “Geiger Counter””

The Quest For High Powered Blinky And Buzzing

Sometimes, we need devices to notify us of something. The oven timer is going off. Your phone has a push notification. The smoke detector battery is getting low. All of these problems can be solved with a buzzer or an LED. It’s a simple and cheap problem to solve.

But what if you need to know if something’s wrong with a diesel engine that throwing out 90 dB of noise? What if you’re not guaranteed to be around that engine? What if you need to tell everyone within a half mile that something is wrong. Again, LEDs and beepers, but the standard, off-the-shelf implementation isn’t going to cut it. You need massive amounts of buzzers and LEDs, and you’re going to need to drive them all with some reasonably high current. How do you solve that problem?

This is the problem [Tegwyn] had to solve for another one of his Hackaday Prize entries. The solution is what you would expect — buzzers and LEDs — but he’s putting some serious current behind these devices. There are, in fact, thermal considerations taken into account when you’re beeping this many buzzers.

The LEDs for this project are a handful of blindingly bright 1209 and 1206 SMD parts, and the buzzer is an obnoxiously loud SMD 97 dB buzzer. There are eight buzzers on this board. So, how do you drive these power-hungry devices? [Tegwyn] is using an L293E half-bridge motor driver, in a ‘Power-DIP’ package for relatively effective heat dissipation. Does it work? Oh, yes, and it’s very annoying. Take a look at the video below and judge for yourself. You can, indeed, make something louder and more annoying by adding more power.

Continue reading “The Quest For High Powered Blinky And Buzzing”

Love Open Source But Hate People? Get OpenKobold

[Tadas Ustinavičius] writes in to tell us of his latest project, which combines his two great loves of open source and annoying people: OpenKobold. Named after the German mythical spirit that haunts people’s homes, this tiny device is fully open source (hardware and software) and ready to torment your friends and family for up to a year on a CR1220 battery.

The design of the OpenKobold is quite simple, and the open source nature of the project makes this an excellent case study for turning an idea into a fully functional physical object.

Beyond the battery and the buzzer module, the OpenKobold utilizes a PIC12F675, a transistor, and a few passive components. This spartan design allows for a PCB that measures only 25 x 20 mm, making it very easy to hide but fiendishly difficult to try to track down later on.

But the real magic is in the software. The firmware that [Tadas] has written for the PIC not only randomizes how often the buzzer goes off, but how long it will sound for. This makes predicting the OpenKobold with any sort of accuracy very difficult, confounding the poor soul who’s searching their home or office for this maddening little device.

Hackers have a long and storied history of creating elaborate pranks, putting the OpenKobold in very good company. From randomly replaying signals from a remote control to building robotic cardboard burglars, we’ve seen our fair share of elaborate pranks from the community.

Let’s Prototype! This Filament End Needs 80 Decibels

Reaching the end of a spool of filament when 3D printing is inevitable. The result ranges from minor annoyance to ruined print. Recently, I needed to print a number of large jobs that used just over half a spool of plastic each. Unwilling to start every print with a fresh spool (and shelve a 60% used one afterward), I had a problem to solve. What my 3D printer needed was filament monitor, or at least that’s what I thought.

After reviewing some projects and aftermarket options, I ended up making my own. Like most prototypes, it wasn’t an instant success, but that’s fine. One of the goals of prototyping is not only to validate that the problems you’re solving are the same ones you think exist, but also to force other problems and issues you may not have considered to the surface. Failure is only a waste if nothing is learned, and the faster and cheaper that learning happens, the better.

Sensible design steps also help minimize waste, so I started by looking at what kind of solutions already existed.

Continue reading “Let’s Prototype! This Filament End Needs 80 Decibels”

Wireless Trivia Game Buzzers Using HopeRF RFM69

TV game shows follow a formula that hasn’t changed much in sixty years. The celebrity presenter, the glamorous assistant, the catch phrases, the gaudy plywood sets, the nervous contestants, and of course the buzzers.

If you want to do a trivia quiz of your own it’s easy enough to dispense with presenter, assistant, set, and catch phrase, but as well as the contestants you’ll still need the buzzers. You can make a mess of wires that the TV technicians of old would have concealed within that set, but in your home or at the pub that could rapidly become inconvenient.

[Larry] solved his trivia game buzzer problems by building a wireless buzzer set. It features 3D printed enclosures containing Adafruit Feather microcontrollers, and instead of wires it uses RFM69 900MHz radio modules. The master unit displays the quickest contestant on an OLED screen, it features a low power standby mode between button presses to save battery power, and care has been taken to add a random timing to button presses to try to avoid collisions.

The buttons themselves started with a 3D printed button working a single tactile switch, but moved to a set of three switches in a triangle after edge presses failed to activate the single switch.

We’ve featured a wired game show buzzer before, but for the complete game show experience how about this countdown timer?

Hacklet 103 – Piezo Projects

The piezoelectric effect is simple in its rules: Apply mechanical stress to a material and you generate an electric charge. The inverse is also true: Apply a voltage to a material, and it changes shape. This doesn’t work for everything, though. Only certain materials like crystals, some ceramics, and bone have piezoelectric properties. The piezoelectric effect is used quite a bit in electronics, so it’s no surprise that plenty of hacker projects explore this physical phenomena. This week’s Hacklet is all about some of the best projects utilizing the piezoelectric effect on Hackaday.io!

strumWe start with [miro2424] and StrumPad. Strumpad lets you play a MIDI instrument by strumming, just like a guitar. A music keyboard acts as the guitar fretboard here – keys can be pressed to choose notes, but no sound is generated. When the strumpad is strummed, six copper strips act as capacitive sensors. Touching the strips determines which notes will be played. A piezo disc hiding below the circuit board detects how hard the notes have been strummed or tapped. The ATmega328 running the strumpad then passes the velocity and note-on MIDI messages on to a synth.

stmNext up is [Dan Berard] with Scanning Tunneling Microscope. Inspired by a project from [John Alexander], [Dan] created his own Scanning Tunneling Microscope (STM). The key to an instrument like this is precise movement. [Dan] achieves that by using a normal piezo disk. These disks are used as speakers and buzzers in everything from smoke detectors to greeting cards, so they’re common and cheap. [Dan] cut his piezo disk electrode into quadrants. Carefully controlling the voltage applied to the quadrants allows [Dan] to move his STM tip in X, Y, and Z. Incredibly, this microscope is able to create images at the atomic scale.

touchboard[Thatcher Chamberlin] is next with Low-Cost Touchscreen Anywhere. [Thatcher] used a trio of Piezo disks to make any flat surface touch sensitive. The three sensors are placed at 3 corners of a rectangle. Touches with the rectangle will create vibrations in the surface that are transmitted to the piezo sensors. By measuring the vibration time of arrival, it should be possible to determine where the surface was touched. This kind of measurement requires a decent processor, so [Thatcher] is using the ARM Cortex-M0 in NXP’s LPC1114FN28. Initial tests were promising, but we haven’t heard much from [Thatcher] on this project. If you see him online, tell him to hurry up! We’re hoping to turn our parking lot into a giant electronic chess board!

contFinally, we have [Jose Ignacio Romero] with Low Power Continuity Tester. [Jose] used a Piezo element in a slightly more mundane way – as a buzzer. Who needs a whole multimeter when you’re just trying to check continuity on a few circuits? This continuity tester uses a PIC12LF1571 processor to find open and short circuits. The 5 10 bit ADC in the PIC is plenty of resolution for this sort of tester. In fact, [Jose] even included a diode test, which emits a short beep if the leads are placed across a working diode. The PIC processor uses so little power that this tester should run for around 800 hours on a CR2032 watch battery.


If you want to see more piezo projects check out our brand new piezo projects list! If I missed your project, don’t get buzzed! Drop me a message on Hackaday.io, and I’ll add it to the list. That’s it for this week’s Hacklet. As always, see you next week. Same hack time, same hack channel, bringing you the best of Hackaday.io!

Teach An ATTiny 85 To Swear

Let’s be honest here: one of the first things we all did when we came across speech synthesizers like the Speak-n-spell was to try swear words. [Alec Smecher] has taken this to heart, building a simple buzzer mechanism driven by an ATTiny 85 that swears repeatedly when you connect it. It is a rather simple project (or, as [Alec] himself says, it is “a satisfyingly minimalist build”), but it is quite nicely done.

The 8kHz speech sample (taken from Google Translate) is stored in the code, and written out to one of the PWM outputs of the ATTiny85 from a timing loop to directly drive the small speaker. So, all that is needed is the buzzer case, a small speaker, the ATTiny85, a power source and a few bits of wire. It’s a great example of a minimalist design: the ATTiny85 can just about drive the speaker directly, and can be run directly from batteries without requiring a power controller. Sometimes it pays to keep things simple, especially when it comes to swearing. 

Continue reading “Teach An ATTiny 85 To Swear”