High End PC Gets A Rustic Woodworking Piece Of Art For A Case

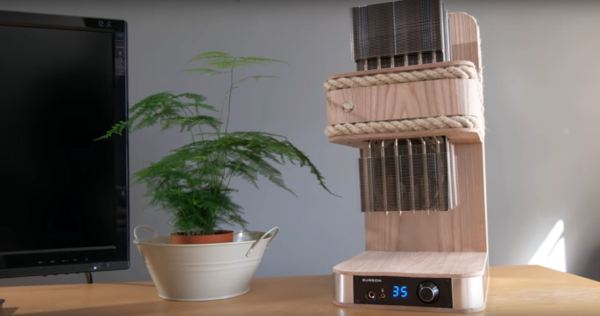
As [Matt] from [DIY Perks] was about to assemble a new PC, he decided to take a unique direction when it came to building a case. Despite the appearance of a woodworking piece with weird industrial radiators, there is actually a full-fledged, high-end PC hidden inside.

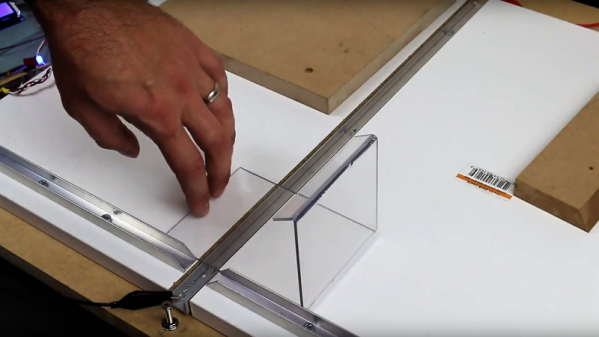
Those radiators are a pair of almost-the-biggest-you-can-buy heatsinks — one of which has been modified to fit the graphics card. Separating the graphics card’s stock cooling fan unit cut down significantly on noise and works with the stringent space requirements of the build. Those fans however keep other components on the card cool, so [Matt] cut pieces of copper plate to affix to these areas and joined them to the heatsink with a heat pipe, bent to shape. The elm wood case then began to take shape around the graphics card — cut into pieces to accommodate the heat pipes, and sealed with black tack to dampen the ‘coil whine’ of the GPU; it turns out the likely culprit are the MOSFETs, but close enough.

Continue reading “High End PC Gets A Rustic Woodworking Piece Of Art For A Case”

Simple Jig Gives Plastic Homes To Orphaned Projects

Look around your bench and chances are pretty good that there’s a PCB or scrap of perfboard or even a breadboard sitting there, wires and LEDs sprouting off it, doing something useful and interesting. Taking it to the next level with a snazzy enclosure just seems too hard sometimes, especially if you don’t have access to a 3D printer or laser cutter. But whipping up plastic enclosures can be quick and easy with this simple acrylic bending outfit.

At its heart [Derek]’s bending rig is not much different from any of the many hot-wire foam cutters we’ve featured. A nichrome wire with a tensioning spring is stretched across a slot in a flat work surface. The slot contains an aluminum channel to reflect the heat from the wire upward and to protect the MDF bed; we wonder if perhaps an angle section set in a V-groove might not be more effective, and whether more vertical adjustment range would provide the wider heating area needed for wider radius bends. It works great as is, though, and [Derek] took the time to build a simple timer to control the heating element, for which of course he promptly built a nice looking enclosure.

We can imagine the possibilities here are endless, especially if you use colored acrylic or Lexan and add in some solvent welding. We’ve covered acrylic enclosure techniques before; here’s a post that covers the basics.

Continue reading “Simple Jig Gives Plastic Homes To Orphaned Projects”

Finishing A Mini PS One: SLA Vs Extruded

One of the biggest lessons learned by first time 3D printer users is that not everything can be replicated and a printer is a machine and not a miracle worker. It has limitations in terms of what it can print as well as the quality of the output. For teeny tiny objects, the 0.8 mm nozzle will just not do and with resin printers on the rise, the question is, ‘are extruder printers obsolete?’

[Dorison Hugo] has made a mini version of the PS One using a Raspberry Pi which you can play games one. The kicker is that in his video, he does a comparison of an SLA printer and a cheaper extruder one for his enclosure. He goes through a laundry-list of steps to print, file, fill, repair, sand paint, sand, paint etc to try to get a good model replica of the original PS One. He then proceeds to print one with an SLA printer and finishes it to compare with the first model. The decals are printed on an inkjet for those who are wondering, and there is a custom cut heatsink in there as well that was salvaged from an old PC.

Spoiler alert! The SLA wins but in our view, just slightly. The idea is that with enough elbow grease and patience, you can get pretty close to making mini models with a cheaper machine. The SLA print needs work too but it is relatively less and for detailed models, it is a much better choice. We really enjoyed watching the process from start to finish including the Dremel work, since it is something that is forgotten when we see a 3D print. Creating something of beauty takes time and effort which stems from a passion to make.

Take a look at the video below of the time lapse and for  SLA printer fans, have a look at the DIY SLA printer which is a Hackaday Prize Entry this year. Continue reading “Finishing A Mini PS One: SLA Vs Extruded”

Portable RetroPie Builds On The Shoulders Of Giants

For anyone wanting to get that shot of nostalgia without the hassle of finding an NES Classic, the Retropie project is a great starting point. Of course, it’s not too noteworthy to grab a Raspberry Pi, throw a pre-built distribution on it, and plug in an SNES to USB converter. What is noteworthy, however, is building a Retropie that’s portable and that has the quality and polish of the latest build from [fancymenofcornwood].

render-blowup-of-retropie
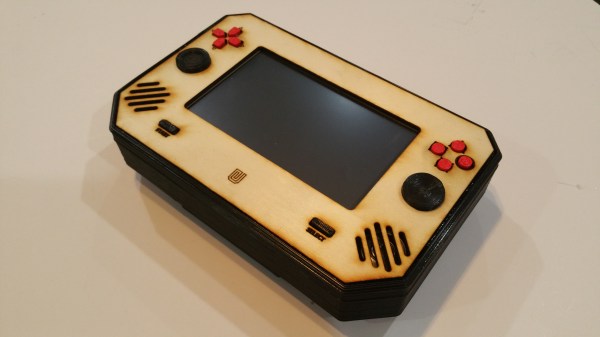
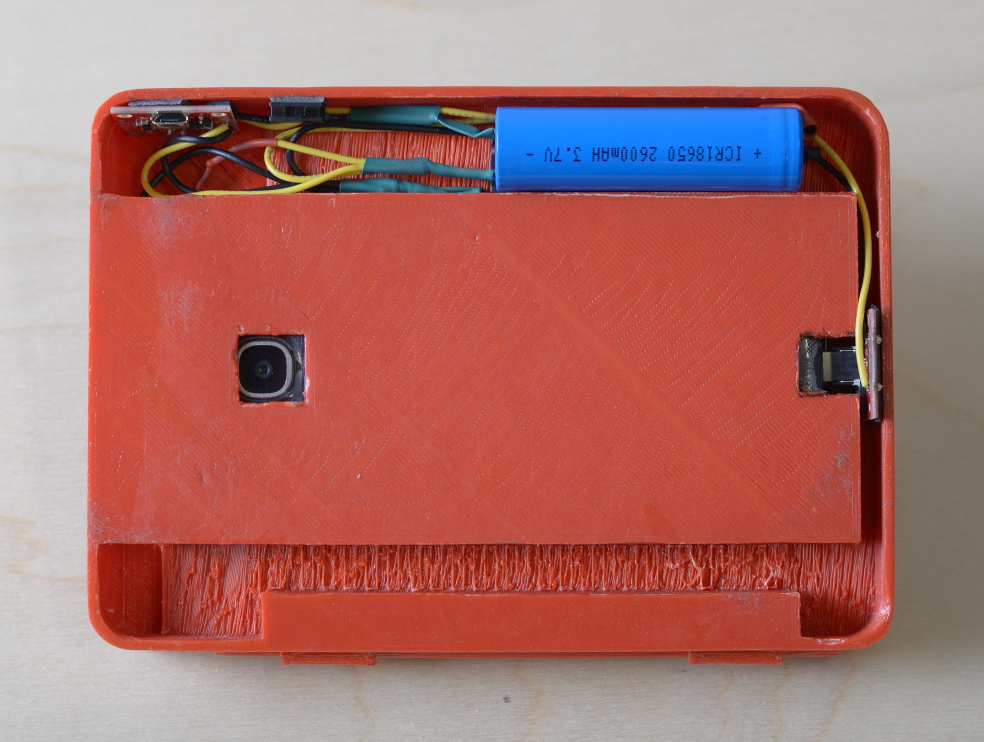
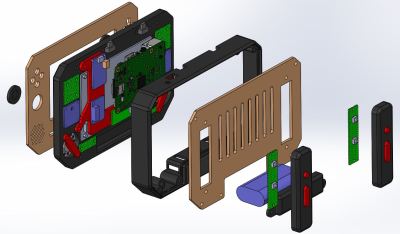
For starters, the laser cut wood case was custom-made. From there, all of the PCBs were fitted including specific ones to handle each set of buttons (complete sets of D-pads, shoulder buttons, and joysticks) and another for the 5″ HDMI screen. It has stereo speakers and its own headphone jack (to the envy of all new iPhone owners), and is powered from a Raspberry Pi 2 running Retropie 4.1. The battery pack shouldn’t leave you stranded, either, especially not if you grew up playing the Sega Game Gear.

The quality of the build here is outstanding, and its creator made a design choice to make it easily replicable, so if you’ve wanted to play N64 or PS1 games while on the go, this might be what you’ve been waiting for. There are lots of other options for getting some fun from a Retropie going though, from building one into a coffee table to re-purposing that infamous Game Gear.

Obligatory clip of this portable playing Doom is found after the break.

Continue reading “Portable RetroPie Builds On The Shoulders Of Giants”

Smartphone Case For The Retro Gamer

A well-designed phone case will protect your phone from everyday bumps with only as much style flair as you’d like. While protection is usually the only real function of a case, some designs — like [Gabbelago]’s Emucase — add specific utility that you might not have known you needed.

Contrary to most cases, the Emucase fits over your phone’s screen, and the resulting facelift emulates the appearance of a Game Boy for easier — you guessed it — Game Boy emulation play on your smartphone.

Cannibalizing a USB SNES gamepad for its buttons and rubber contact pads, Gabbelago then threaded some wire through the contacts, securing it with copper tape and glue; this provides a measurable level of capacitance to register on the touchscreen. Using heat to bend the sides of the 3D printed case so it can attach to the phone is probably the trickiest part of this cool project. Check out his build instructions for any pointers you need.

Continue reading “Smartphone Case For The Retro Gamer”

Pokédex Case Keeps Your Phone Powered Up So You Can Catch ‘Em All

The launch of Pokemon Go has unleashed the franchise upon the world once again but this time it’s encouraging users to get active and socialize in the great outdoors. To show off their dedication to the cause, [Npoole] 3D printed a Pokédex external battery and case to combat the game’s already legendary drain on their Galaxy S4’s resources.

Pokedex Open BackMimicking the first-generation Kanto design, [Npoole] 3D printed it in red ABS and added a small circuit with a red, yellow and green LED to complete the effect. Inside, a 18650 lithium cell provides the much-needed backup power via a micro B plug and is boosted to 5V with a LiPo charger/booster board. Despite a switch on the circuit, the battery slowly drains so that’s something to be corrected in a future version.

As you can see, there is still some room left over in the external bat–I mean–Pokédex, and [Npoole]  intends to add another battery and a cooling fan to further improve the design. The result is a little bulky, but for new and diehard fans alike, a working Pokédex definitely worth it.

While that’s printing, if you’re looking to hack your way to the perfect Poké-ball throw, try out this lo-tech addition to your Pokémon trainer kit.

[via Sparkfun]

Raspberry Pi Cluster Build Shows How And What

Raspberry Pi clusters are a dime a dozen these days. Well, maybe more like £250 for a five-Pi cluster. Anyway, this project is a bit different. It’s exquisitely documented.

[Nick Smith] built a 5-node Pi 3 cluster from scratch, laser-cutting his own acrylic case and tearing down a small network switch to include in the design. It is, he happily admits, a solution looking for a problem. [Smith] did an excellent job of documenting how he designed the case in CAD, prototyped it in wood, and how he put the final cluster together with eye-catching clear acrylic.

Of interest is that he even built his own clips to hold the sides of the case together and offers all of the files for anyone who wants to build their own. Head over to his page for the complete bill of materials (we didn’t know Pis were something you could order in 5-packs). And please, next time you work on a project follow [Nick’s] example of how to document it well, and how to show what did (and didn’t) work.

If 5 nodes just doesn’t do it for you, we suggest this 120-node screen-equipped monster, and another clear-acrylic masterpiece housing 40 Pis. This stuff really isn’t only for fun and games. Although it wasn’t Pi-based, here’s a talk at Hackaday Belgrade about an ARM-based SBC cluster built to crunch numbers for university researchers.