Linux Fu: Atomic Power

People are well aware of the power of virtual machines. If you want to do something dangerous — say, hack on the kernel — you can create a virtual machine, snapshot it, screw it up a few times, restore it, and your main computer never misses a beat. But sometimes you need just a little shift in perspective, not an entire make belive computer. For example, you are building a new boot disk and you want to pretend it is the real boot disk and make some updates. For that there is chroot, a Linux command that lets you temporarily open processes that think the root of the filesystem is in a different place than the real root. The problem is, it is hard to manage a bunch of chroot environments which is why they created Atoms.

The system works with several common distributions and you install it via Flatpak. That means you can launch, for example, a shell that thinks it is running Gentoo or Centos Linux under Ubuntu.

Continue reading “Linux Fu: Atomic Power”

Set Up A Headless Raspberry Pi, All From Another Computer’s Command Line

There are differences between setting up a Raspberry Pi and installing an OS on any other computer, but one thing in common is that if you do enough of them, you seek to automate the process any way you can. That is the situation [Peter Lorenzen] found himself in, and his solution is a shell script to install and configure the Raspberry Pi for headless operation, with no need to connect either a keyboard or monitor in the process.

[Peter]’s tool is a script called rpido, and with it the process for setting up a new Raspberry Pi for headless operation is super streamlined. To set up a new Pi, all [Peter] needs to do is:

  1. Plug an SD card into his laptop (which happens to be running Ubuntu.)
  2. Run: rpido -w -h myhostname -s which downloads and installs the newest version of Raspbian lite, does some basic setup (such as setting the hostname), configures for headless operation, and launches a root shell.
  3. Use the root shell to do any further tweaks or checks (like launching raspi-config for additional changes.)
  4. Exit the shell, remove the SD card from his laptop, and install the card into the Raspberry Pi.

There are clear benefits to [Peter]’s script compared to stepping through a checklist of OS install and setup tasks, not to mention the advantage of not needing to plug in a keyboard and monitor. Part of the magic is that [Peter] is mounting the SD card’s filesystem in a chroot environment. Given the right tools, the ARM binaries intended for the Pi run on his (Intel) Ubuntu laptop. It’s far more convenient to make changes to the contents of the SD card in this way, before it goes to its new home in a Pi.

Not everything has to revolve around an SD card, however. [Jonathan Bennet] showed that it’s possible to run a Raspberry Pi without an SD card by using the PXE boot feature, allowing it to boot and load its file system from a server on the same network, instead of a memory card.

An Android Phone Makes A Better Server Than You’d Think

There was a time a few years ago when the first Android phones made it to market, that they seemed full of promise as general purpose computers. Android is sort of Linux, right, or so the story went, so of course you must be able to run Linux on an Android phone and do all sorts of cool stuff with it.

As anyone who tried to root an Android phone from 2010 will tell you, it was a painful and unrewarding process. There was normally a convoluted rooting process followed by somehow squeezing your own Linux filesystem tree onto the device, then chroot-ing into it. You’d then have to set up a VNC server and VNC into it, and eventually you’d feel immensely proud of your very slow tiny-screen Linux desktop that you’d slaved over creating. It was one of those things that’s simple in theory, but extremely convoluted in practice.

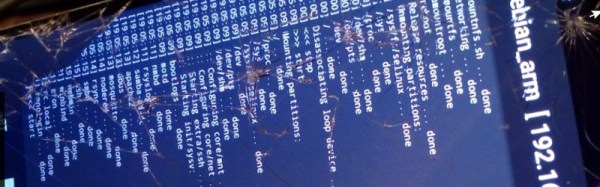
But six years have passed since those days, phones have gotten much faster and so has the software for tasks such as rooting, so maybe it’s time to return to the topic of Linux on an Android device. [Pete Scargill] gave it a try when a friend gave him a Chinese quad-core Android phone with a broken screen. He proceeded to put a Debian installation on it, upon which he runs his collection of server processes.

Rooting the phone was straightforward process using the KingRoot app, a sideloaded version as it seems there’s a bogus copy on the Play Store. Then bringing a Linux system to it could be achieved with the LinuxDeploy app. The result is surprisingly useful, after some installation steps upon which he goes into detail.

You might ask what would be the point of this exercise, given that you can do the same thing much more easily with a single board computer such as a Raspberry Pi. But to buy a Pi, SD card, screen, and UPS, as he points out you’d have to spend a lot more than you would for a second-hand phone from eBay — or a free, slightly broken, one from friends or family.

If getting more from your Android phone is your thing, perhaps you’d like to know about installing Busybox on it. We’ve also advocated for using old Android phones for ARM dev.

Full Linux Distro On A Nook Color

We should have included a footnote in the title. You can say that [Thomas Polasek] installed a full version of Arch Linux on his Nook Color, but there’s one caveat. It’s running on top of the Android kernel and his proof-of-concept uses a second computer to get it up and running. But there’s potential for that to change moving forward.

Unlike previous attempts to run a Linux distro on Android, this does away with using a VNC to show the desktop. [Thomas] is commandeering Android’s frame buffer so that it can be used by the X desktop without needing to set up display drivers. To start off he installed a ROM based on CM7. A couple of Android apps give him the functionality needed to get the Arch Linux distro running from the SD card. This is accomplished by tunneling into the tablet via SSH, and using the ‘chroot’ command to make it active. The hope is that this can somehow be automated by a script.

A female to female USB coupler was used to connect the keyboard and mouse to the Nook. It looks like LXDE would be useless without them; touch control is not yet implemented. Those shortcomings aside, everything seems to be running pretty fast in the video after the break.

Continue reading “Full Linux Distro On A Nook Color”

Running Debian And Android On The G1

tmobileg1

[Jay Freeman] has a rather exhaustive tutorial on how to set up a Debian environment on your T-Mobile G1. The first major issue with this is that getting root level access through telnetd is being patched. It certainly is a security issue that needs to be fixed, but a user shouldn’t have to root their own phone to begin with. While the G1 comes with some Linux tools, they’re limited. [Jay]’s goal was to create a familiar Debian environment on the phone. It takes a few tricks, but if you’re familiar with the command line, you shouldn’t have any problems. Debian already has ARM EABI support, so creating a working image isn’t a problem. The image file is stored on the SD card and mounted using the loopback device. The G1’s kernel has module support turned on, so [Jay] created an ext2 and unionfs kernel modules. [Benno Leslie]’s Android version of busybox is used to perform the actual mounting. Once mounted, you just need to chroot into the environment to start playing with native Linux apps. [Jay] takes this a step further by using unionfs to make the Android and Debian environments share the same root. This is really a great how-to and it’s nice to know that modules can be added to the kernel.

[photo: tnkgrl]

[via Hackszine]