An Apple ][ With A Pendulum

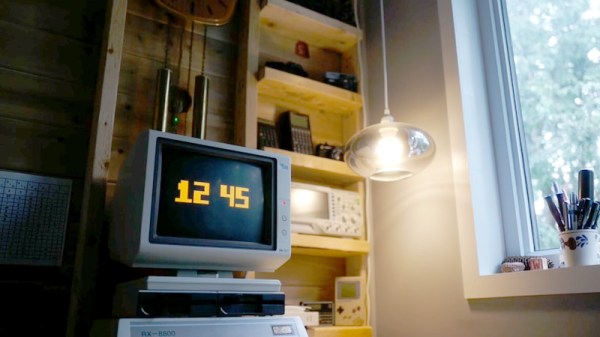
Clocks are a favourite project here, and we can say we’ve seen all conceivable types over the years. Just a software clock on a retrocomputer perhaps isn’t the coolest among them, but [Willem van der Jagt ]’s Apple][ clock has a little bit extra. It takes its time reference from a real pendulum, on an antique wall clock.

A proximity sensor next to a metal pendulum gives an easy way to generate a digital pulse on each pass, but leaves the question of how to transfer it to the computer. With computers of this age the circuitry is surprisingly simple, and in this case he’s sending an interrupt to the machine which the software can pick up for its timing. There is a small logic circuit between the sensor and the interrupt allowing him to gate the pendulum line, triggered from one of the output lines exposed on the Apple’s game port.

The code is written in assembly, and counts the number of pendulum swings before incrementing the number of minutes. It’s an enjoyable reminder of the days when the architecture of a computer was this accessible, and for those of us whose past lies in the Sinclair world it’s also been a little peek into something of how the Apple works.

We think this is the first pendulum-driven retrocomputer clock we’ve seen here at Hackaday, as you might understand when a clock has a pendulum it’s usually a more traditional design.

Resistor Color Code Clock Is A Bit Of Fun

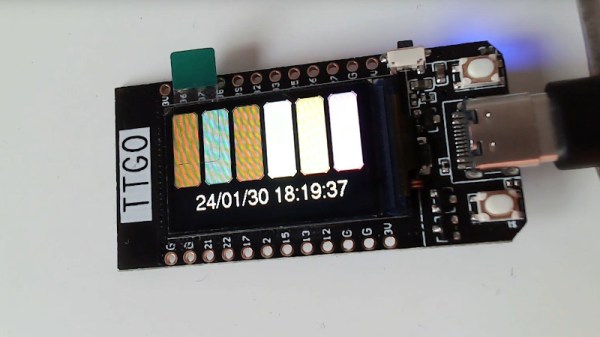
Younger electronic engineers may see resistors with old-style color codes to display their values a little less than those from previous years, but if there’s a shibboleth among those who wield a soldering iron it’s probably something similar to instinctively saying “1K” when asked “Brown-black-red?”. Colors as numbers can be used outside resistors, for example in a clock, as [Det Builds Stuff] shows us with an ESP32 TFT dev board.

It’s fair to say that this is more of a software project than a hardware one, but that’s not necessarily a bad thing as he takes us though the process of creating a Network Time Protocol (NTP) capable clock with the dev board. He claims it may be the world’s first resistor clock, something we’d have to disagree with, but beside that we can see this could make a neat little desk ornament with a 3D printed case.

Oddly though, we’d expect older engineers to face the same steep learning curve as younger ones when reading it, because it’s easier to recognize visual sequences of numbers as preferred resistor values than it is to visually decode each one every time.

Continue reading “Resistor Color Code Clock Is A Bit Of Fun”

Neon Watch Glows Rather Nicely, Tells Time

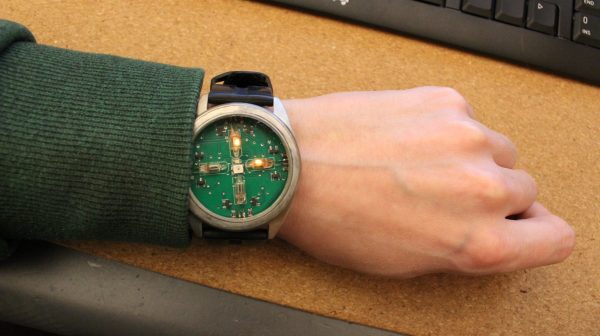
It wasn’t long after the development of the LED that LED watches became available. They were prized for their clear light output and low power draw. Neon bulbs, on the other hand, are thirsty for current and often warm or even hot in operation. And yet, [Lucas] found a way to build them into a sweet watch that actually does the job. Nice, right?

The design uses a simple trick to avoid killing the batteries with excessive power draw. The neon lamps are only activated when the user waves a hand above the watch, at which point the lamps light to display the time. Reading the time is  a little fiddly, but understandable with the aid of this PDF diagram. Basically, the two electrodes of each neon lamp are driven independently. This gives each of the four lamps three possible states: with the first electrode lit, the second electrode lit, or both lit. Four lamps multiplied by three states equals 12—so the watch can display the hour quite easily. As for minutes, a similar scheme is used with some modifications for clarity. Setting the time is via a light sensor on the watch which picks up flashes from a computer screen.

It reminds us of a time when we once thought nixie tubes were too power hungry for a wristwatch build… until the hackers of the world proved us wrong. Video after the break.

Continue reading “Neon Watch Glows Rather Nicely, Tells Time”

Kinetic Clock Is A Clean Modern Way To Tell Time

Hackers and makers aren’t usually too interested in basic round analog clocks. They tend to prefer building altogether more arcane and complicated contraptions to display numbers for the telling of time. [alstroemeria] did just that with this nifty kinetic clock build.

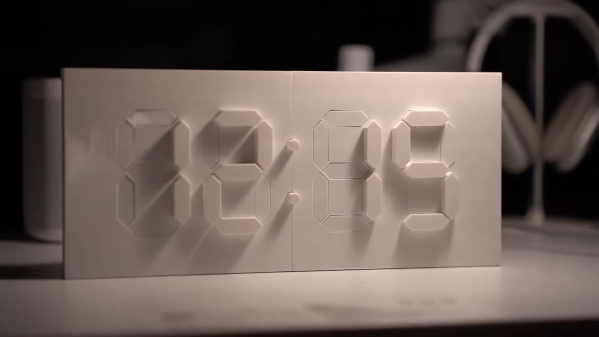
The basic concept of the kinetic clock is to have a flat plate, which individual segments raise out of to create a physical (instead of illuminated) 7-segment display. This is achieved with servos which push the segments in and out using a small rack mechanism. It’s not a sophisticated build; it simply uses 30 servos to handle all the segments needed to tell time. Thus, the Arduino Mega was the perfect tool for the job. With a sensor shield added on, it has an abundance of IO, driving a ton of servos is a cinch. There’s also a DS3231 real time clock to help it keep accurate time.

Incidentally, it’s a hefty thing to print, according to YouTuber [Lukas Deem] who replicated the project. It took around 85 hours to print, and a total of 655 grams of filament – not counting mistakes and trashed parts.

And if you think you’re having deja-vu, you might well be. We’ve seen a take on this exquisite design before. We liked it then, and we like it now.

Overall, it’s a stylish build that looks as good as your 3D printer’s output will allow. A resin printer would be a massive boon in this regard. Video after the break.

Continue reading “Kinetic Clock Is A Clean Modern Way To Tell Time”

Simulating A Time-Keeping Radio Signal

As far as timekeeping goes, there’s nothing more accurate and precise than an atomic clock. Unfortunately, we can’t all have blocks of cesium in our basements, so various agencies around the world have maintained radio stations which, combined with an on-site atomic clock, send out timekeeping signals over the air. In the United States, this is the WWVB station located in Colorado which is generally receivable anywhere in the US but can be hard to hear on the East Coast. That’s why [JonMackey], who lives in northern New Hampshire, built this WWVB simulator.

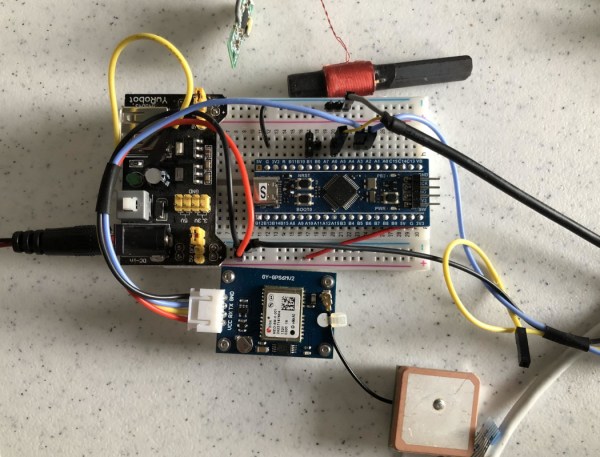
Normally, clocks built to synchronize with the WWVB station include a small radio antenna to receive the 60 kHz signal and the 1-bit-per-second data transmission which is then decoded and used to update the time shown on the clock. Most of these clocks have internal (but much less precise) timekeeping circuitry to keep themselves going if they lose this signal, but [JonMackey] can go several days without his clocks hearing it. To make up for that he built a small transmitter that generates the proper timekeeping code for his clocks. The system is based on an STM32 which receives its time from GPS and broadcasts it on the correct frequency so that these clocks can get updates.

The small radio transmitter is built using one of the pins on the STM32 using PWM to get its frequency exactly at 60 kHz, which then can have the data modulated onto it. The radiating area is much less than a meter, so this isn’t likely to upset any neighbors, NIST, or the FCC, and the clocks need to be right beside it to update. Part of the reason why range is so limited is that very low frequency (VLF) radios typically require enormous antennas to be useful, so if you want to listen to more than timekeeping standards you’ll need a little bit of gear.

Making A Kit-Kat Clock Even Creepier

If there’s anything as American as baseball and apple pie, it’s gotta be the Kit-Kat clock in the kitchen. For the unfamiliar, the Kit-Kat clock is special in that its pendulum tail and eyes move back and forth with each passing second. They’re equal parts cute and creepy.

But not this particular Kit-Kat, not once [Becky Stern] got a hold of it. The cute/creepy scales have been tipped, because the eyes of this Kat follow you around the room. “You” in this case is fellow maker [Xyla Foxlin], whom [Becky] drew in the Maker Secret Santa pool. See, [Xyla] loves cats, but is deathly allergic to them. So really, what better gift is there?

In order to make this happen, [Becky] started by disconnecting the long lever that link the eyes and the tail, which move together, and connected a servo horn to the eyes. [Becky] drilled out the nose in order to fit the camera, which is connected to a Seeed Grove AI Vision board with a Xiao RP2040 piggybacked on top.

While soldering on the servo wires, [Becky] accidentally detached a tiny capacitor from the AI Vision board, but it turns out that it wasn’t critical. Although she only had to write one line of code to get it to work, it ended up working too well, with the eyes darting around really quickly. By making the servo move in timed increments to the new positions, it’s now much more creepy. Be sure to check out the build video after the break.

You know we can’t resist a clock build around here, especially when those clocks are binary.

Continue reading “Making A Kit-Kat Clock Even Creepier”

Monitoring Energy Use And Saving Money

On the surface, the electric grid might seem like a solved piece of infrastructure. But there’s actually been a large amount of computerized modernization going in the background for the past decade or so. At a large scale this means automatic control of the grid, but for some electric utility customers like [Alex] this means the rates for electricity can change every hour based on demand. By keeping an eye on the current rate, you can extract the most value from these utilities.

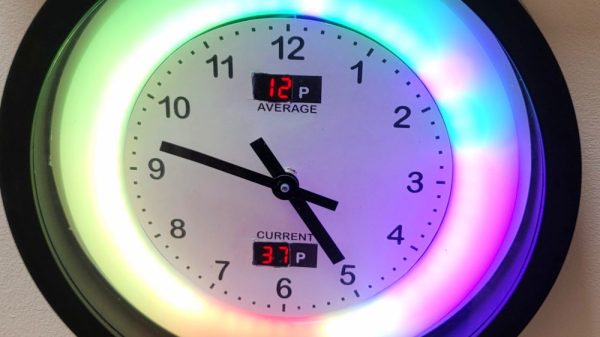
[Alex] is located in the United Kingdom and has an energy provider whose rates can change every half hour. This information is freely available well enough in advance to download the data and display it visibly in with a NeoPixel LED ring around a clock. The colors displayed by the LEDs represent an increase or decrease in price for the corresponding time and allow him to better plan out the household’s energy use for the day. The clock uses a TinyPICO ESP32 module to gather the data and handle the clock display. A second wall-mounted device shows real-time energy readings for both gas and electricity using two old analog voltmeters modified to display kilowatt-hours.

While not everyone has a utility which allows this sort of granularity with energy pricing, having one can make a bit of a difference as electricity rates under this system can sometimes go negative. [Alex] estimates that using these two displays to coordinate his energy usage has saved around £50 a month. Even if your utility offers minimal or no price adjustments for time-of-use, it’s still a good idea to monitor energy use in your home. Here’s a fairly comprehensive project that does that without modifying any existing wiring.