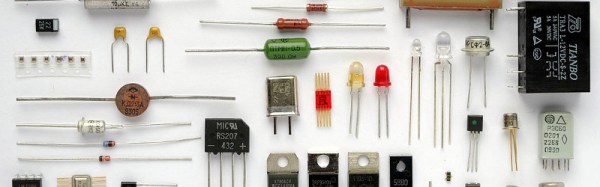
There are two types of Hackaday readers: those that have a huge stock of parts they’ve collected over the years (in other words, an enormous pile of junk) and those that will have one a couple of decades from now. It’s easy to end up with a lot of stuff, especially items that you’re likely to use in more than one design; the price breakpoints at quantities of 10 or 100 of something can be pretty tempting, and having a personal stock definitely speeds the hacking process now that local parts shops have gone the way of the dinosaur. This isn’t a perfect solution, though, because some components do have shelf-lives, and will degrade in some way or another over time.
If your stash includes older electronic components, you may find that they haven’t aged well, but sometimes this can be fixed. Let’s have a look at shelf life of common parts, how it can be extended, and what you can do if they need a bit of rejuvenation.
Potentiometers, or variable resistors, are a standard component that we take for granted. If it says “10k log” on a volume pot, than we fit and forget. But if like [Ben Holmes] you are modelling electronic music circuitry, some greater knowledge is required. To that end he’s created a rig for characterising a potentiometer to produce a look-up table of its values.
It’s a simple enough set-up in which a voltage controlled current source feeds the pot while an Arduino with a motor controller turns it through a stepper motor, and takes a voltage reading from its wiper via an analogue pin. Probably most readers could assemble it in a fairly short time. Where it becomes interesting though is in what it reveals about potentiometer construction.
Audio potentiometers are usually logarithmic. Which is to say that the rate of change of resistance is logarithmic over the length of the track, in an effort to mimic the logarithmic volume response of the human ear in for example a volume control. If you are taught about logarithmic pots the chances are you’re shown a nice smooth logarithmic curve, but as he finds out in the video below that isn’t the case. Instead they appear as a set of linear sections that approximate to a logarithmic curve, something that is probably easier to manufacture. It’s certainly useful to know that for [Ben]’s simulation work, but for the rest of us it’s a fascinating insight into potentiometer manufacture, and shows that we should never quite take everything for granted.
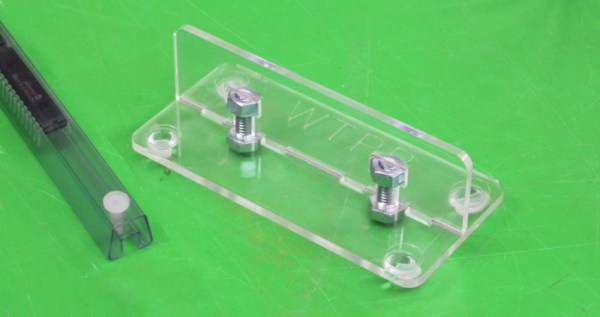
Picture the scene: you’ve whipped up an amazing new gadget, your crowdfunding campaign has gone well, and you’ve got a couple hundred orders to fill. Having not quite hit the big time, you’re preparing to tackle the production largely yourself. Parts begin to flood in, and you’ve got tube after tube of ICs ready to populate your shiny new PCBs? After the third time, you’re sick and tired of fighting with those irksome little pins. Enter [Stuart] with the answer.
It’s a simple tool, attractively presented. Two pieces of laser cut acrylic are assembled in a perpendicular fashion, creating a vertical surface which can be used to press pins out of IC tubes. [Stuart]’s example has rubber feet, though we could easily see this built into a work surface as well.
The build highlights two universal truths. One, that laser cutters are capable of producing elegant, visually attractive items almost effortlessly, something we can’t say about the garden variety 3D printer. Secondly, all it takes is a few little jigs and tools to make any production process much easier. This is something that’s easy to see in the many factories all over the world – special single-purpose devices that make a weird, tricky task almost effortless.
We’ve all experienced it: that sinking feeling you get when you’ve powered up your latest circuit and nothing happens. Maybe you made a mistake in your design or you shorted something while soldering. It’s even possible that ESD damaged one of your chips. All of these issues and more are possible, maybe even inevitable, when designing your own hardware.
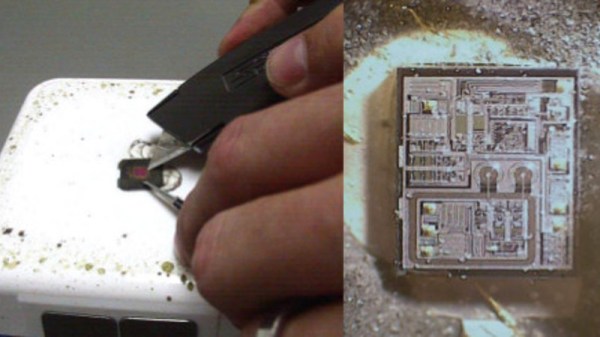
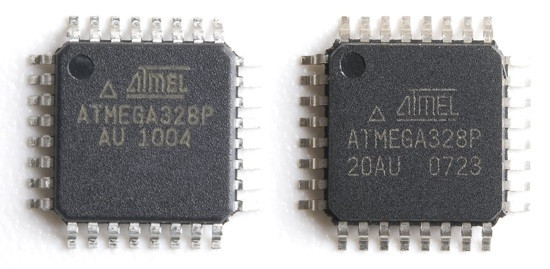
One of these is an ATmega328, the other is literal garbage.
[Yahya] points to a number of government studies on the rising scourge of counterfeit components, and the numbers are rather surprising. For example, the U.S Department of Commerce conducted a study between 2005 and 2008 where over 50% of respondent manufacturers and distributors had encountered counterfeit components. Another estimate claims that up to 15% of the semiconductors purchased by the Pentagon are counterfeit, presenting a serious risk to national security.
But how exactly does one counterfeit a microcontroller or transistor? Interestingly, in the vast majority of cases, old chips are pulled from recycled circuit boards and new labels are written over the original. Sometimes the forgery is as simple as changing the date code on the component or up-rating its capability (such as labeling it military spec when it isn’t), but in some cases chips with the same package will be labeled as something else entirely. Other tricks are decidedly low-tech: the documentation for the device may list functions and capabilities which it simply does not possess, artificially raising its value.
The report is a worthwhile read, even for those of us who may not be purchasing components in the same quantities as the Pentagon. It may make you think twice before you click “Buy” on that shady site with the prices that seem to good to be true.
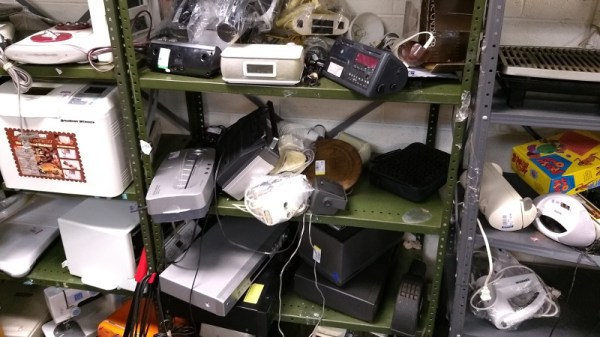
While working on a project recently, I required a capacitor of around 1000 μF and went rummaging through my collection of parts. No luck there. At that point I’d usually go through my collection of junk electronics and computer motherboards, but I had recently gone through and tossed the stuff that had been laying around for as long as I could remember. No matter, I thought. I’ll just head over to RadioShack and…
Now, I have been accused of many things over the years, but “deep” is certainly not one of them. Yet, at this moment I had what could only be described as an existential crisis. There is no RadioShack, not in my state at least. I don’t live in an area that’s blessed with a maker “scene”, so no independent shop or even a hackerspace within reasonable driving distance of me either. I could order it online of course, but everyone’s trying to sell them in bulk and shipping will take a few days at least. A few days? Who knows where my interests will be in a few days. How can I get anything done under these conditions?
Desperate times call for desperate measures, so I got in the car and took a ride to the only place I knew where I could by electronic components for cheap: Goodwill. Continue reading “My Kingdom For A Capacitor”→
Sometimes you see an excellent post somewhere else on the web, and then discover that it is one of a series of similarly good posts that you completely missed when they were published. If you are a Hackaday scribe you are left wondering how you managed to pass them by, and then why on earth you didn’t think of writing them yourself.
Such is the case with [Sanket Gupta]’s excellent series for Octopart, of posts titled “How to select a…” and then a class of component. It was the latest, “How to select a voltage regulator” that caught our eye first, but then we found the previous installments dealing with capacitors,resistors, inductors, connectors, IC packages and MCUs. Each one provides a basic primer for the engineer, in terms of both parts selection based on capability and on suitability for manufacturing, and while you may think that only an inexperienced reader might find benefit in such pieces the reality is that everybody can learn something.
So if you are involved in choosing electronic parts, no matter at what level, take a look at this series. If you know everything [Sanket] has to say then we congratulate you on your mastery of the field, however we think most readers will find them to be an interesting and useful resource.
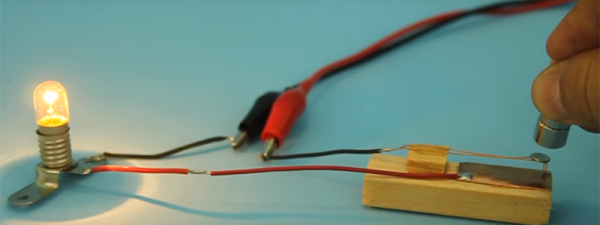
[Lucid Science] shows us how to make some simple reed switches. Reed switches are simple components that detect a magnetic field and can close or open a circuit once detected. While not really a thing of beauty, these DIY reed switches should help you out if you just can’t wait to order some or you fancied trying your hands at making some components from scratch.
Reed switches normally come in very small form factors so if you need something small then this may not be for you however the video does show you on a macro scale the fundamental workings of a reed switch. To make your own reed switch you need only a few parts: some copper, enamelled wire and magnets. They really are simple devices however sometimes it’s easy to overlook how simple some things are when they are so small that you can’t really see how they work.
Making your own components from scratch is probably the best way to understand the inner workings of said component. In the past we have seen some pretty awesome self built components from these beautiful DIY Nixie tubes to even making your own LEDs