All Inverters Are (Not) Created Equal

Building a crystal clock source for a CPU used to be a bit of an effort but these days, there’s nothing to it. Even if your CPU or other device needs an external clock, you just slap in an inverter, a crystal, and two capacitors together, and you are done, right? Maybe not. [Dave Collins] got interested in the common circuit and pulled out his scope and an array of different kinds of inverters. He looked at inverters and NAND gates and a few common circuit configurations.

This is one of those things you just assume is of little importance, but it turns out your choice of circuit architecture and active device can have a big impact on the output. But who has time to do all the testing? Thanks to [Dave] you don’t have to.

Continue reading “All Inverters Are (Not) Created Equal”

How To Grow Your Own Pyramid Salt Crystals

The regular granular table salt you’re used to isn’t the most attractive-looking seasoning out there, even given its fundamentally compelling flavor. You don’t have to settle for boring old salt anymore though, because [Chase] has shown us you can grow your own pyramid salt crystals at home!

Pyramid salt crystals can grow naturally, and typically occur in locations where salt pools are undisturbed under the warmth of the sun. However, it’s possible to grow them on purpose, too. As a bonus, their hollow structure means they dissolve very quickly on the tongue, and can taste “saltier” than typical granular salt.

To grow your own, you’ll need a bag of salt, which is mixed with some water. You’ll want to do so in a glass dish, as the salty solution you’ll be making can ruin metal cookware. The dish can then be heated up on an electric hotplate, which is used to heat the solution to between 60 and 70°C.

A small amount of food-grade potassium alum is also added to the solution to calm the convection currents in the heated solution, allowing the crystals to form gently without sticking and clumping together. As the water boils away, the rectangular-pyramidal crystals grow.

Naturally, you must be careful before eating the results of any home-grown lab experiments. However, [Chase] reports having licked some of the crystals and has confirmed they do indeed taste salty. [Chase] also notes several ways in which the parameters can be changed to grow different types of pyramid crystals, too.

We’ve featured [Chase]’s crystal-growing work before. If you’ve got your own cool DIY crystal projects cooking up in the lab, be sure to let us know!

holding up the flavor stone

An Infinity Gem That Didn’t Make The Cut, The Flavor Stone

MSG (Monosodium Glutamate) is a flavor enhancer used to add a meaty/savory (often called umami) flavor to a dish. You might even have some in your pantry (though more likely it is in something that is in your pantry). What you might not know is that you can grow it into a large crystal.

[Chase] does an excellent job walking through the details of the process. MSG is one of the many common household substances that can grow into a crystal such as table salt, alum, fertilizer, sugar, or Epsom salt to name a few. The idea is quite simple —  just create a supersaturated solution with your desired crystal material and then suspend a string in it; but the execution has some nuance. To create a medium that’s super saturated, heat some water and mix in equal parts of MSG. Then let it cool once it has all dissolved and split it into two parts, one big and one small. You need to create a seed crystal, so place the small solution in a shallow dish and let a crystal percolate out over the new few days. You attach one of the seed crystals that grow to a string and suspend it in your solution. There are several gotchas around how to properly harvest the crystals but [Chase] enumerates them for you.

We’ve covered [Chase’s] efforts before when he grew crystals out of Rust. He is on a quest to grow all five flavor stones: salty, sweet, sour, umami, and bitter and we wish him all the best. What we would also love to see is the whole process of MSG from start to finish, making your own MSG.

The (Sodium Chloride) Crystal Method

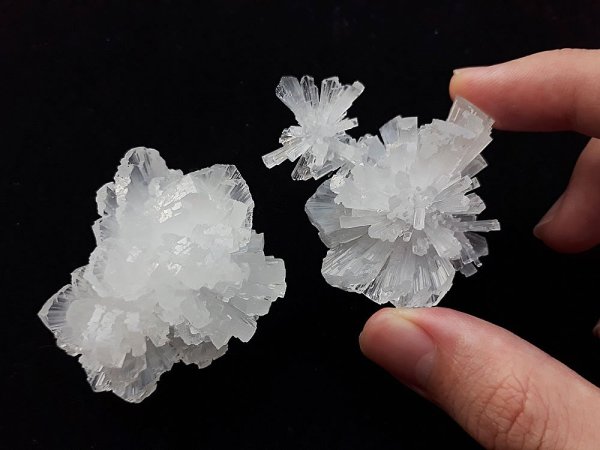
[Chase’s] post titled “How to Grow Sodium Chloride Crystals at Home” might as well be called “Everything You Always Wanted to Know about Salt Crystals (but Were Afraid to Ask).” We aren’t sure what the purpose of having transparent NaCl crystals are, but we have to admit, they look awfully cool.

Sodium chloride, of course, is just ordinary table salt. If the post were simply about growing random ugly crystals, we’d probably have passed over it. But these crystals — some of them pretty large — look like artisan pieces of glasswork. [Chase] reports that growing crystals looks easy, but growing attractive crystals can be hard because of temperature, dust, and other factors.

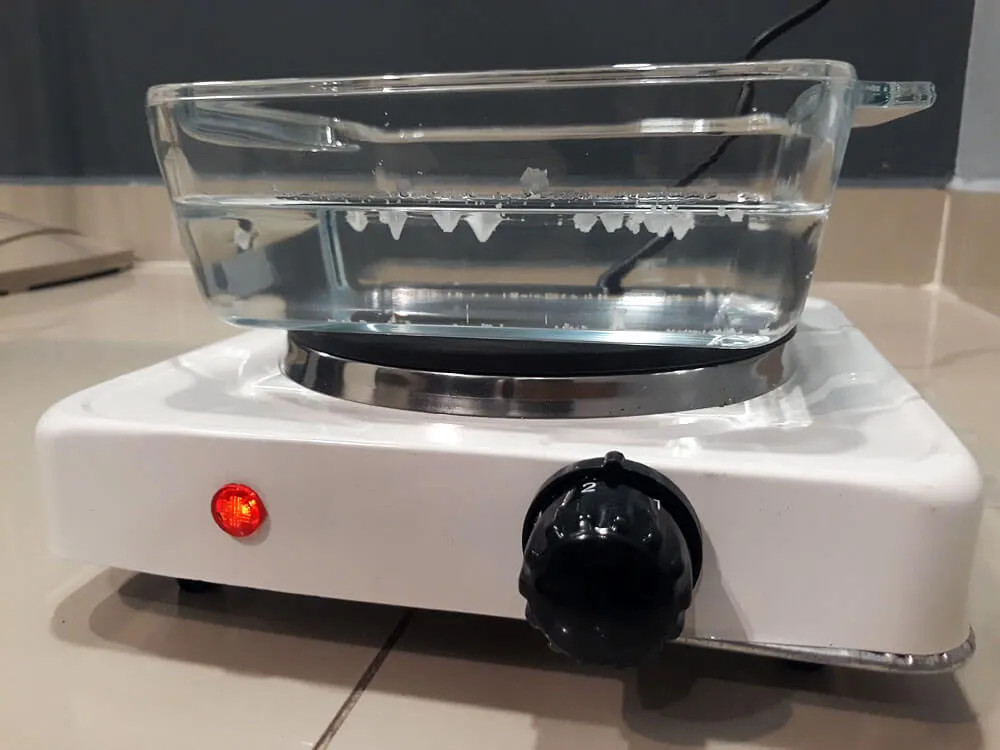
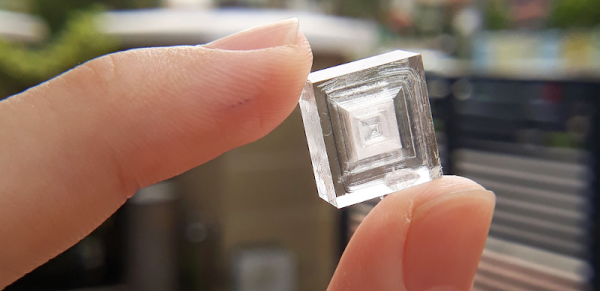
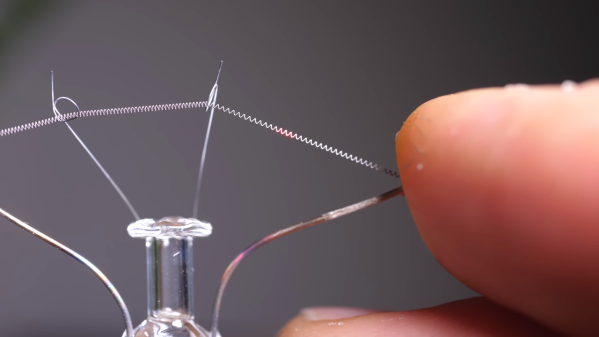
You probably have most of what you need. Table salt that doesn’t include iodine, a post, a spoon, a funnel, filter paper, and some containers. You’ll probably want tweezers, too. The cooling rate seems to be very important. There are pictures of what perfect seed crystals look like and what happens when the crystals form too fast. Quite a difference! Once you find a perfectly square and transparent seed crystal, you can use it to make bigger ones.

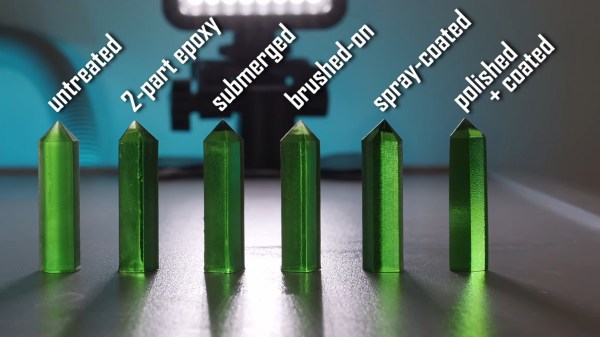
After the initial instructions, there is roughly half the post devoted to topics like the effect growth rate has on the crystal along with many pictures. There are also notes on how to form the crystals into interesting shapes like stars and pyramids. You can also see what happens if you use iodized salt.

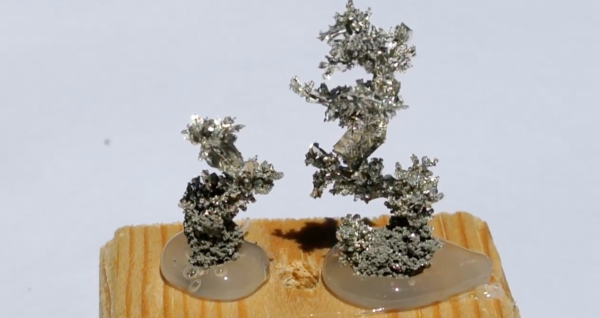
If salt is too tame for you, try tin. Or opt for copper, if you prefer that.

How To Make Resin Prints Crystal Clear

[Matou] has always been entranced by the beauty of natural crystal formations [and has long wished for a glowing crystal pendant]. Once he got a resin-based 3D printer, he was majorly disappointed to find out that although transparent resin prints look like delicious candy when they’re still wet, they turn cloudy and dull after being washed in an isopropyl bath and cured with UV light. There must be a way to either polish pieces back to clear, or keep them clear in the first place, [Matou] thought, and set about experimenting with some test crystals (video, embedded below).

As [Matou] found out, the dullness is caused by surface imperfections. Resin prints have layer lines, too, and although they may be super fine and invisible to the naked eye, they will still scatter light. The choices seem obvious — either polish the proud parts down with many grits of sandpaper, or fill the valleys with something to smooth everything out. As you’ll see in the video after the break, [Matou] tried it all, including a coat of the same resin that made the print. It’s an interesting look at the different ways to smooth out resin prints, though you may not be surprised to find that the one with the most work put into it looks the best.

We were hoping to see [Matou] try a green LED in the pendant, but it didn’t happen. If you’re dying to know what that looks like, you can get one of these pendants for yourself by supporting [Matou] on Patreon.

We think crystals are pretty cool, too — especially crystal radios. Here’s the hack-iest one of those we’ve ever seen, free of charge.

Continue reading “How To Make Resin Prints Crystal Clear”

A Beginner’s Guide To X-Ray Crystallography

In graduate school, I had a seminar course where one of the sections was about X-ray crystallography. I was excited, because being able to discern the three-dimensional structure of macromolecules just by shining X-rays on them seemed like magic to me. And thanks to a lackluster professor, after the section it remained just as much of a mystery.

If only I’d had [Steve Mould] as a teacher back then. His latest video does an outstanding job explaining X-ray crystallography by scaling up the problem considerably, using the longer wavelength of light and a macroscopic target. He begins with a review of diffraction patterns, those alternating light and dark bands of constructive and destructive interference that result when light shines on two closely spaced slits — the famous “Double-Slit Experiment” that showed light behaves both as a particle and as a wave and provided our first glimpse of quantum mechanics. [Steve] then doubled down on the double-slit, placing another pair of slits in the path of the first. This revealed a grid of spots rather than alternating bands, with the angle between axes dependent on the angle of the slit pairs to each other.


To complete the demonstration, [Steve] then used diffraction to image the helical tungsten filament of an incandescent light bulb. Shining a laser through the helix resulted in a pattern bearing a striking resemblance to what’s probably the most famous X-ray crystallogram ever: [Rosalind Franklin]’s portrait of DNA. It all makes perfect sense, and it’s easy to see how the process works when scaled down both in terms of the target size and the wavelength of light used to probe it.

Hats off to [Steve] for making something that’s ordinarily complex so easily understandable, and for filling in a long-standing gap in my knowledge.

Continue reading “A Beginner’s Guide To X-Ray Crystallography”

Grow Your Own Tin Crystals

[The Plutonium Bunny] saw homegrown tin crystals on YouTube and reckoned he could do better—those crystals were flimsy and couldn’t stand up outside of the solution in which they were grown. Having previously tackled copper crystals, he applied the same procedure to tin.

Beginning with a 140 ml baby food jar filled with a solution of tin II chloride, 90 grams per liter, with a small amount of HCl as the electrolyte. A wire at the bottom of the jar was connected to a blob of tin and served as the anode, while the cathode, a loop of tin, stuck down from above. A LM317-based adjustable voltage regulator circuit was used to manage the power running through the solution. Because [The Plutonium Bunny]’s technique involves days or even weeks of very low current, he used six diodes to drop the circuit’s voltage from 1.5 V to 0.25 V, giving him around 13 mA.

His first attempt seemed to go well and he got some nice shiny crystal faces, but he couldn’t get the current bellow 10 mA without it dropping to the point where no tin was depositing. Rather than reset the experiment he made some changes to the project: he changed the solution by removing 30 ml of the electrolyte and topping it off with water. He also made a gentle agitator out of a DC motor and flattened plastic tube from a pen, powering it with another low-voltage LM317 circuit so he could get the lowest RPM possible.

With this new setup [The Plutonium Bunny] began to get much  better results, proving his hypothesis that low current with a lower concentration of Sn2+ was the ticket for large crystal growth. We featured his copper crystal experiments last year and he’s clearly making good progress! Video after the break.

Continue reading “Grow Your Own Tin Crystals”