UnifiedWater Finds Potable Water And Stops Polluters

Millions of people all over the world don’t have access to clean drinking water, and it’s largely because of pollution by corporations and individuals. Solving this problem requires an affordable, scalable way to quickly judge water quality, package the data, and present it to an authority that can crack down on the polluters before the evidence dissipates. Ideally, the solution would be open source and easy to replicate. The more citizen scientists, the better.

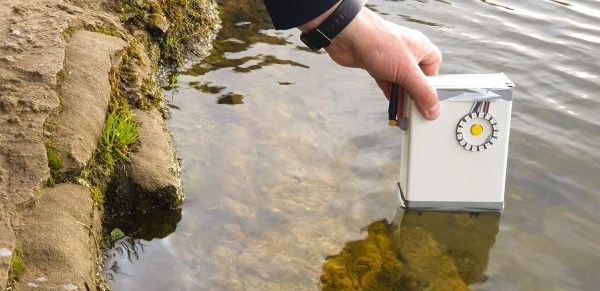
[Andrei Florian]’s UnifiedWater flows directly from this line of thinking. Dip this small handheld device below the surface, and it quickly takes a bunch of water quality and atmospheric readings, averages them, and sends the data to a web dashboard using an Arduino MKR GSM.

UnifiedWater judges quality by testing the pH and the turbidity of the water, which gauges the amount of impurities. Commercial turbidity sensors work by measuring the amount of light scattered by the solids present in a liquid, so [Andrei] made a DIY version with an LED pointed at a photocell. UnifiedWater also reads the air temperature and humidity, and reports its location along with a timestamp.

This device can run in one of two modes, depending on the application. The enterprise mode is designed for a fleet of devices placed strategically about a body of water. In this mode, the devices sample continuously, taking readings every 15 minutes, and can send notifications that trigger on predefined thresholds. There’s also a one-and-done individual mode for hikers and campers who need to find potable water. Once UnifiedWater takes the readings, the NeoPixel ring provides instant color-coded judgment. Check out the demo after the break.

Continue reading “UnifiedWater Finds Potable Water And Stops Polluters”

Reverse Engineering A Saab’s In-Dash Display

For [Leigh Oliver], there’s something undeniably appealing about the green on black instrumentation of the 2003 Saab 9-3 Gen2. Perhaps it’s because the Infotainment Control Module 2 (ICM2) screen brings a bit of that classic Matrix vibe to the daily commute. Whatever the reason, it seemed the display deserved better than to be stuck showing the nearly 20 year old stock user interface. Luckily, you can control it via I2C.

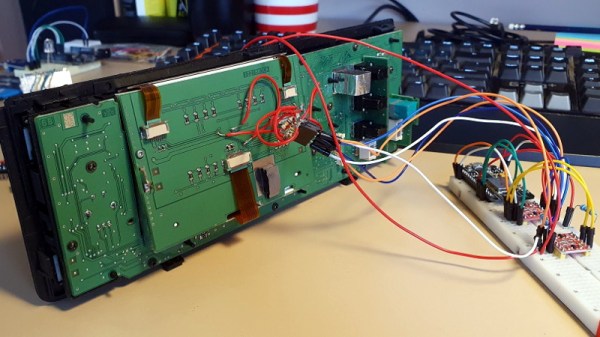
Though as you might expect, that fact wasn’t obvious at first. [Leigh] had to start by taking the ICM2 apart and reverse engineering the display board. With a multimeter and high resolution photographs of both sides of the PCB, all of the traces were mapped out and recreated in KiCAD. This might not have been strictly necessary, but it did serve as good practice for using KiCAD; a worthwhile tip for anyone else looking to build practical experience creating schematics.

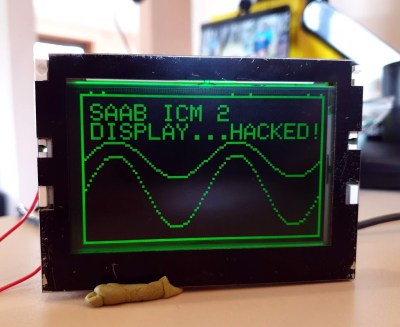
With everything mapped out, [Leigh] was able to connect a BusPirate V3 up to the board and pretty quickly determine it was using I2C to control the display. As far as figuring out how to repurpose existing displays goes, this was perhaps the best possible scenario. It even allowed for creating a display library based on Adafruit_GFX which offers graphical capabilities far beyond what the ICM2 module itself is capable of.

Even with so much progress made, this project is really just getting started. [Leigh] has managed to put some impressive imagery on the black and green Saab display, but the hardware side of things is still being worked on. For example, there’s some hope that an I2C multiplexer would allow the display to easily and quickly be switched between “stock” mode and whatever enhanced version comes about thanks to the new libraries and an ESP8266 hiding behind the dashboard.

If you don’t have a sufficiently vintage Saab to take advantage of this project, don’t worry. Tapping into the OBD port with an OLED display can get you similar results on a wide range of vehicles.

Mustang Dash Becomes Bookshelf Art Piece

Despite most of the common gauges remaining the same over the last 60 years, the automotive dashboard of days past used very different technology to those today. Cable driven speedometers were common, along with mechanical drive for the odometer, too. Fuel and temperature gauges were often wired directly to their senders, and some oil pressure gauges actually ran an oil line right up to the back of the dash. Now, things are mostly handled over the CAN bus, which inspired [Thomas]’s bookshelf-based Mustang build.

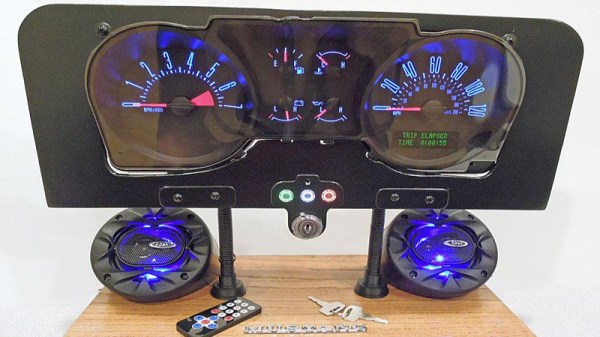
The idea behind the project is to build a nice piece of bookshelf art, using a modern CAN-driven Mustang dashboard. Through research and much trial and error, [Thomas] was able to figure out the CAN messages necessary to interface with a 2009 Mustang dashboard. There were innumerable hiccups along the way – [Thomas] had to 3D print his own connectors, reflash CAN bus interfaces, and make more than a few educated guesses to get things working.

The dash is combined with an Arduino with an MP3 shield and a 30 watt audio system, which provides both CAN signals to drive the dash as well as the obligatory sound effects of a Mustang tearing about town. It’s all finished up with an ignition keyswitch and 3 LED-lit buttons in the traditional Mustang colors.

It’s a fun build which does a great job of showcasing the basic tools and techniques required to interface with modern automotive subsystems. Salvaging an instrument cluster can be a great way to add immersion to your home racing sim, too. Video after the break.

Continue reading “Mustang Dash Becomes Bookshelf Art Piece”

Howto: Docker, Databases, And Dashboards To Deal With Your Data

So you just got something like an Arduino or Raspberry Pi kit with a few sensors. Setting up temperature or motion sensors is easy enough. But what are you going to do with all that data? It’s going to need storage, analysis, and summarization before it’s actually useful to anyone. You need a dashboard!

But even before displaying the data, you’re going to need to store it somewhere, and that means a database. You could just send all of your data off into the cloud and hope that the company that provides you the service has a good business model behind it, but frankly the track records of even the companies with the deepest pockets and best intentions don’t look so good. And you won’t learn anything useful by taking the easiest way out anyway.

Instead, let’s take the second-easiest way out. Here’s a short tutorial to get you up and running with a database backend on a Raspberry Pi and a slick dashboard on your laptop or cellphone. We’ll be using scripts and Docker to automate as many things as possible. Even so, along the way you’ll learn a little bit about Python and Docker, but more importantly you’ll have a system of your own for expansion, customization, or simply experimenting with at home. After all, if the “cloud” won’t let you play around with their database, how much fun can it be, really?

Continue reading “Howto: Docker, Databases, And Dashboards To Deal With Your Data”

3D Printed Dashboard CB Mount Is Convoy Ready

Some may be surprised to hear that CB radio is alive and well in the 21st century. From disaster response to operating in areas without reliable communication infrastructure, there are plenty of reasons people are still reaching for their radio and not their smartphone. Unfortunately, modern automotive interior design doesn’t have such an enlightened view. It’s hard enough to get decent cup holders in some cars, let alone a spot to hang your microphone.

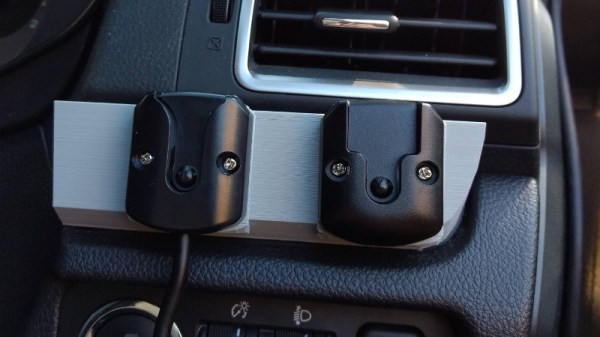
When presented with this problem in his Subaru Forester, [Alex Loizou] did what any modern hacker would, he 3D printed a mount that snaps into the stock dash. No drilling was required to attach his radio mount, it simply replaces a decorative trim piece that wasn’t doing anything anyway. Obviously this particular mount would only really work on the same year and make of vehicle as [Alex] has, but this is a good demonstration of how 3D printing can be used to adapt to existing hardware.

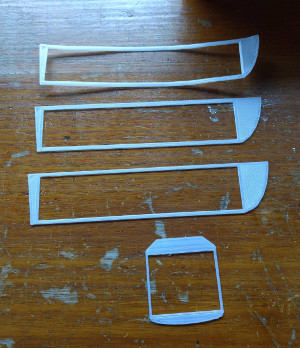
As is often the case when trying to print something to match perfectly with an existing object, there was a fair amount of trial and error required. It took a few attempts before [Alex] got the proper shape, and things weren’t made any easier by the fact he was doing his designing in TinkerCAD. While we appreciate the fact that TinkerCAD provides a web-based CAD tool that is easy enough for anyone to use, using a parametric design tool like OpenSCAD is generally preferred when you need to make slight adjustments to your model.

Software limitations aside, [Alex] managed to come up with a mount that not only holds his CB microphone, but also his handheld transmitter. All while looking about as close to stock hardware as something like this could. We especially like that he switched to a darker filament color for his final version to blend it into the dashes color scheme a bit better.

If your radio interest is a little full-fat for CB, take a look at what keeps ham radio alive and well in 2017, and if you’re a radio amateur with a hankering for the CB days we’ve got you covered.

Art With Steppers And STM32

Automotive dashboards are something that largely go untouched in the average car’s life. Other than the occasional wipe with a damp cloth, they’re generally reliable for the life of the car and considered too tricky to repair as age sets in. Nevertheless, some hackers find themselves tinkering with them, and learn skills in the process, such as how to control stepper motors and talk to the CAN bus. Having done some projects in the past, [Dan] had some old tachometers lying around and decided to turn them into a piece of art.

The build is powered by an STM32 – a powerful ARM-based platform with plenty of IO and potential. [Dan] leveraged its capabilities to have the board generate music and react to its onboard accelerometer data while also driving the stepper motors from the old tachometers. The project was then completed by 3D printing a mounting plate and placing the tachometer assemblies into the back of an IKEA canvas print.

The end result is a piece of wall art that emits eerie stringed music while twitching around. It came about from [Dan]’s prior projects in working with dashboards. It’s a fun use of some well-earned hacking skills, but we reckon there’s even more potential. There’s a huge number of projects that could benefit from lightweight tiny actuators, and we’d love to see a robot made entirely out of junkyard dashboard parts.

For another dashboard hack, why not check out this beautiful Jeep desk clock?

Homebrew Dash Cam Enables Full Suite Of Sensors

You heard it here first: dash cams are going to be the next must-have item for your daily driver. Already reaching market saturation in some parts of the world but still fairly uncommon in North America, we predict that car makers will soon latch onto the trend and start equipping cars with dash cams as standard equipment. And you can just bet that whatever watered-down, overpriced feature set they come up with will be sure to disappoint, so you might want to think about building your own Raspberry Pi dash cam with an accelerometer and lots of LEDS.

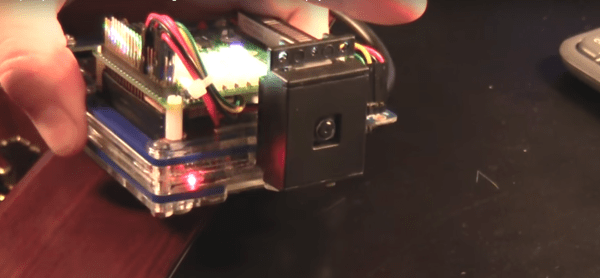
Still very much in the prototyping phase, [CFLanger]’s project is at its heart a dash cam, but it looks like he wants to go far beyond that. Raspivid and a PI NoIR camera take care of the video streaming, but the addition of a Pi SenseHAT gives [CFLanger] a bunch of options for sensing and recording the car’s environment. Not content with the SenseHAT’s onboard accelerometer, he added an ADXL345 to the sensor suite. The 64-pixel LED display is just for fun – it displays pitch and roll of the platform – and a yet-to-be-implemented bar-graph display will show acceleration in the X-axis. He figures the whole thing is good for a couple of days of video, but we hope he adds audio capture and perhaps ECU data from an OBDII-Bluetooth adapter.

We’ve seen surprisingly few DIY dash cams on Hackaday, at least so far. There has been a dash cam teardown and retasking, and there are plenty of dashboard computer builds, though. Seems like most hackers want that DIY self-driving car first.

Continue reading “Homebrew Dash Cam Enables Full Suite Of Sensors”