On The Merits Of A Solid-State Dehumidifier Filament Dry Box

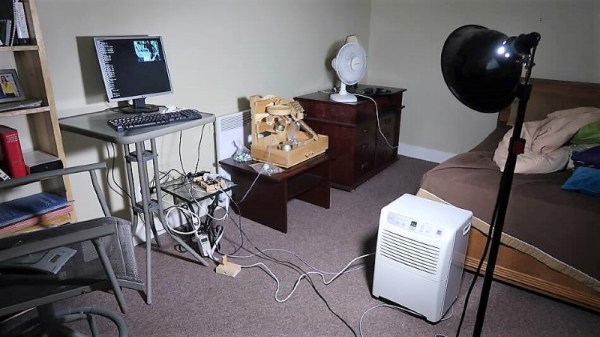
How good are ion membrane dehumidifiers for keeping FDM filament dry and ready for printing? This is the question which [Stefan] at CNC Kitchen sought to answer in a recent video. Like many of us, he was inspired by a video which [Big Clive] made a while ago in which said dehumidifiers were demonstrated for keeping an enclosure free from moisture. Yet would they be able to tackle the much bigger drying job of one or more spools of filament? Thanks to some free samples sent by Rosahl, [Stefan] was able to start answering this question.

Performance of desiccants and dehumidifier element. (Credit CNC Kitchen)

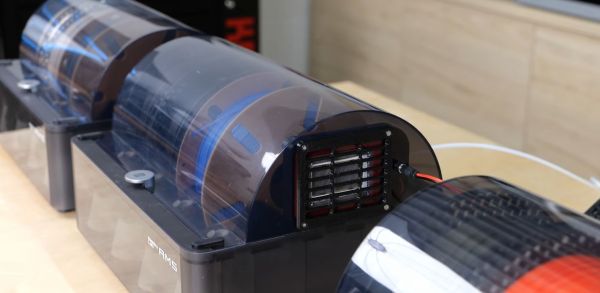
In the experiments, he used the smaller RS1 (€36.25 a piece) for a single spool container, and the larger MDL-3 (€169) with a Bambu Lab AMS multi-spool unit. Normally such an AMS has three big containers with silica desiccant in it that have to be regularly swapped out, but he modified one AMS to only have the big MDL-3 membrane to dehumidify. A second AMS was left with older silica in its containers, and a third got fresh silica, allowing for some benchmarking between the three units.

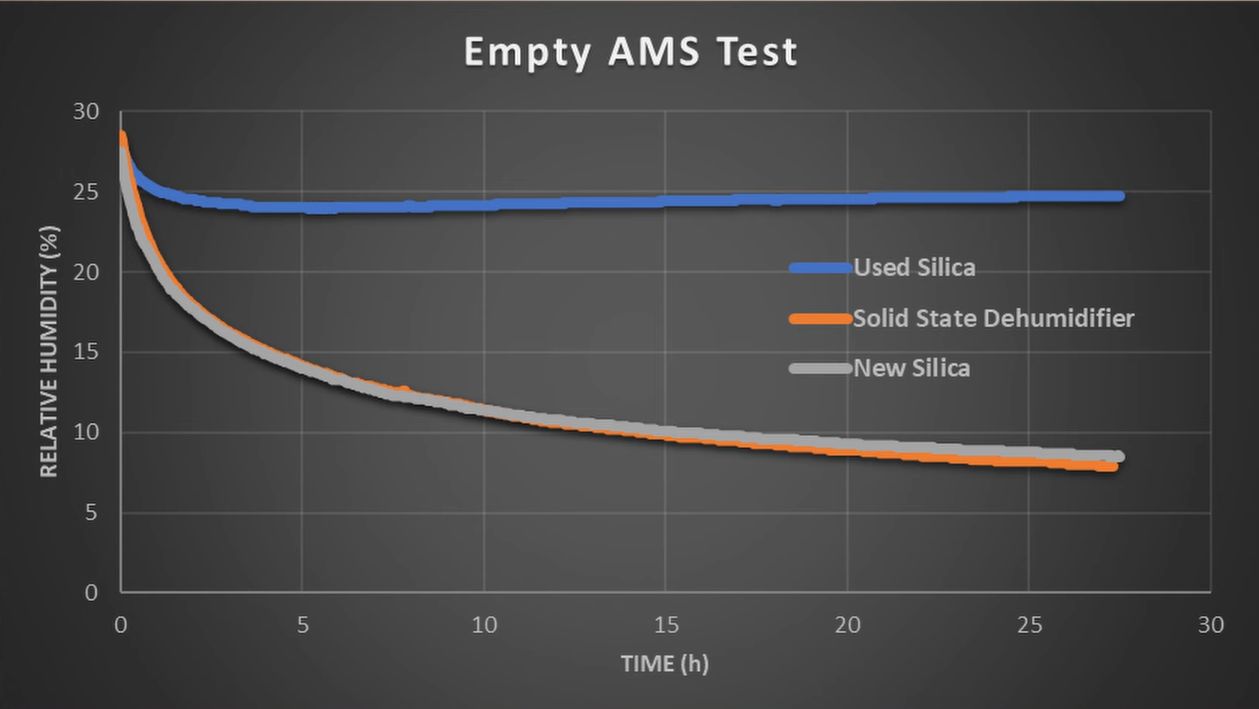
The results say a lot, with the initial empty AMS test showing the older silica desiccants topping out quickly and leaving the fresh silica and the membrane dehumidifier to go neck to neck. This is not the usual scenario in which you’d use these dehumidification methods of course, and the small-scale test with the RS1 showed that with a full filament spool in the box, humidity inside the container would only drop very gradually as more and more moisture replaced what was removed from the air. In particular the cardboard element of the spool being used was suspected of being one of the biggest sources of moisture.

Continue reading “On The Merits Of A Solid-State Dehumidifier Filament Dry Box”

Recharged Dehumidifier Put Back Into Service

For the average consumer, repairing relatively low-cost home devices such as microwaves and TVs just isn’t economically viable. You can hardly blame them when the repair bill could easily be higher than the cost of just buying a new model. Luckily for folks like us, that means you can often find cheap or even free appliances on the second hand market that can be brought back online with a bit of troubleshooting and some spare parts.

Take for example the non-functional dehumidifier [HowToLou] recently came across. You probably couldn’t find a professional repair shop that would be willing to bother with one of these things if you tried, but as he shows in the video below, that doesn’t mean the DIY’er can’t run through some probable failure modes and get the unit back up and running. As a bonus, he also walks viewers through how your typical compressor-based dehumidifier operates.

The failed thermal switch.

Beyond the lack of water in the collection compartment, the first sign that something was wrong with this dehumidifier was that the compressor wasn’t running. Upon closer inspection, [HowToLou] determined that the thermal cut-off switch had failed and was stuck open. Luckily it had a visible part number so he could order a replacement, and in the meantime, all he had to do was cut the switch out of the circuit and wire up the compressor’s power directly.

Unfortunately, even with the compressor running, no water was being collected. Noticing that the evaporator coils weren’t getting very cold, [HowToLou] thought the unit might be low on refrigerant. Usually these systems aren’t meant to be recharged, but with a clever piercing tap valve, you can add a quick-connect port to the low pressure side. This particular dehumidifier happened to be filled with the same R134a used in automotive A/C systems, so a quick trip to the auto parts store got him a can of refrigerant complete with a handy pressure gauge.

After getting juiced up, [HowToLou] shows ice forming on the coils and plenty of water getting dumped into the tank. Automotive A/C refill cans usually include some substance to stop or reduce leaks in the system, so hopefully this will end up being a long-term fix. It might not be the most elaborate dehumidifier repair we’ve ever seen, but it’s certainly the most approachable. If you ever see one of these things laying on the side of the road, maybe you should pick it up and see what ails it.

Continue reading “Recharged Dehumidifier Put Back Into Service”

Exploring Basement Humidity With A Raspberry Pi

Sometimes a hack isn’t about building something cool. Sometimes it’s more tactical, where the right stuff is cobbled together to gather the information needed to make decisions, or just to document some interesting phenomenon.

Take this impromptu but thorough exploration of basement humidity undertaken by [Matthias Wandel]. Like most people with finished basements in their homes, [Matthias] finds the humidity objectionable enough to warrant removal. But he’s not one to just throw a dehumidifier down there and forget about it. Seeking data on how well the appliance works, [Matthias] wired a DHT22 temperature/humidity sensor to a spare Raspberry Pi to monitor room conditions, and plugged the dehumidifier into a Kill-A-Watt with a Pi camera trained on the display to capture data on electrical usage.

His results were interesting. The appliance does drop the room’s humidity while raising its temperature, a not unexpected result given the way dehumidifiers work. But there was a curious cyclical spike in humidity, corresponding to the appliance’s regular defrost cycle driving moisture back into the room. And when the dehumidifier was turned off, room humidity gradually increased, suggesting an unknown source of water. The likely culprit: moisture seeping up through the concrete slab, or at least it appeared so after a few more experiments. [Matthias] also compared three different dehumidifiers to find the best one. The video below has all the details.

We always appreciate [Matthias]’ meticulous approach to problems like these, and his field expedient instrumentation. He seems to like his creature comforts, too – remember the target-tracking space heater from a few months back?

Continue reading “Exploring Basement Humidity With A Raspberry Pi”

Basement Wood-Drying Kiln

Once upon a time, a woodworker met another woodworker who happened to have a tree business. They struck a deal stating that the first woodworker would dry the sawn boards provided by the second and both would share the lumber. That’s exactly what happened to [Tim], which led to his entry in The Hackaday Prize.

[Tim] does a great job explaining his build of the kiln itself, his controls, and the gist of running the thing. The idea is to pull moisture out of the wood at just the right speed. Otherwise, the boards might check on the outside, honeycomb on the inside, or bear residual tension. He’s using a dehumidifier to pump dry air into the kiln and a control system to both monitor the relative humidity in the kiln and to dry the stock down to a moisture content in the 6-8% range.

kiln controls
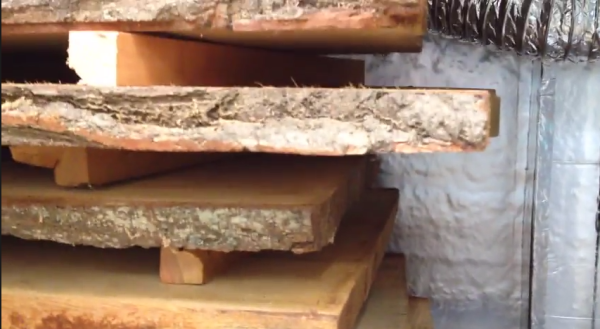
The kiln is built from slightly blemished pallet rack shelving that [Tim] cut to suit his needs. He skinned it with 1/2″ insulation boards sealed with aluminium tape and plans to add sheet metal to protect the insulation.

[Tim] wanted to control both a fan and the dehumidifier, monitor relative humidity in the kiln, log the data, and send it to the internets. For this, he has employed an Arduino Due, a DHT-22, an RTC, a relay board, an Ethernet shield, and an LCD to show what’s happening. The hardware is all working at this point, and the software is on its way. Check out his entry video below.


SpaceWrencherThis project is an official entry to The Hackaday Prize that sadly didn’t make the quarterfinal selection. It’s still a great project, and worthy of a Hackaday post on its own.


Continue reading “Basement Wood-Drying Kiln”

Building A Replacement For A Broken Dehumidifier Controller

dehumidifier-replacement-controller

We’ve thought of doing a project like this ourselves as the dehumidifier we ordered online runs the fan 24/7 no matter what the humidity conditions. But it wasn’t that [Davide Gironi] was unhappy with the features on his unit. It’s that the dehumidifier controller stopped working so he replaced it with one of his own design. The original humidity sensor was mechanical and simply broke. He used an AVR along with a humidity and frost sensor to get the appliance up and running again.

A DHT22 humidity sensor is polled by the ATmega8 chip and compared to the user-adjustable trimpot value. If it is above that threshold the unit is switched on using one of the relays seen in the image above. The one problem you have to watch out for when using compressor cooled appliances is ice accumulation on the radiator. [Davide] uses a thermistor for temperature feedback, switching the compressor off when it gets below 7C and turning it back on again when it is above 12C.

The replacement still uses the reservoir sensor and indicator LEDs. We, however, would recommend using the watchdog timer on the chip to ensure that it is reset if something goes wrong in the code.