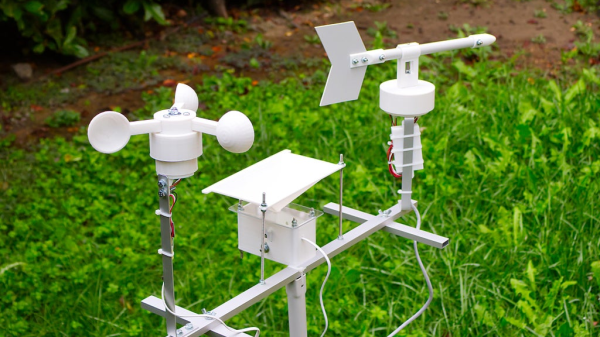
An esp32 weather station with 3d printed anemometer, rain gauge and wind vane mounted on an aluminum frame sitting in an overgrown lawn

A Weather Station For Whether It Rains Or Shines

[Giovanni Aggiustatutto] creates a DIY weather station to measure rain fall, wind direction, humidity and temperature. [Giovanni] has been working on various parts of the weather station, including the rain gauge and anemometer, with the weather station build incorporating all these past projects and adding a few extra features for measurement and access.
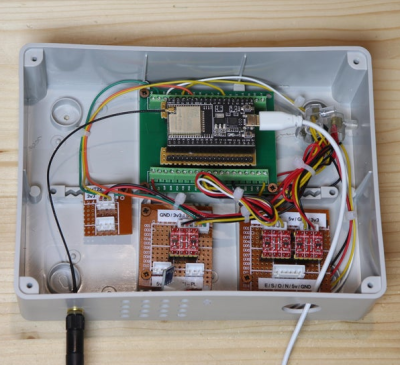
An esp32 module connected to three level shifters inside of a grey utility junction box with a USB power connector coming in powering the ESP32 device and an external wifi antenna mounted on the outside of the junction box, all siting on a wooden table

For temperature and humidity, a DHT22 sensor is located in a 3D printed Stevensen screen, giving the sensor steady airflow while protecting the module from direct sunlight and rain. A mostly 3D printed wind vane is printed with the base attached to a ball bearing and magnet so that the four hall sensors positioned in a “plus” configuration at the base can detect direction. The 3D printed anemometer uses a hall sensor to detect the revolution speed of the device. The rain gauge uses a “tipping bucket” mechanism, with a magnet attached to it that triggers the hall sensor affixed to the frame. The rain gauge (or pluviometer if you’re fancy) needs extra calibration to adjust for how much water the buckets take on before tipping.

An ESP32, with additional level shifters and BMP180 atmospheric pressure sensor module, are placed in a junction box. The ESP32 is used to communicate with each of the sensors and allows for an external internet connection to a Home Assistant server to push collected data out.

[Giovanni] has done an excellent job of documenting each piece, including making the 3D STL files available. Weather stations are a favorite of ours with a lot of variety in what gets collected and how, from ultrasonic anemometers to solar powered weather stations, and it’s great to see [Giovanni]’s take.

Video after the break!

Continue reading “A Weather Station For Whether It Rains Or Shines”

Smart Lid Spies On Sourdough Starter, Sends Data Wirelessly

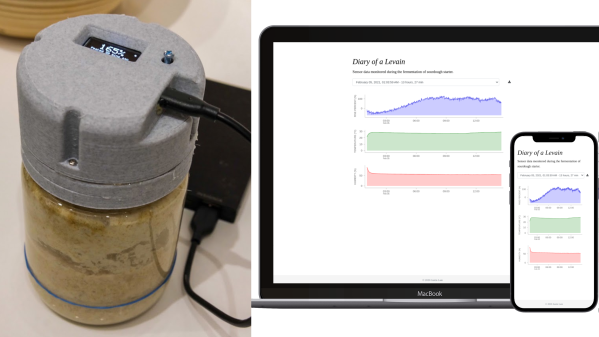
[Justin Lam] created a wonderfully-detailed writeup of his Smart Sourdough Lid project, which was created out of a desire to get better data on the progress and health of his sourdough starters, and to do so more efficiently. The result is a tidy, one-piece lid that constantly measures temperature, humidity, and height of the starter in the jar. Data is sent wirelessly for analysis, but there is also a handy OLED display on the top of the lid that shows immediately useful data like how much the starter has peaked, and how much time has passed since it did so.

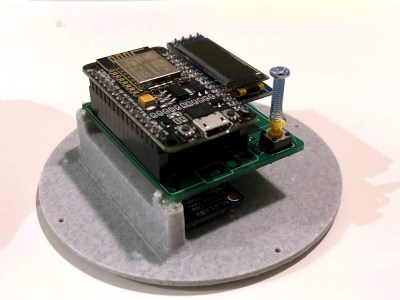
The PCB was optimized for size, and not designed with mounting in mind, so a hot-glued machine screw serves as a “button extender”. Issues like this can happen when enclosures are designed after the fact; it’s something to which we can all relate.

We really like how focused the design is, and the level of detail [Justin] goes into to explain his design decisions and describe how well they worked out. This isn’t [Justin]’s first kick at the can when it comes to getting data on his sourdough, after all. We remember his earlier work using computer vision to analyze sourdough starters, and he used what he learned to inform this new design; the smart lid is easier to use and handles data much more efficiently.

The project’s GitHub repository has all the information needed to build your own. The lid is ESP8266-based and integrates a VL6180X time-of-flight (ToF) distance sensor, DHT22 to sense temperature and humidity, and a small SSD1306 OLED display for data. A small custom PCB keeps the modules tidy, and a 3D-printed custom enclosure makes it one tidy package.

[Justin] also analyzes the results he obtained and talks about what they mean in the last part of his writeup, so if you’re into baking and interested in his findings, be sure to give that a look.

Vintage Gauges Turned Classy Weather Display

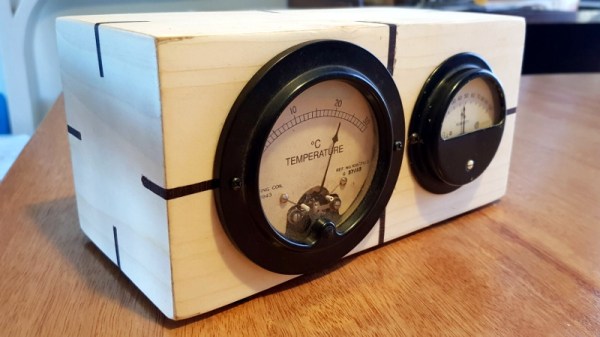
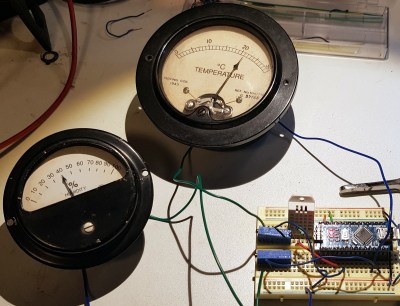
It’s always good to see old hardware saved from the junk pile, especially when the end result is as impressive as this analog gauge weather display put together by [Build Comics]. It ended up being a truly multidisciplinary project, combing not only restoration work and modern microcontroller trickery, but a dash of woodworking for good measure.

Naturally, the gauges themselves are the real stars of the show. They started out with rusted internals and broken glass, but parts from a sacrificial donor and some TLC from [Build Comics] got them back in working order. We especially like the effort that was put into making the scale markings look authentic, with scans of the originals modified in GIMP to indicate temperature and humidity while retaining the period appropriate details.

To drive the 1940s era indicators, [Build Comics] is using an Arduino Nano and a DHT22 sensor that can detect temperature and humidity. A couple of trimmer pots are included for fine tuning the gauges, and everything is mounted to a small scrap of perfboard hidden inside of the custom-made pine enclosure.

This is hardly the first time we’ve seen analog gauges hooked up to modern electronics, but most of the projects are just that: modern. While the end look might be somewhat polarizing, we think maintaining the hardware’s classic style was the right call.

This Freezer Failure Alarm Keeps Your Spoils Unspoiled

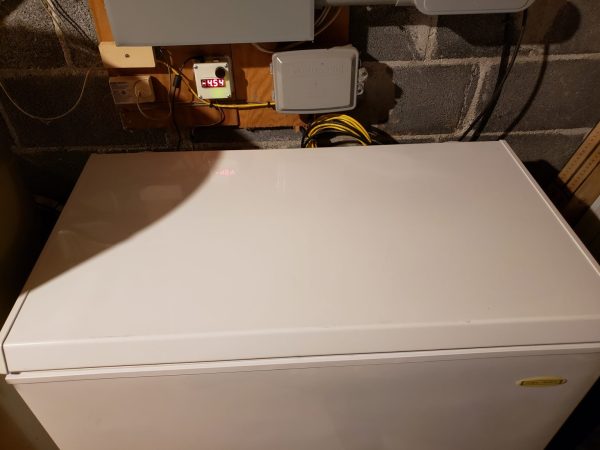
Deep freezers are a great thing to have, especially when the world gets apocalyptic. Of course, freezers are only good when they’re operating properly. And since they’re usually chillin’ out of sight and full of precious goods, keeping an eye on them is important.

When [Adam] started looking at commercial freezer alarms, he found that most of them are a joke. A bunch are battery-powered, and many people complain that they’re too quiet to do any good. And you’d best hope that the freezer fails while you’re home and awake, because they just stop sounding the alarm after a certain amount of time, probably to save battery.

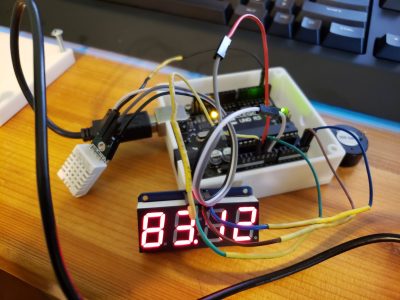
If you want something done right, you have to do it yourself. [Adam]’s homemade freezer failure alarm is a cheap and open solution that ticks all the boxen. It runs on mains power and uses a 100dB piezo buzzer for ear-splitting effectiveness to alert [Adam] whenever the freezer is at 32°F/0°C or above.

If the Arduino loses sight of the DHT22 temperature sensor inside the freezer, then the alarm sounds continuously. And if [Adam] is ever curious about the temperature in the freezer, it’s right there on the 7-segment. Pretty elegant if you ask us. We’ve got the demo video thawing after the break, but you might wanna turn your sound down a lot.

You could assume that the freezer is freezing as long as it has power. In that case, just use a 555.

Continue reading “This Freezer Failure Alarm Keeps Your Spoils Unspoiled”

Thermochromic Display Tells You The Temperature Despite Your Current Mood

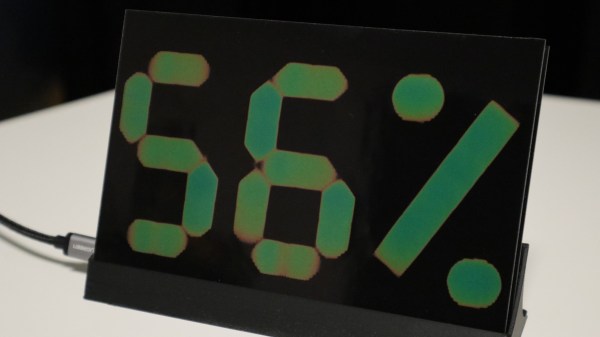
Readers who survived the 1970s will no doubt remember the “mood ring” fad, where a liquid crystal mounted to a ring would magically reveal your current emotional state to all and sundry by changing color. This nifty thermochromic display is based on the same principle, and while it might not start a new craze, it’s still pretty mesmerizing to watch.

This isn’t [Moritz v. Sivers]’ first attempt at a thermochromic display. His earlier version was far more complicated, using separate copper plates clad with thermochromic film for each segment, with Peltier devices to cool and heat them individually. Version two is much simpler, using a printed circuit board with heating elements in the shape of seven-segment displays etched into it. The thermochromic film sits directly on the heater PCB; a control PCB below has the MCU and sensors on it. The display alternates between temperature and humidity, with the segments fading in an uneven and ghostly way that really makes this fun to watch. [Moritz] has made the build files available, and there’s a detailed Instructable as well.

We’re always on the lookout for alternate display modalities, especially when they look this cool. We’ve seen other thermochromic displays before, of course, and persistence of phosphorescence looks great, too.

Continue reading “Thermochromic Display Tells You The Temperature Despite Your Current Mood”

A VFD Wall Thermometer

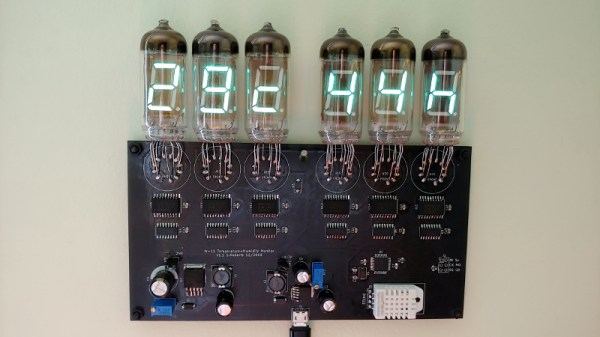
Want to build something using VFD tubes, but don’t need yet another clock project? In that case, this wall mounted temperature and humidity display created by [commanderkull] might be exactly what you’re looking for. With six IV-11 tubes, this display is a practical way to add some of that gorgeous blue-green glow to your home or office.

The USB powered display uses a XL6009 and an XL7015 to provide the 24 V and 1.8 V needed by the IV-11 tubes, respectively. Both of which can be disconnected with jumpers to shut down the tubes without powering off the entire device, a useful feature when programming and debugging the display’s ATmega328P microcontroller. Each tube is connected to the ATmega with an 74HC595 shift register and a UDN2981 driver. Temperature and humidity data is provided, perhaps unsurprisingly, by the exceptionally common DHT22 sensor.

If you are looking to build another clock with these style tubes, there’s certainly enough prior art out there to get you started. We’ve also seen faux VFDs that you could use for either project, just in case you aren’t looking to deal with the voltage requirements and relative rarity of the real thing.

Exploring Basement Humidity With A Raspberry Pi

Sometimes a hack isn’t about building something cool. Sometimes it’s more tactical, where the right stuff is cobbled together to gather the information needed to make decisions, or just to document some interesting phenomenon.

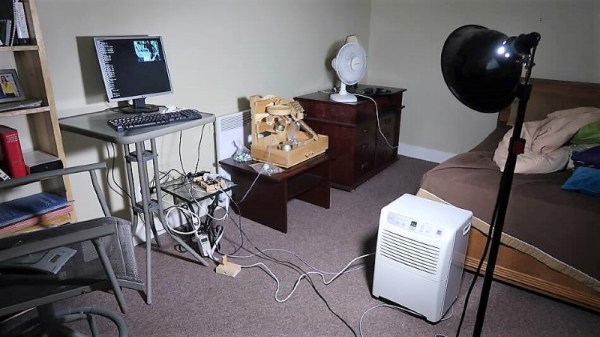
Take this impromptu but thorough exploration of basement humidity undertaken by [Matthias Wandel]. Like most people with finished basements in their homes, [Matthias] finds the humidity objectionable enough to warrant removal. But he’s not one to just throw a dehumidifier down there and forget about it. Seeking data on how well the appliance works, [Matthias] wired a DHT22 temperature/humidity sensor to a spare Raspberry Pi to monitor room conditions, and plugged the dehumidifier into a Kill-A-Watt with a Pi camera trained on the display to capture data on electrical usage.

His results were interesting. The appliance does drop the room’s humidity while raising its temperature, a not unexpected result given the way dehumidifiers work. But there was a curious cyclical spike in humidity, corresponding to the appliance’s regular defrost cycle driving moisture back into the room. And when the dehumidifier was turned off, room humidity gradually increased, suggesting an unknown source of water. The likely culprit: moisture seeping up through the concrete slab, or at least it appeared so after a few more experiments. [Matthias] also compared three different dehumidifiers to find the best one. The video below has all the details.

We always appreciate [Matthias]’ meticulous approach to problems like these, and his field expedient instrumentation. He seems to like his creature comforts, too – remember the target-tracking space heater from a few months back?

Continue reading “Exploring Basement Humidity With A Raspberry Pi”