Power Up Vintage Electronics Less Unsafely With A Dim-Bulb Tester

Plugging in something like an antique radio to see if it works is a good way to have a bad time, because some old components don’t age well. For vintage electronics, inspection and repair are steps one and two. When it comes time to cautiously apply power, it’s best to use what’s called a dim-bulb tester and most hackers can probably put one together from scrap.

Being able to use one (or both) bulbs adds some flexibility, and the embedded power monitor is an inexpensive and handy addition.

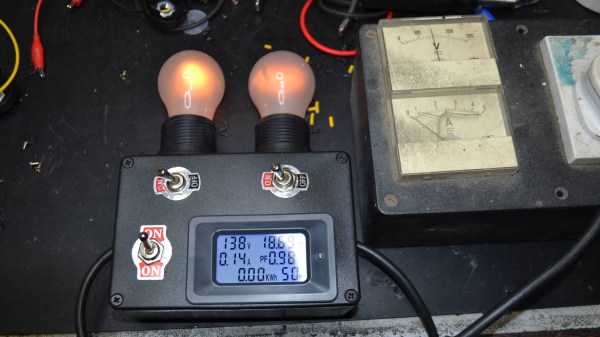
These testers make it easier, and safer, to tell if there are any big problems with a device’s power supply. In its simplest form, a dim-bulb tester puts an incandescent lamp in series between a device — like an old radio — and the AC power from a wall socket. Thanks to this, if the device has a short circuit, the bulb will simply light up instead of causing any damage.

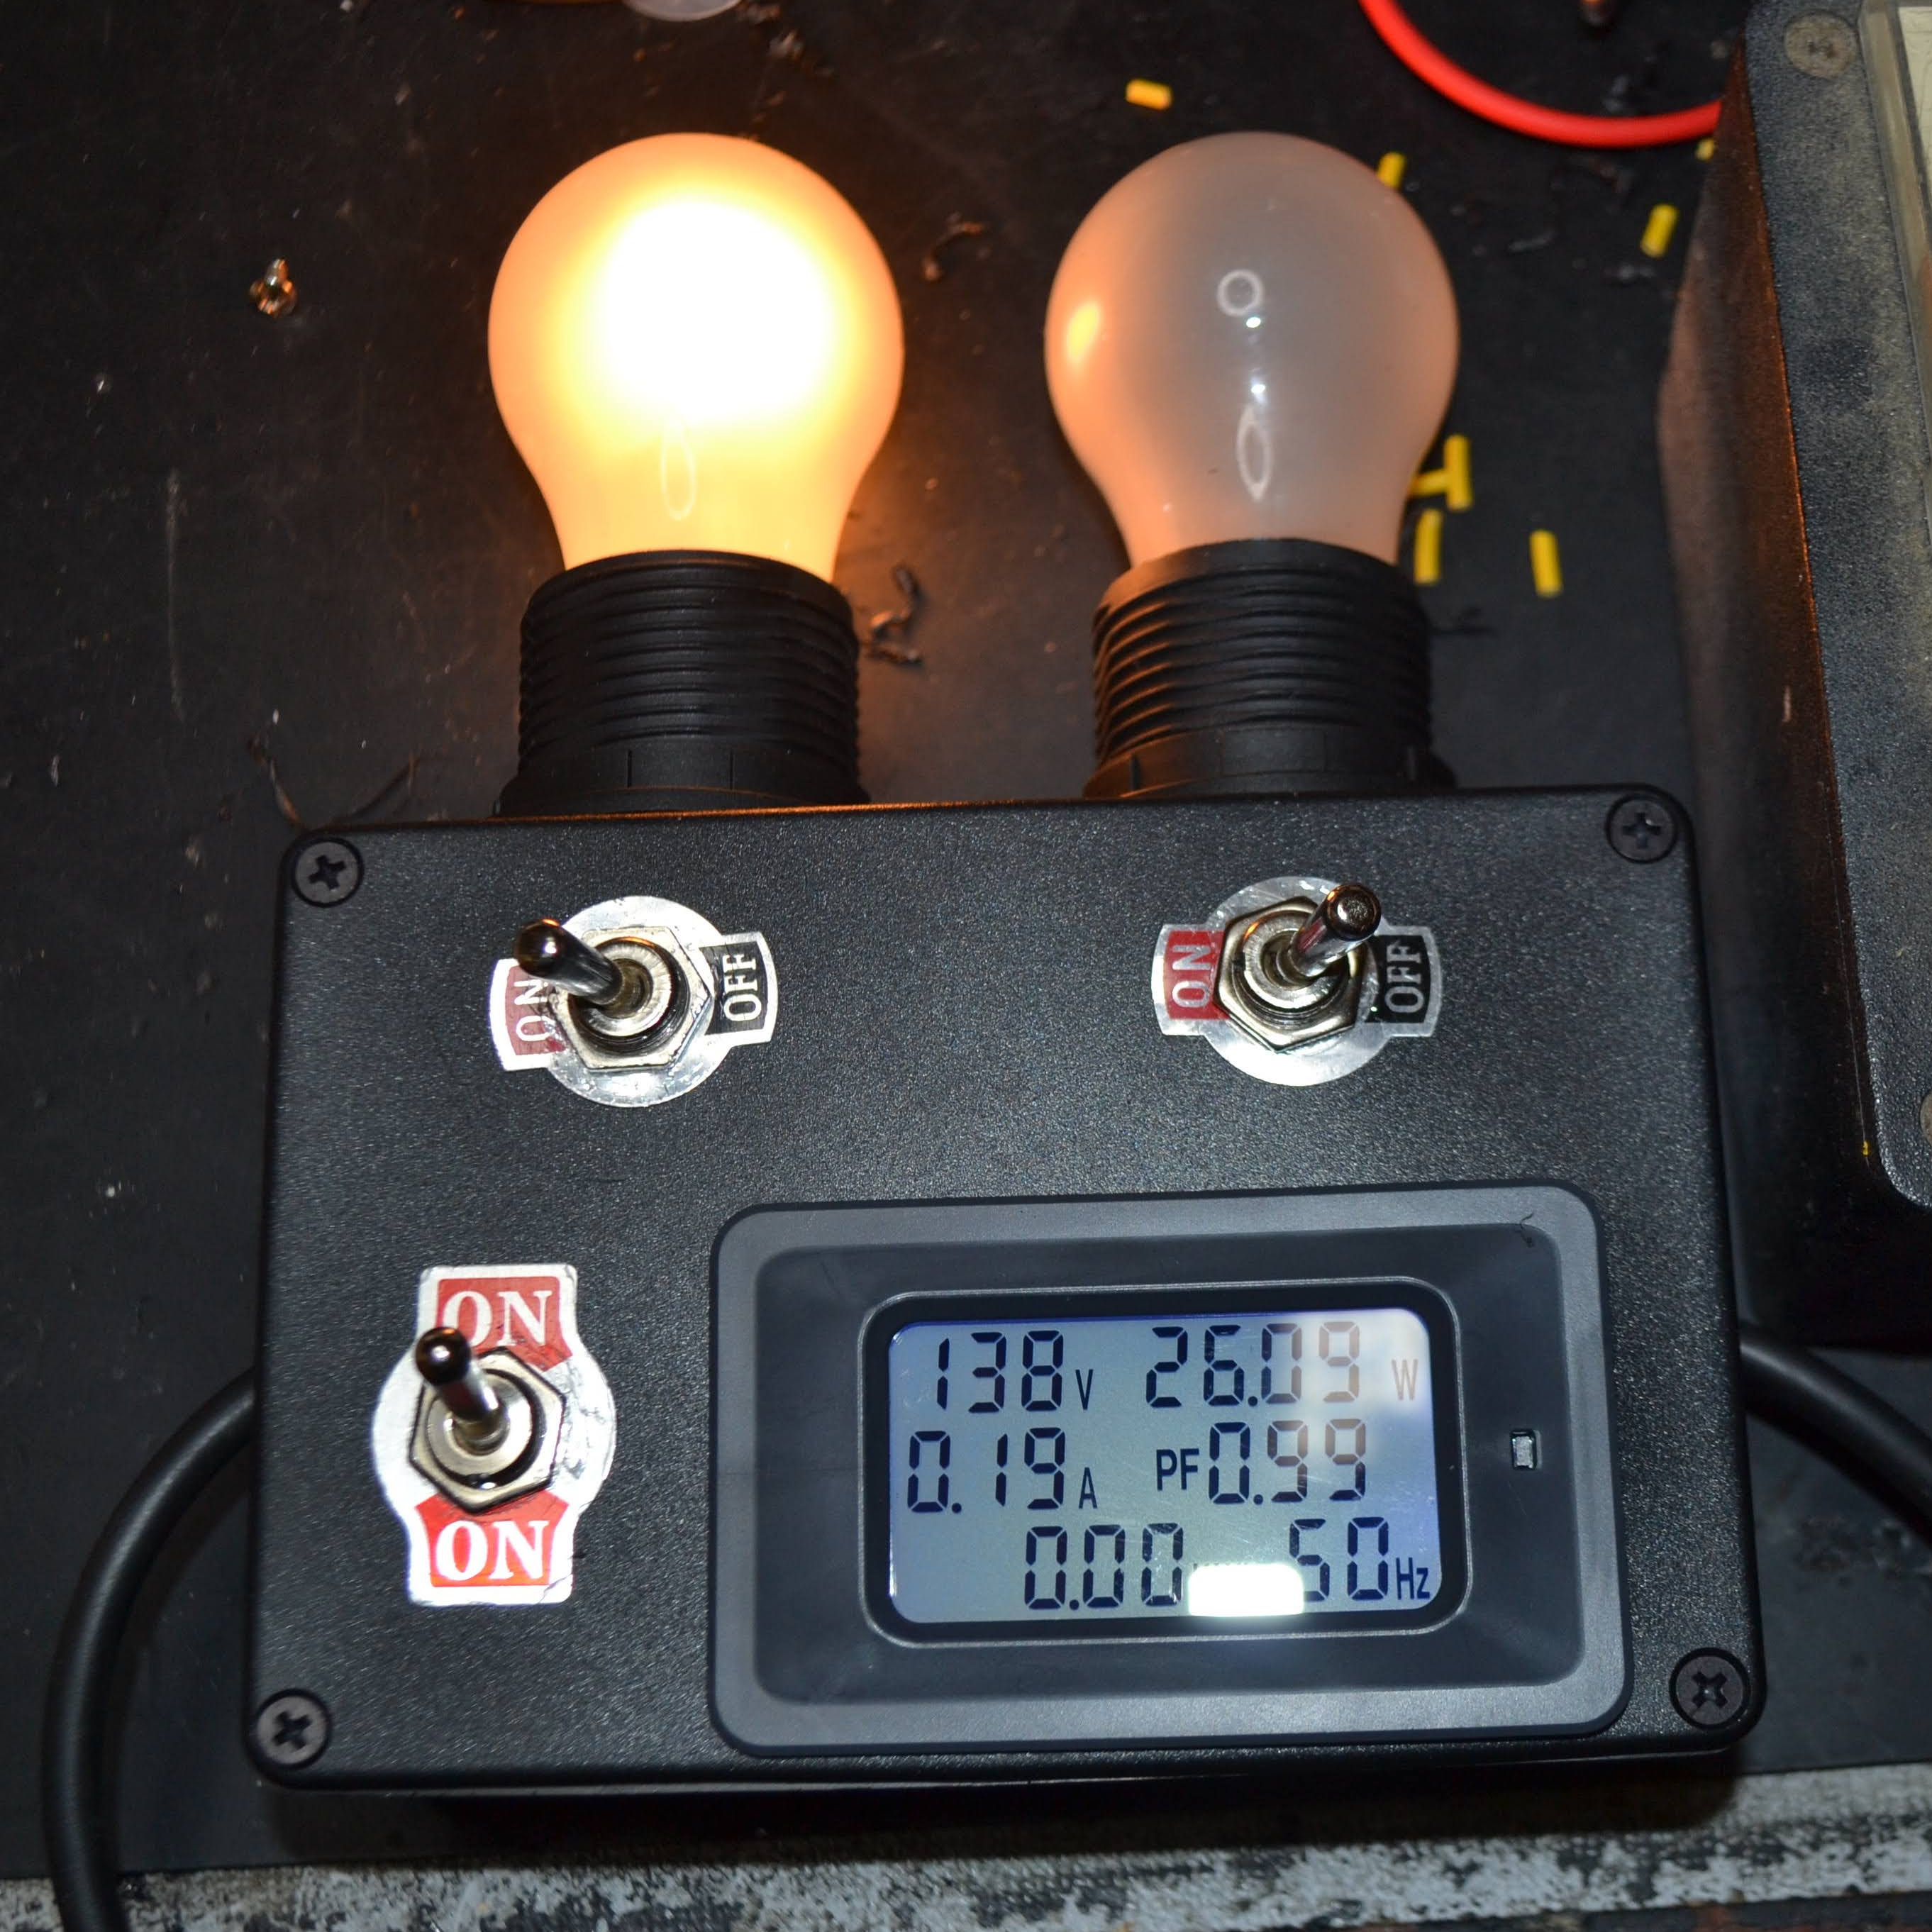
Ideally, one uses a bulb with a wattage rating that is roughly equal to the power consumption of the device being tested. If all is well, the bulb will glow very faintly and the device will work normally. A brightly glowing bulb would indicate excessive current draw. To allow some flexibility, [Doz]’s tester design allows using one or two 60 W incandescent bulbs in series, and even incorporates an inexpensive power monitor.

A dim-bulb tester isn’t an in-depth diagnostic tool but it is effective, simple, and allows for a safe startup even if there’s a serious problem like a short.  It helps protect valuable hardware from going up in smoke. In fact, the fundamental concept of limiting power to protect hardware in case of a fault has also been applied in the world of retrocomputing, where it helps protect otherwise irreplaceable hardware if something goes wrong.

MAC TIP Diagnoses Your Old Zip And Jaz Drives

Trouble In Paradise (TIP) was a popular Windows-only tool for troubleshooting  Iomega Jaz and Zip drives way back when. The drives have fallen out of favor with PC, but the drives are still highly prized amongst classic Mac collectors, who use the SCSI versions as boot disks for the vintage machines. Thus, [Marcio Luis Teixeira] set about porting the TIP tool to the platform.

Macintosh utilities used to have so much personality about them.

It all came about because running the original TIP recovery tool became difficult in the modern era. One must dig up a old Windows 98 machine and SCSI adapters in order to use it with Macintosh-compatible Zip or Jaz drives. This inspired [Marcio] to reach out to the developer, [Steve Gibson], who provided the original x86 assembly code for the tool.

[Marcio] then ported this line-by-line into C and compiled it with a retro Macintosh compiler to get TIP up and running on the classic Mac platform. Now, it’s possible to check and test Zip and Jaz drives and media on your old Mac without having to mess around with a vintage Windows machine.

It took plenty of effort, and the generous donation of code from [Steve Gibson], and all involved should be applauded for their work. It’s not every day we see such an impressive port, but they come along every now and then.

Meanwhile, if you’ve been tinkering on your own projects with Iomega’s classic removable storage, don’t hesitate to let us know! Video after the break.

Continue reading “MAC TIP Diagnoses Your Old Zip And Jaz Drives”

A Motorcycle Dashboard Straight From The ECU

Classic motorcycles are the wild west of information displays. Often lacking even basic instrumentation such as a fuel gauge and sometimes even a speedometer, motorcycles have come a long way in instrument cluster design from even 20 years ago. There’s still some room for improvement, though, and luckily a lot of modern bikes have an ECU module that can be tapped into for some extra information as [mickwheelz] illustrates with his auxiliary motorcycle dashboard.

This display is built for a modern Honda enduro, and is based upon an ESP32 module. The ESP32 is tied directly into the ECU via a diagnostic socket, unlike other similar builds that interface with a CAN bus specifically. It can monitor all of the bike’s activity including engine temperature, throttle position, intake air temperature, and whether or not the bike is in neutral. [mickwheelz] also added an external GPS sensor so the new display can also show him GPS speed and location information within the same unit.

[mickwheelz] credits a few others for making headway into the Honda ECU. [Gonzo] created a similar build using a Raspberry Pi and more rudimentary screen but was instrumental in gathering the information for this build. If you’re looking for a display of any kind for your antique motorcycle which is lacking an ECU, though, we would suggest a speedometer made with nixie tubes.

Coronavirus Testing: CRISPR Technology Set To Streamline Viral Testing

If we could run back 2020 to its beginning and get a do-over, chances are pretty good that we’d do a lot of things differently. There’s a ton of blame to go around on COVID-19, but it’s safe to say that one of the biggest failures of this whole episode has been the lack of cheap, quick, accurate testing for SARS-CoV-2, the virus behind the current pandemic. It’s not for lack of information; after all, Chinese scientists published the sequence of the viral genome very early in the pandemic, and researchers the world over did the same for all the information they gleaned from the virus as it rampaged around the planet.

But leveraging that information into usable diagnostics has been anything but a smooth process. Initially, the only method of detecting the virus was with reverse transcriptase-polymerase chain reaction (RT-PCR) tests, a fussy process that requires trained technicians and a well-equipped lab, takes days to weeks to return results, and can only tell if the patient has a current infection. Antibody testing has the potential for a quick and easy, no-lab-required test, but can only be used to see if a patient has had an infection at some time in the past.

What’s needed as the COVID-19 crisis continues is a test with the specificity and sensitivity of PCR combined with the rapidity and simplicity of an antibody test. That’s where a new assay, based on the latest in molecular biology methods and dubbed “STOPCovid” comes in, and it could play a major role in diagnostics now and in the future.

Continue reading “Coronavirus Testing: CRISPR Technology Set To Streamline Viral Testing”

Open-Source Medical Devices Hack Chat

Join us on Wednesday, January 29 at noon Pacific for the Open-Source Medical Devices Hack Chat with Tarek Loubani!

In most of the developed world, when people go to see a doctor, they’re used to seeing the latest instruments and devices used. Most exam rooms have fancy blood pressure cuffs, trays of shiny stainless steel instruments, and a comfortable exam table covered by a fresh piece of crisp, white paper. Exams and procedures are conducted in clean, quiet places, with results recorded on a dedicated PC or tablet.

Such genteel medical experiences are far from universal, though. Many clinics around the world are located in whatever building is available, if they’re indoors at all. Supplies may be in chronically short supply, and to the extent that the practitioners have the instruments they need to care for patients, they’ll likely be older, lower-quality versions.

Tarek Loubani is well-versed in the practice of medicine under conditions like these, as well as far worse situations. As an emergency physician and researcher in Canada, he’s accustomed to well-appointed facilities and ample supplies. But he’s also involved in humanitarian relief, taking his medical skills and limited supplies to places like Gaza. He has seen first-hand how lack of the correct tools can lead to poor outcomes for patients, and chose to fight back by designing a range of medical devices and instruments that can be 3D-printed. His Glia Project has free plans for a high-quality stethoscope that can be built for a couple of dollars, otoscopes and pulse oximeters, and a range of surgical tooling to make the practice of medicine under austere conditions a little easier. Continue reading “Open-Source Medical Devices Hack Chat”

To See Within: Making Medical X-rays

I was a bit of a lost soul after high school.  I dabbled with electrical engineering for a semester but decided that it wasn’t for me – what I wouldn’t give for a do-over on that one. In my search for a way to make money, I stumbled upon radiologic technology – learning how to take X-rays. I figured it was a good way to combine my interests in medicine, electronics, and photography, so after a two-year course of study I got my Associates Degree, passed my boards, and earned the right to put “R.T.(R) (ARRT)” after my name.

That was about as far as that career went. There are certain realities of being in the health care business, and chief among them is that you really have to like dealing with the patients. I found that I liked the technology much more than the people, so I quickly moved on to bigger and better things. But the love of the technology never went away, so I thought I’d take a look at exactly what it takes to produce medical X-rays, and see how it’s changed from my time in the Radiology Department.

Continue reading “To See Within: Making Medical X-rays”

Kindle Hack

Unlock Your Demo Kindle Paperwhite

If you’ve been holding off on upgrading your kindle, this project might inspire you to finally bite the bullet. [WarriorRocker] recently saved quite a few dollars on his Kindle upgrade by using a demo unit. Of course, it’s not as simple as just finding a demo unit and booting it up. There’s some hacking involved.

[WarriorRocker] found his Kindle Paperwhite demo unit on an online auction site for just $20. Kindles are great for reading but also make popular displays for your own projects. This used display model was much less expensive than a new unit, which makes sense considering it had probably received its share of abuse from the consumers of some retail store. The problem with a demo unit is that the firmware that comes with it is very limited, and can’t be used to sync up with your Amazon account. That’s where the hacking comes in.

pwdu-01
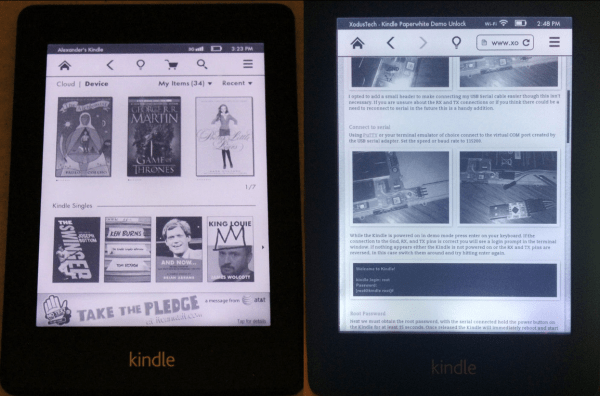
The first step was to crack open the case and locate the serial port. [WarriorRocker] soldered a small three pin header to the pads to make it easier to work on his device as needed. He then connected the Kindle to his PC using a small serial to USB adapter. Pulling up the command prompt was as simple as running Putty and connecting to the correct COM port. If the wires are hooked up correctly, then it just takes a press of the enter key to pull up the login prompt.

The next step requires root access. The root password for each unit is related to the unit’s serial number. [WarriorRocker] obtained the serial number by rebooting the Kindle while the Serial connection was still open. The boot sequence will spit out the number. This number can then be entered in to an online tool to generate possible root passwords. The tool is available on [WarriorRocker’s] project page linked above.

Next, the Kindle needs to be rebooted into diagnostic mode. This is because root logins are not allowed while the device is booted to the system partition. To enter diagnostic mode, [WarriorRocker] had to press enter over and over during the boot sequence in order to kill the automatic boot process. Then he checked some environment variables to locate the memory address where the diagnostic mode is stored. One more command tells the system to boot to that address and into diagnostic mode.

The last step of the process begins by mounting the Kindle as a USB storage device and copying over the stock Kindle firmware image. Next [WarriorRocker] had to exit the diagnostic menu and return to a root command prompt. Finally, he used the dd command to copy the image to the Kindle’s partition bit by bit. Fifteen minutes and one reboot later and the Kindle was working just as it should. [WarriorRocker] even notes that the 3G connection still works. Not bad for $20 and an hour or two of work.