Who Needs Yeast When You Have Lab Equipment?

This particular story on researchers successfully making yeast-free pizza dough has been making the rounds. As usual with stories written from a scientific angle, it’s worth digging into the details for some interesting bits. We took a look at the actual research paper and there are a few curious details worth sharing. Turns out that this isn’t the first method for yeast-free baking that has been developed, but it is the first method to combine leavening and baking together for a result on par with traditional bread-making processes.

Some different results from varying the amount of pressure released during the baking process.

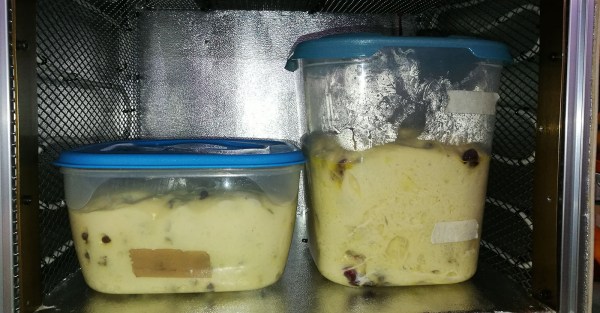
Basically, a dough consisting of water, flour, and salt go into a hot autoclave (the header image shows a piece of dough as seen through the viewing window.) The autoclave pressurizes, forcing gasses into the dough in a process similar to carbonating beverages. Pressure is then released in a controlled fashion while the dough bakes and solidifies, and careful tuning of this process is what controls how the bread turns out.

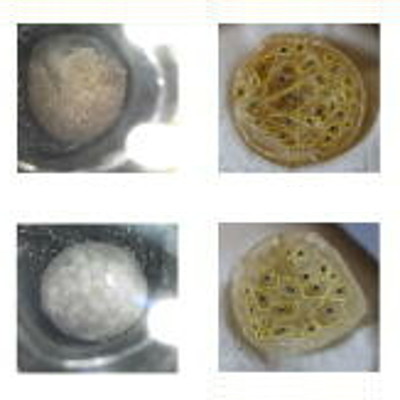
With the right heat and pressure curve, researchers created a pizza whose crust was not only pleasing and tasty, but with a quality comparable to traditional methods.

How this idea came about is interesting in itself. One of the researchers developed a new method for thermosetting polyurethane, and realized that bread and polyurethane have something in common: they both require a foaming (proofing in the case of bread) and curing (baking in the case of bread) process. Performing the two processes concurrently with the correct balance yields the best product: optimized thermal insulation in the case of polyurethane, and a tasty and texturally-pleasing result in the case of pizza dough. After that, it was just a matter of experimentation to find the right balance.

The pressures (up to 6 bar) and temperatures (145° Celsius) involved are even pretty mild, relatively speaking, which could bode well for home-based pizza experimenters.

The Proof Is In The Box

Making bread dough is simple — it’s just flour and water, with some salt and yeast if you want to make things easy on yourself. Turning that dough into bread is another matter entirely. You need to punch that dough down, you need to let it rise, and you need to knead it again. At home, you’re probably content with letting the dough rise on the kitchen counter, but there’s a reason your home loaf doesn’t taste like what you would get at a good bakery. A bakery has a proofer, or a box that lets dough rise at a temperature that would be uncomfortable for humans, but perfect for yeast.

The leavening cell is a DIY proofing box that keeps dough at a steady 26° C to 28° C, the perfect temperature for making bread, pizza dough, and even yogurts. [vittorio] made this and the results look great.

The design of this build is simple enough and made out of 20×20 aluminum profiles shaped into a cubic frame. The outside of this box is 6mm thick wooden panels coated on the inside with a heat-reflective insulating mesh. Inside of that is a frame of metal mesh to which a six-meter long cable heating element is attached. This heating element is controlled via a thermostat with a probe temperature sensor on a timer. No, it’s not very complicated but the entire idea of a proofer is to have a slightly warm box.

You can check out the promo video for the Leavening Cell below.

Continue reading “The Proof Is In The Box”

The Quest For Perfect Croissants Via A DIY Dough Sheeter

Baking is a wonderful pastime, as much an art as a science. [Alex] pursues the craft with plenty of vigor, and had built his very own dough sheeter to assist in his work. Unfortunately, the design had several flaws, and came out of a recent move rather the worse for wear. Growing tired of having to deal with dough of inconsistent thickness, he went back to the drawing board to whip up a new version (Youtube link, embedded below).

The new model improves significantly over the predecessor, by directly addressing the engineering pitfalls of the first design.

The core of the machine is a moving platform combined with a rolling pin, that can be set to a desired height to roll the dough into a set thickness. This is key to baking top-notch croissants, which [Alex] takes very seriously. His initial model used a table leg for a rolling pin, fitted with a threaded rod down the centre. This had significant issues with both runout, and uneven diameter across its length. Additionally, its frame had not held up after a recent move, and [Alex] was keen to start again.

The new model starts with attention paid to the basic engineering issues. The table leg is replaced with a professional-grade rolling pin, fitted with 3D-printed gears that accurately align the axis of rotation to the centre of the pin. A rack and pinion drive is also added to move the dough platform. Finally, a locking pin system is used to set the desired height of the dough.

It’s a useful project for the keen baker, and one that leans heavily on additive manufacturing methods. Producing such a tool in the years before 3D printers would have required significant effort to produce the required gears and mating components, so it’s impressive to see how easily something like this can come together these days. A hacker mindset can always be handy for baking – don’t forget, you can improve your bread crusts with steam! Video after the break.

Continue reading “The Quest For Perfect Croissants Via A DIY Dough Sheeter”

3D Printed Christmas Cookies

3d-printing-christmas-cookies

Here is yet another way to get into the holiday spirit at your local Hackerspace (or at home if you’re happen to have your own 3D printer). [Ralph Holleis] wrote in to show off his 3D printed Christmas cookies. The majority of the info on this project comes from the video embedded after the break. The extruder head he’s using includes a syringe which is filled with what we assume is Spritz Cookie dough. It is squeezed out in a pattern before heading to the oven for baking.

[Ralph] mentioned that he’s using UNFOLD Pastruder as the print head. We looked and couldn’t find that exact design, but it seems like it might be related to this Claystruder head designed by a user named [Unfold]. If you have the exact link to the extruder design seen above please let us know in the comments section.

If you don’t already have this type of head it’s just a matter of printing the mounting brackets and buying a syringe to match. But you’ll also need compressed air and a valve to regulate the flow of dough. It might be easier just to print your own cookie cutters. This is a great project for people who don’t have access to a laser cutter for gingerbread house work.

Continue reading “3D Printed Christmas Cookies”