Giving The Amstrad CPC A Voice And A Drum Kit

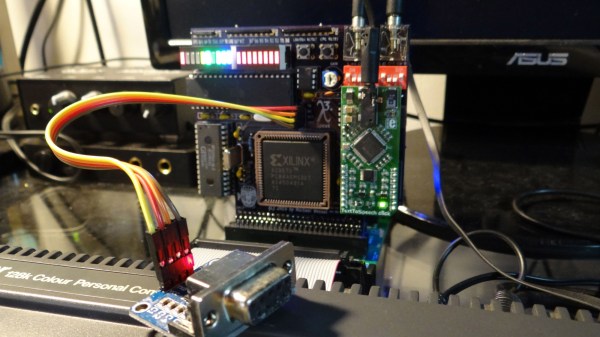
Back in the ’80s, home computers weren’t capable of much in terms of audio or multimedia as a whole. Arguably, it wasn’t until the advent of 16-bit computers such as the Amiga that musicians could make soundtrack-quality music without having to plug actual studio gear up to their machines. [Michael Wessel] is trying to bring some of that and many more features to the Amstrad CPC with his ambitious LambdaSpeak 3 project, an expansion card built completely up from scratch and jam-packed with features.

First, and likely giving it its name, is the speech synthesizer. [Michael] has made an emulation mode where his card can act just like the original SSA-1 expansion, being able to be controlled by the same software as back then. By default, the card offers this mode with an Epson S1V30120 daughterboard (which is based on DECTalk synthesis), however for further authenticity you also have the option of fitting it with an SP0256-AL2 chip, the same one used in the original Amstrad hardware in 1985.

As for the more musical part of the project, the board supports 4-channel PCM playback, much like the Amiga’s sound offering. This can be used for a drum machine sequencer program, and it has an Amdrum mode, emulating another expansion from the original Amstrad days. Sample playback can also be used alongside the speech synthesis as shown here, with random allophone beats that wouldn’t sound out of place in a Kraftwerk recording. Finally, by using the UART interface included on the LambdaSpeak, you can also turn the CPC itself into a synth by giving it MIDI in/out and interfacing a controller in real time with the computer’s AY-3-8912 sound chip.

If you like modern expansions giving old computers new life, did you know that you can get just about any retro computer online, perhaps a TRS-80, an Amiga and even a Psion Organizer? And if you’re interested in just using old systems’ sound chips with modern USB MIDI controllers, it’s easy to make a microcontroller do all the heavy lifting.

Continue reading “Giving The Amstrad CPC A Voice And A Drum Kit”

Probability-Based Drummer Leaves The Beats Up To Chance

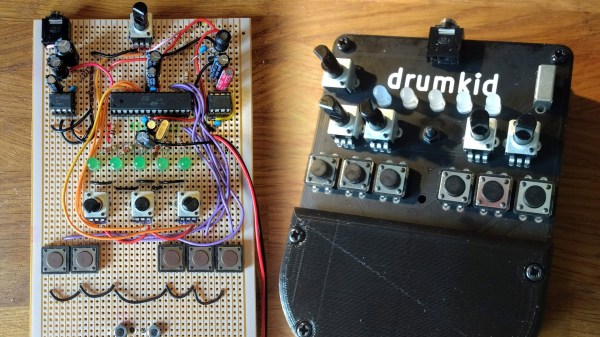
Drum machines may seem like one of the many rites of passage for hardware makers, they’re a concept you can implement simply or take into the extreme making it as complex as you want. [Matt’s] DrumKid is one of them, and its long development history is wonderfully documented in the project logs.

[Matt’s] original intention was to use the automatic drummer as part of his band, wanting “the expressiveness of a good drummer but without the robotic tendencies of a simple drum machine”. For that, he created the first iteration of the DrumKid, a web-based project using the Web Audio API. The interface consisted of bars showing levels for different settings which could be intuitively tweaked, changing the probability of a drum sound being played. This gave the “drummer” its unpredictability, setting itself apart from any regular old drum machine.

Fast forward a few years, and [Matt] now wants to recreate his DrumKid as a proper piece of musical gear, porting the concept into a standalone hardware drum machine you can plug into your mixer. He decided to go with the Arduino framework for his project rather than the Teensy platform in order to make it cheaper to build. The controls are simplified down to a few buttons and potentiometers, and the whole thing runs off of three AAA batteries. Also, targeting the project for hardware like this allowed for new features to be added, such as a bit-crush filter.

We already saw the first prototype here on Hackaday when it was featured in a Hackaday Prize mentor session, and it’s nice to see how the project evolved since. After a number of revisions, the new prototype takes design cues from Teenage Engineering’s “Pocket Operator” drum machine, using the main PCB as its own faceplate rather than a 3D printed case in a familiar way we’ve seen before. Unfortunately, the latest board is non-functional due to a routing mistake, but you can see the previous working prototypes in his project logs.

A Baby Named DJ

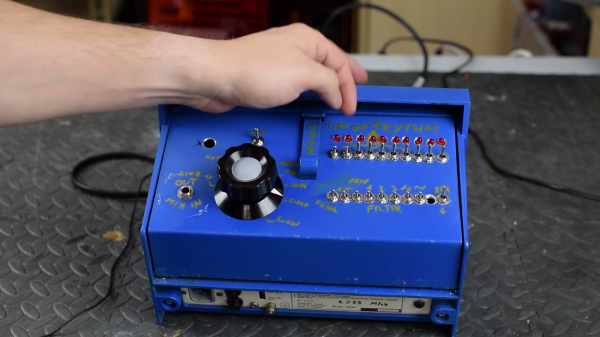
Some of us are guilty of picking up questionable hardware from garage sales, fleamarkets, and well-meaning relatives. There is a balance between turning down a good investment and hoarding, and if we figure out how to tell the difference you will be the first to know. [Clem Mayer] may start on the side of unwise acquisition, but he pushes a broken fetal detector into the realm of awesome by converting it to an analog synthesizer, born to headline at an Eastern European dance party.

He starts with a basic teardown, and we get to see how old hardware was serviceable with only two standard screws. It is a good thing too, because the nickel-cadmium batteries are older than some of you and they are in need of replacement. New nickel-metal hydride batteries got it up and running but [Clem] does not have a baby bump so its functionality turned to Pink Floyd era synthesizer circuit bending. Circuit bending involves modifying a circuit for sound it was not intended to make.

Continue reading “A Baby Named DJ”

A Drum Set In Your Pocket

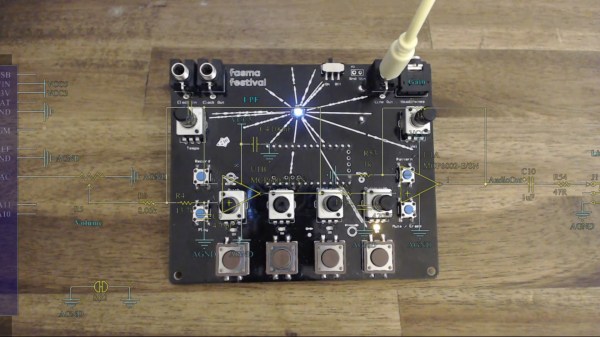
Cargo pants can fit drumsticks in the pockets if you don’t mind them sticking out. They can also hold this drum set and still have enough room for a pair of headphones, some pens, and a small notebook. At least, guy’s cargo pants can fit all that. Now your pocket is decked out with enough music gear to compose and drum few drum loops and even scribble some notes. We can’t speak for [Tomash Ghz] carrying a notebook, but he wanted a drum set in his pocket badly enough to make a custom circuit board to bring to the 2017 Fasma Festival in Athens. He wrote code for a Teensy 3.2 which fits on the back of his PCB next to a 9V battery. Don’t be afraid, the smallest components are 0805 so even clumsy fingers will be able to build their own. The Gerber files and BOM are all available, so nothing is stopping you.

On the board, we find an array of op-amps to support headphone and line-level outputs, four big ole’ buttons to activate each type of drum: kick, tom, snare, and hat. Then we have four potentiometers to change the sound of each like pitch, decay/length, modulation, and distortion. Once the perfect pattern is recorded, it can be saved in non-volatile memory in case you run out of juice although it can run up to seven-and-a-half hours on one battery. If you find yourself invested in the hardware, there is also a video walk-through about using the drum machine so grab your notebook and beat it.

We have seen simpler drums in simpler chips, and even drums on an entirely different type of chip.

Continue reading “A Drum Set In Your Pocket”

Racing The Beam And Dropping Some Beats

The heart of the Atari 2600 wasn’t the 6502 (or the 6507 for the pedants), it was the TIA chip. This is the chip responsible for drawing graphics on the display, racing the beam, and extremely limited support for sound generation. We haven’t seen many attempts of using the Atari 2600 for chiptunes, but that doesn’t mean it can’t be done. [John Sutley]’s Syndrum, a take on an Atari 2600 drum machine is nearly a work of art. It’s a custom cartridge for the wood-paneled Atari, and an impressive input device that turns this classic console into a beat machine

Did the Atari 2600 ever come with a drum machine cartridge? Maybe. Probably not. [John] originally built this project to experiment with the TIA chip, but found it was less tonal than a kazoo. That struck ‘Atari synthesizer’ off the list and replaced it with an ‘Atari drum machine’. There are two key parts of the build here, the first being a repurposed Asteroids cartridge that had the PROM replaced with a ZIF socket. This allows [John] to easily burn new code to an EEPROM, stuff it in the socket, and run it on the Atari. All the code was developed with batari Basic, a BASIC-inspired language that spits out .bin files for the Atari.

But running code on the Atari is just one half of this build. To do a drum machine, you somehow need to tell the Atari when to play each sound. Given the lack of expansion capabilities for the Atari, [John] turned to the controller port. The Syndrum uses Arduino Nano to bridge the DE9 controller connector to a MIDI port. Yes, it’s real MIDI, on a machine that could probably never do MIDI natively (although we’d love to see someone try).

Need a video of this mind-blowing hack in action? Here you go:

Continue reading “Racing The Beam And Dropping Some Beats”

Elegant Drum Machine From Teensy

Playing the drums is pretty hard, especially for the uncoordinated. Doing four things at the same time, all while keeping an even tempo, isn’t reasonable for most of us. Rather than hiring a drummer for your band who is well versed in this art, though, you might opt instead to outsource this job to a machine instead. It’s cheaper and also less likely to result in spontaneous combustion.

This drum machine is actually a MIDI Euclidean sequencer. Euclidean rhythms are interesting in their own regard, but the basics are that a common denominator between two beats is found in order to automatically generate complicated beats. This particular unit is running on a Teensy 3.5 and consists of four RGB rotary encoders, an SSD1306 LCD, four momentary buttons, and four 16 LED Neopixel rings. Setting each of the dials increases the number of beats for that particular channel, and it can be configured for an almost limitless combination of beats and patterns.

To really get a feel of what’s going on here, it’s worth it to check out the video after the break. MIDI is also a fascinating standard, beyond the fact that it’s one of the few remaining standards created in the 80s that still enjoys active use, it can also be used to build all kinds of interesting instruments like one that whacks wine glasses with mallets or custom synthesizers.

Thanks to [baldpower] for the tip!

Continue reading “Elegant Drum Machine From Teensy”

You Can’t Build A Roland TR-808 Because You Don’t Have Faulty Transistors

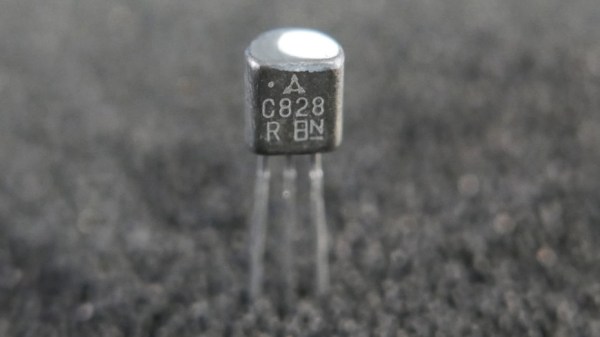
That headline sounds suspect, but it is the most succinct way to explain why the Roland TR-808 drum machine has a very distinct, and difficult to replicate noise circuit. The drum machine was borne of a hack. As the Secret Life of Synthesizers explains, it was a rejected part picked up and characterized by Roland which delivers this unique auditory thumbprint.

Pictured above is the 2SC828-R, and you can still get this part. But it won’t function the same as the parts found in the original 808. The little dab of paint on the top of the transistor indicates that it was a very special subset of those rejected parts (the 2SC828-RNZ). A big batch of rejects were sold to Roland back in the 1970’s — which they then thinned out in a mysterious testing process. What was left went into the noise circuit that gave the 808 its magical sizzle. When the parts ran out, production ended as newer processes didn’t produce the same superbly flawed parts.

This is an incredible story that was highlighted in 808, a documentary premiered at SXSW back in 2015. The film is currently streaming on Amazon Prime (and to rent everywhere else) and is certainly worth your time just to grasp how seminal this drum machine has been in hip hop and several other music genres.

For modern product developers, betting your production on a batch of reject parts is just batty. But it was a very different time with a lot fewer components on the market. What worked, worked. You do have to wonder how you stumble upon the correct trait in an obscure batch of reject parts? Looks like we’ll be adding Ikutar Kakehashi’s book I Believe in Music: Life Experiences and Thoughts on the Future of Electronic Music by the Founder of the Roland Corporation to our reading list.

[via EMSL]