Brass Plaque Honors Brother

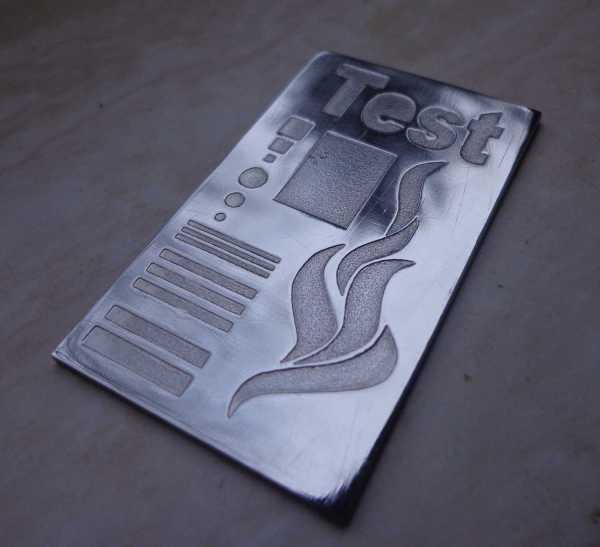
Brass plaques are eye-catching because no one makes them on a whim. They are more costly than wood or plastic, and processing them is proportionally difficult. [Becky Stern] picked the medium to honor her brother, who enjoyed coffee, motorcycles, and making things by hand. She made some playing card-sized pieces to adorn his favorite brand of hot bean juice and a large one to hang at his memorial site.

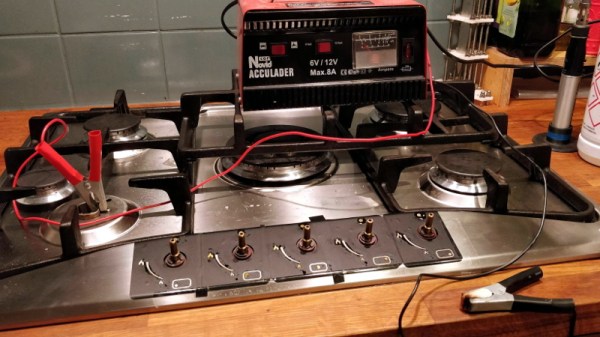
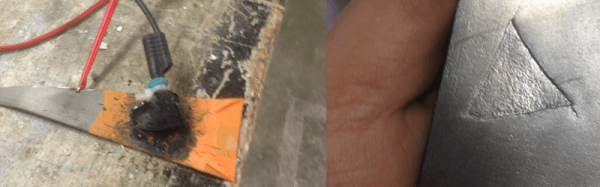
The primary components are a vertical salt water bath, DC power supply, metal to etch, scrap steel approximately the same size, and a water agitator, which in this case is an air pump and diffuser stone. You could stir manually for two hours and binge your shows but trust us and take the easy route. The video doesn’t explicitly call for flexible wires, but [Becky] wisely selected some high-strand hook-up leads, which will cause fewer headaches as stiff copper has a mind of its own, and you don’t want the two sides colliding.

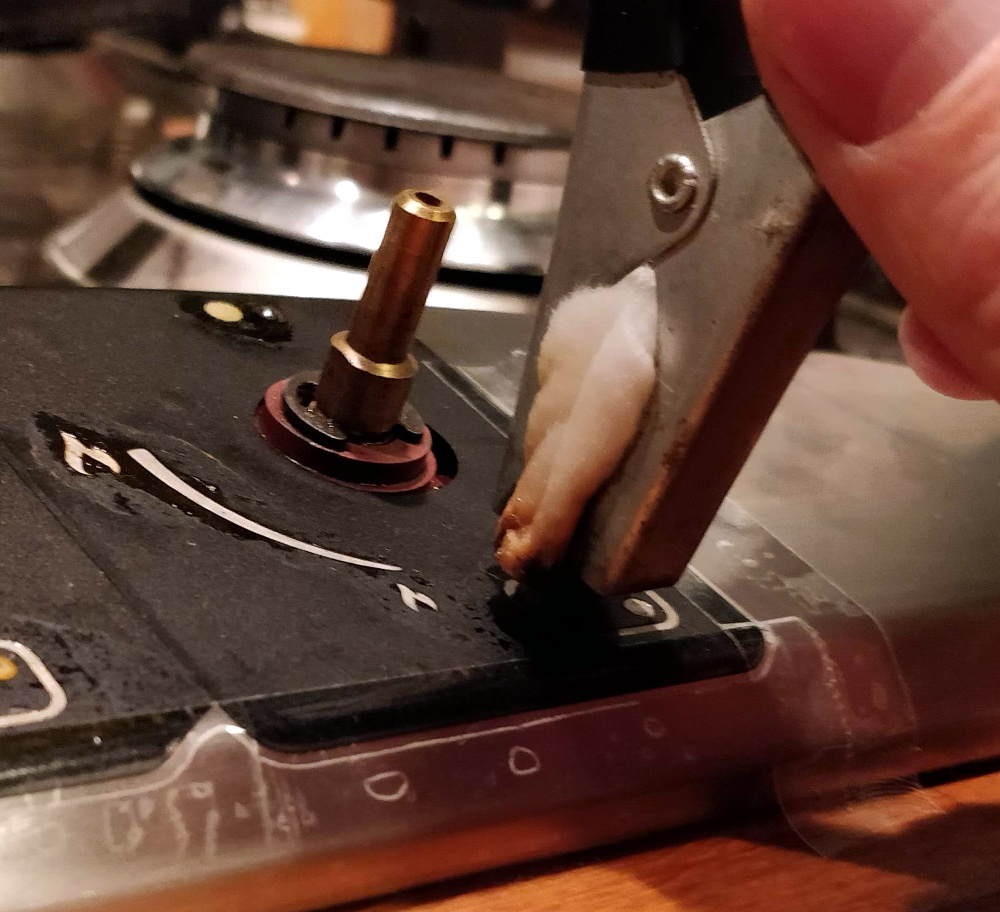
There are a couple of ways to transfer an insulating mask to metal, and we see the ole’ magazine paper method fail in the video, but cutting vinyl works a treat. You may prefer lasers or resin printers, and that’s all right too. Once your mask is sorted, connect the positive lead to the brass and the negative to your steel. Now, it’s into the agitated salt water bath, apply direct current, and allow electricity to immortalize your design.

Continue reading “Brass Plaque Honors Brother”

How Do You Etch Something You Can’t Move?

We probably don’t need to tell this to the average Hackaday reader, but we’re living in a largely disposable society. Far too many things are built as cheaply as possible, either because manufacturers know you won’t keep it for long, or because they don’t want you to. Of course, the choice if yours if you wish to you accept this lifestyle or not.

Like many of us, [Erik] does not. When the painted markings on his stove become so worn that he couldn’t see them clearly, he wasn’t about to hop off to the appliance store to buy a new one. He decided to take things into his own hands and fix the poor job the original manufacturers did in the first place. Rather than paint on new markings, he put science to work and electroetched them into the metal.

Whether or not you’ve got a stove that needs some sprucing up, this technique is absolutely something worth adding to your box of tricks. Using the same methods that [Erik] did in his kitchen, you could etch an awesome control panel for your next device.

So how did he do it? Despite the scary multisyllabic name, it’s actually quite easy. Normally the piece to be etched would go into a bath of salt water for this process, but obviously that wasn’t going to work here. So [Erik] clipped the positive clamp of a 12 V battery charger to the stove itself, and in the negative clamp put a piece of gauze soaked in salt water. Touching the gauze to the stove would then eat away the metal at the point of contact. All he needed to complete the project were some stencils he made on a vinyl cutter.

We’ve previously covered using electricity to etch metal in the workshop, as well as the gorgeous results that are possible with acid etched brass. Next time you’re looking to make some permanent marks in a piece of metal, perhaps you should give etching a try.

[via /r/DIY]

Etching Your Own Metal

It’s been said that with enough soap, one could blow up just about anything. A more modern interpretation of this thought is that with enough knowledge of chemistry, anything is possible. To that end, [Peter] has certainly been doing a good job of putting his knowledge to good use. He recently worked out a relatively inexpensive and easy way to etch metals using some chemistry skill and a little bit of electricity.

After preparing a set of stencils and cleaning the metal work surface, [Peter] sets his work piece in a salt solution. A metal bar is inserted in the other end of the bath, and both it and the work piece are connected to electrodes. The flow of electricity removes some metal from the exposed work surfaces, producing whatever patterns [Peter] wants.

One interesting thing that [Peter] found is that the voltage must stay under 6 volts. This is probably part of the reason it’s relatively easy to etch with even a wall wort. Above that, the iron work piece produces a different ion which can clog the work surface and create undesirable effects. Additionally, since his first experiments with this process he has upgraded the salt bath with magnetic stirrers. He also gets the best results in a very cold environment.

There are many other uses for etching metals, too. Creating your own printed circuit boards comes to mind, but there are plenty of other uses as well. What will you do with this technique?

Fail Of The Week: Cutting Steel With Baking Soda

[NightHawkInLight] wants what may be the impossible – a dirt cheap replacement for a laser cutter or a water jet. He’s got this crazy idea about using electrolysis to etch sheet steel parts, but he just can’t get the process to work. Sounds like a job for the Hackaday community.

In theory, electrolytic cutting of metal  is pretty simple to understand. Anyone who lives in the northeast of the USA knows all about how road salt can cut holes in steel given enough time – say, one winter into payments on that new car. Adding a few electrons to the mix can accelerate the process of removing metal, but doing so in a controlled manner seems to be the crux of [NightHawkInLight]’s problem.

In his research into the method, he found a 2010 video by [InterestingProducts] of etching reed valves for DIY pulse jet engines from spring steel that makes it look easy. [NightHawkInLight] deviated from the reed valve process by substituting baking soda for salt to avoid the production of chlorine gas and changed up the masking technique by using different coatings. We applaud the empirical approach and hope he achieves his goal, but we tend to agree with frequent-Hackaday-tipline-project notable [AvE]’s assessment in the YouTube comments – the steel is just too darn thick. Once the etching starts, a third dimension is created at 90° to the surface and is then available to electrolyze, causing the corrosion to extend under the masking.

What does the Hackaday hive mind think? Is there any way to fix this process for thicker steel stock? Narrower traces, perhaps? Somehow modulating the current in the tank? Perhaps using the Hackaday logo would have helped? Chime in down below in the comments, and maybe we can all throw out our laser cutters.

Continue reading “Fail Of The Week: Cutting Steel With Baking Soda”

Hack A Bike Electroetching

[Melka] wanted a track bike, but never quite got around to buying a nice one. Then he found an inexpensive abandoned project bike for 10 Euro. He had to do a lot of work to make it serviceable and he detailed it all in a forum post. What caught our eye, though, was his technique for electroetching.

The process is simple, but [Melka] says the procedure caused hydrochloric acid fumes as a byproduct. Your lungs don’t like HCl fumes. Apart from the danger, you probably have everything you need. He used electrical tape to create a stencil on the metal (although he mentioned that Kapton tape might come off better afterward) and a saturated solution of common table salt as the electrolyte.

Power comes from a bench power supply set to about 24V. The positive lead was connected to the metal and the ground to the sponge. From the photos, it looks like the particular piece and solution caused about 600mA to flow. After 10 minutes, the metal etched out to about 0.2 mm. After the etching, [Melka] brazed some brass into the etched area to make an interesting looking logo.

If you have a laser cutter, you can skip the chemicals. We’ve even seen laser etching combine with a 3D printer to produce PCBs. [Melka’s] method is a little messier and probably would not do fine lines readily, but if you need to etch steel and you don’t mind the fumes, it should be simple to try.

Fetching Etchings For Stainless Steel

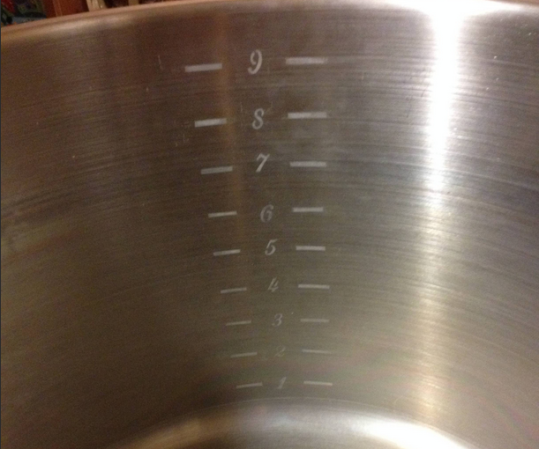
What do you do when you have a 10-gallon brew kettle (or any other stainless steel or aluminium thing) with no volume markings (or Hack a Day logos)? If you’re [Itsgus], you use science to etch some markings with a few household items and a 9V and you call it a day.

[Itsgus] used 1/4c vinegar and 1/4tsp of salt to form an electro-etchant and applied it with a Q-tip connected to the negative terminal of a 9V. He used tape to connect a wire between the positive terminal and the kettle. The vinegar dissolves the salt, creating negatively charged ions. Connected correctly to a 9V, the process removes metal where the current flows. If you were to connect it in reverse,  you would add a small amount of metal.

The process only takes a few seconds. When the etchant starts to sizzle and bubble, Bob’s your uncle. Even though the stainless steel’s natural coat re-oxidizes over the etches, you should probably wash that thing before you brew. If you prefer adding metal to removing it, try electroplating copper on the cheap.

Machining Gets Wet And Wild

Electromachining

[Tyler] has had his electrochemical machining hack up for a while now. His final version uses a pump to move electrolyte out through the etching head and onto the workpiece. This keeps fresh electrolyte in the etching region and clears out the insoluble material. We see how this could be attached to a CNC system and used to etch PCBs without the use of a special inkjet printer, toner transfer, or laser etching machine.

[thanks Ian]