Build Yourself A Screw Propelled Robot To Tackle The Dirt

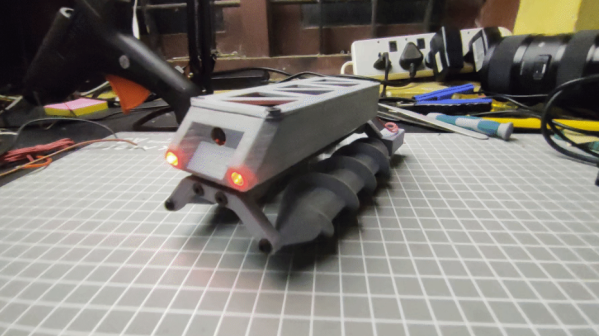
Wheels and tracks are common choices for robot propulsion, but they’re not the only game in town. You can do some nifty things with long extruded screws , and they work pretty well in soft terrain. [gokux] set about building a small robot using this propulsion method using 3D printed parts.

The build uses a Seeed Studio XIAO ESP32S3 as the brains of the operation. This provides wireless connectivity for remote control, as well as a way to get a low-latency video feed out of the robot from the OV2640 camera. The ESP32 controls a pair of brushed DC gearmotors via a DRV8833 motor driver. Each drives one of the two screws on the robot. By driving the two screws separately, the robot has simple skid steering. Two 18650 lithium-ion cells provide power for the robot, and are charged via a TP4056 battery charger module.

If you want to build a small robot that can handle soft terrain well, screw drives could be just the solution you’re looking for. They’re usually a bit slow, though, especially for human-scale conveyances, so don’t write off wheels or tracks if you don’t have to. And, of course, when your build is done, don’t forget to put it online and tell us all about it!

This Standalone Camera Gets The Picture Through With SSTV

These days, sending a picture to someone else is as simple as pulling out your smartphone and sending it by email or text message. It’s so simple a child can do it, but that simple user experience masks a huge amount of complexity, from the compression algorithms in the phones to the huge amount of distributed infrastructure needed to connect them together. As wonderful and enabling as all that infrastructure can be, sometimes it’s just too much for the job.

That seems to have been the case for [Dzl TheEvilGenius], who just wanted to send a low-resolution image from a remote location. It turns out that hams solved that problem about 70 years ago with slow-scan television, or SSTV. While most of the world was settling down in front of “I Love Lucy” on the regular tube, amateur radio operators were figuring out how to use their equipment to send pictures around the world. But where hams of yore had to throw a considerable amount of gear at the problem, [Dzl] just used an ESP-32 with a camera and some custom code to process the image. The output from one of the MCU’s GPIO pins is a PWM audio signal which can be fed directly into the microphone input of a cheap portable transceiver.

To decode the signal, [Dzl] used one of the many SSTV programs available. There’s no mention of the receiver, although it could be pretty much anything from another Baofeng to an SDR dongle. The code is available in the article, as is an audio file of an encoded image, if you just want to play around with the receiving and decoding side of the equation.

We could see something like this working for a remote security camera, or even for scouting hunting spots. If you want to replicate this, remember that you’ll need a license if you want to transmit on the ham bands — relax, it’s easy.

Every Frame A Work Of Art With This Color Ultra-Slow Movie Player

One of the more recent trendy builds we’ve seen is the slow-motion movie player. We love them — displaying one frame for a couple of hours to perhaps a full day is like an ever-changing, slowly morphing work of art. Given that most of them use monochrome e-paper displays, they’re especially suited for old black-and-white films, which somehow makes them even more classy and artsy.

But not every film works on a monochrome display. That’s where this full-color ultra-slow motion movie player by [likeablob] shines. OK, full color might be pushing it a bit; the build centers around a 5.65″ seven-color EPD module. But from what we can see, the display does a pretty good job at rendering frames from films like Spirited Away and The Matrix. Of course there is the problem of the long refresh time of the display, which can be more than 30 seconds, but with a frame rate of one every two hours, that’s not a huge problem. Power management, however, can be an issue, but [likeablob] leveraged the low-power co-processor on an ESP32 to handle the refresh tasks. The result is an estimated full year of battery life for the display.

We’ve seen that same Waveshare display used in a similar player before, and while some will no doubt object to the muted color rendering, we think it could work well with a lot of movies. And we still love the monochrome players we’ve seen, too.

Pushing The Limits Of A 16×2 LCD With Bad Apple!!

While low-contrast, blue-on-slightly-less-blue 16-character by 2-line LCDs are extremely popular, they really are made specifically for alphanumeric use. They do an admirable job of displaying a few characters, but they don’t exactly spring to mind as a display for non-character purposes. But displaying video on a 16×2 LCD is possible, as long as you’re willing to stretch the definition of “video” a bit and use some imagination while watching.

Normally, a 16×2 display can only display a single character in each spot, chosen from a fixed character set. But [arduinocelantano] was able to leverage the eight custom character slots the display allows to build up images from arbitrary 5×8 pixel bitmaps. After using ffmpeg to scale the original video to a viewport of eight characters, a Python program was used to turn every frame of the scaled video into code to generate the custom bitmaps for each chunk of the viewport. Even with the low refresh rate of the display and the shrunken frame size, the result is a recognizable video, helped no doubt by the choice of the shadow-puppet Bad Apple!! video. Check it out after the break to see how it looks.

We saw a similar rendering of the same video on LCD a while back; that effort was amazing in that it was an EEPROM-only implementation, along with a somewhat bigger LCD with better contrast. That project served as inspiration for [arduinocelantano]’s build here, which in some ways we think looks a bit better — perhaps it’s the inverted pixels. Either way, hats off to both builders for pushing past the normal constraints and teaching us something interesting.

Continue reading “Pushing The Limits Of A 16×2 LCD With Bad Apple!!

A stepper-powered flip clock

Steppers And ESP32 Make This Retro-Modern Flip-Clock Tick

Before LEDs became cheap enough to be ubiquitous, flip-card displays were about the only way to get a digital clock. These entirely electromechanical devices had their own charm, and they have a certain retro cachet these days. Apart from yard sales and thrift stores, though, they’re a bit hard to source — unless you roll your own, of course.

Granted, [David Huang]’s ESP32-based flip clock is worlds apart from the flip cards of the “I Got You, Babe” era. Unfortunately, the video below is all we have to go on to get the story behind this clock, but it’s pretty self-explanatory. [David] started the build by making the flip cards themselves, a process that takes some topological tricks as well as a laser cutter. 3D-printed spools are loaded with the cards, which are then attached to frames that hold a stepper motor and a Hall-effect sensor. The ESP32 drives the steppers via L298N H-bridge drivers, but it’s hard to say if there’s an RTC chip or if the microcontroller is just getting time via an NTP server.

[David] might not be the only one trying to recapture that retro look, but we’ve got to hand it to him — it’s a great look, and it takes a clever maker to not only build a clock like this, but to make a video that explains it all so clearly without a single word of narration.

Continue reading “Steppers And ESP32 Make This Retro-Modern Flip-Clock Tick”

RevK_NFC-Reader_v2-Photo

NFC Who’s At The Door

RevK_NFC_v1-Prototype-Photo
An early prototype that worked on the first try, except for one LED

[RevK] wanted to learn about NFC readers, and we agree that the best way to do so is to dive in and build one yourself.

There are readers available from multiple sources, but [RevK] found them either compact but with no prototyping space or plenty of prototyping space and a large footprint. High-speed UART (HSU) was selected over I2C for communication with an ESP32 as testing showed it was just as fast and more reliable over long distances at the cost of only one additional wire.

After a few versions, the resulting PN532 based NFC reader has just enough GPIO for a doorbell and tamper switch and three status LEDs, with board files and a 3D-printed case design included in the open source project on GitHub. When looking into the project, we appreciated learning about tamper switches that can include closed or open contact status when an NFC is read, most often used in the packaging of high-value and collectible products. If you have worked with this tamper feature of NFCs, let us know about it.

Thanks for the tip, [Simon]

Give Your Smart Home A Green Thumb With MQTT

We have all been stuck inside for too long, and maybe that’s why we have recently seen a number of projects attempting to help humans take better care of their housemates from Kingdom Plantae. To survive, plants need nutrients, light, and water. That last one seems tricky to get right; not too dry and not drowning them either, so [rbaron’s] green solder-masked w-parasite wireless soil monitor turns this responsibility over to your existing home automation system.

w-parasite MQTT diagram

Like this low-power soil sensor project and the custom controller for six soil sensors, [rbaron’s] w-parasite uses a “parasitic capacitive” moisture sensor to determine if it’s time to water plants. This means that unlike resistive soil moisture sensors, here the copper traces are protected from corrosion by the solder mask. For those wondering how they work, [rbaron]’s Twitter thread has a great explanation.

The “w” in the name is for WiFi as the built-in ESP-32 module then takes the moisture reading and sends an update wirelessly via MQTT. Depending on the IQ of your smart-home setup, you could log the data, route an alert to a cellphone, light up a smart-bulb, or even switch on an irrigation system.

w-parasite circuit board in a potted plant
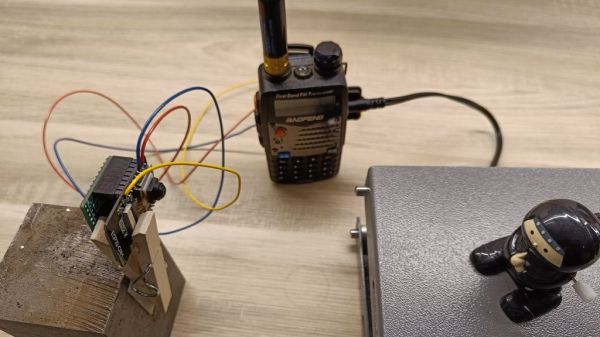
[rbaron] has shared a string of wireless hacks, controlling the A/C over Slack and a BLE Fitness Tracker that inspired more soldering than jogging. We like how streamlined this solution is, with the sensor, ESP-32 module, and battery all in a compact single board design. Are you asking yourself, “but how is a power-hungry ESP-32 going to last longer than it takes for my geraniums to dry out?” [rbaron] is using deep sleep that only consumes 15uA between very quick 500ms check-ins. The rechargeable LIR2450 Li-Ion coin cell shown here can transmit a reading every half hour for 90 days. If you need something that lasts longer than that, use [rbaron]’s handy spreadsheet to choose larger batteries that last a whole year. Though, let’s hope we don’t have to spend another whole year inside with our plant friends.

We may never know why the weeds in the cracks of city streets do better than our houseplants, but hopefully, we can keep our green roommates alive (slightly longer) with a little digital nudge.