Custom Fume Hood For Safe Electroless Plating

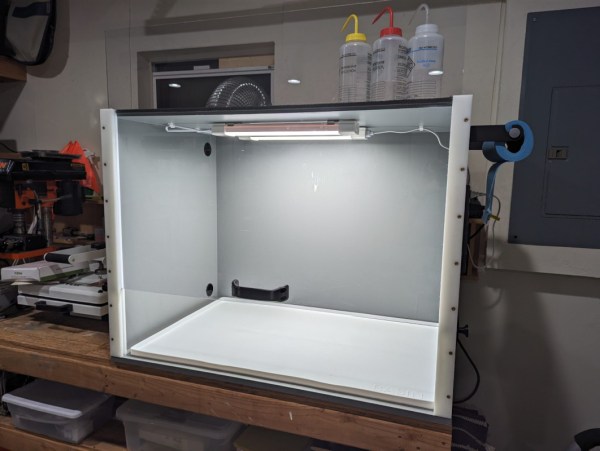
There are plenty of chemical processes that happen commonly around the house that, if we’re really following safety protocols to the letter, should be done in a fume hood. Most of us will have had that experience with soldering various electronics, especially if we’re not exactly sure where the solder came from or how old it is. For [John]’s electroless plating process, though, he definitely can’t straddle that line and went about building a fume hood to vent some of the more harmful gasses out of a window.

This fume hood is pretty straightforward and doesn’t have a few of the bells and whistles found in commercial offerings, but this process doesn’t really require things like scrubbing or filtering the exhaust air so he opted to omit these pricier and more elaborate options. What it does have, though, is an adjustable-height sash, a small form factor that allows it to easily move around his shop, and a waterproof, spill-collecting area in the bottom. The enclosure is built with plywood, allowing for openings for an air inlet, the exhaust ducting, and a cable pass-through, and then finished with a heavy-duty paint. He also included built-in lighting and when complete, looks indistinguishable from something we might buy from a lab equipment supplier.

While [John] does admit that the exhaust fan isn’t anything special and might need to be replaced more often than if he had gone with one that was corrosion-resistant, he’s decided that the cost of this maintenance doesn’t outweigh the cost of a specialized fan. He also notes it’s not fire- or bomb-proof, but nothing he’s doing is prone to thermal anomalies of that sort. For fume hoods of all sorts, we might also recommend adding some automation to them so they are used any time they’re needed.

Continue reading “Custom Fume Hood For Safe Electroless Plating”

Homebrew Optical Sensor Helps Your Diesel Pass The Smoke Test

We’ve all heard of the smoke test, and we know that it’s the lowest possible bar for performance of an electronic device. If it doesn’t burst into flames when power is applied, you’re good to go for more functional testing. But the smoke test means something else for cars, especially those powered by diesel fuel. And passing diesel exhaust tests can become something of a chore.

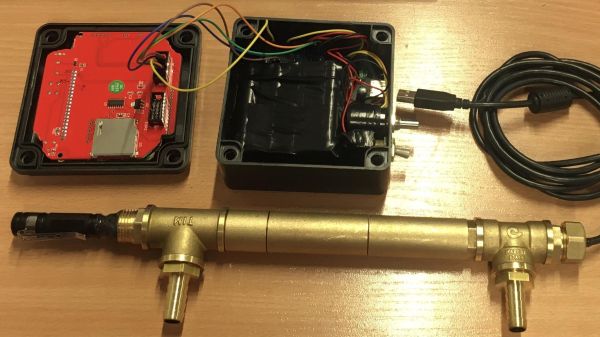
To make passing these tests a little easier, [Janis Alnis] came up with this diesel exhaust monitor that measures the opacity of his car’s emissions. The sensor itself is quite simple, and mimics what commercial exhaust analyzers use: a LED and a photodiode at opposite ends of a tube of a specified length. Soot particles in exhaust passing through the tube will scatter light in a predictable way, and the numbers work out that a passing grade is anything greater than 53% transmission.

The sensor body is cobbled together from brass pipe fittings with glass windows epoxied into each end. Exhaust enters via a tee fitting attached to a hose and sampling tube, and exits through another tee. One window of the sensor has a cheap battery-powered flashlight as a light source, while the other end has a Texas Instruments OPT101 photodiode sensor. The sensor is connected to one of the analog inputs of an Arduino, which also runs a 128×64 pixel LCD display — inspired by this air quality meter — to show the current smokiness both graphically and as a percentage. The video below shows the sensor at work.

While there were some issues with soot buildup and water vapor condensation, using the sensor [Janis] discovered that a little bit of a warm-up drive got things hot enough to clear up his ride’s tendency to smoke a bit, allowing him to pass his inspection. Continue reading “Homebrew Optical Sensor Helps Your Diesel Pass The Smoke Test”

Shop Exhaust Fan Salvaged From Broken Microwave

You don’t have to look hard to find a broken microwave. These ubiquitous kitchen appliances are so cheap that getting them repaired doesn’t make economical sense for most consumers, making them a common sight on trash day. But is it worth picking one of them up?

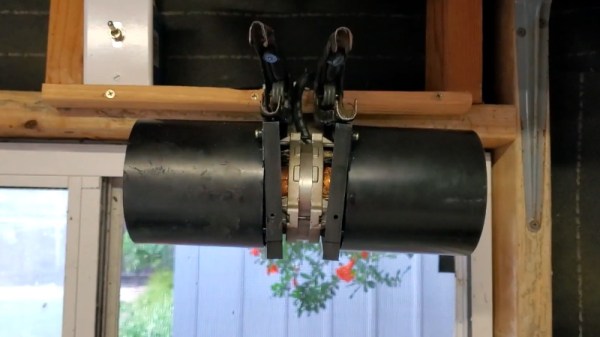
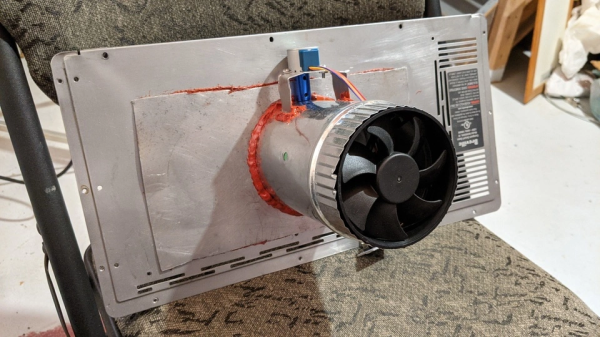
The [DuctTape Mechanic] certainly thinks so. In his latest video, he shows how the exhaust fan from a dead microwave can easily and cheaply be adapted to blow smoke and fumes out of your workshop. While it’s obviously not going to move as much air as some of the massive shop fans we’ve covered over the years, if you’re working in a small space like he is, it’s certainly enough to keep the nasty stuff moving in the right direction. Plus as an added bonus, it’s relatively quiet.

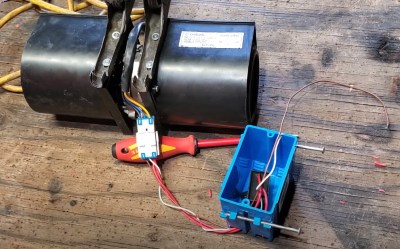
Now as you might expect the exact internal components of microwave ovens vary wildly, so there’s no guarantee your curbside score is going to have the same fan as this one. But the [DuctTape Mechanic] tries to give a relatively high-level overview of how to liberate the fan, interpret the circuit diagram on the label, and wire it up so you can plug it into the wall and control it with a simple switch. Similarly, how you actually mount the fan in your shop is probably going to be different, though we did particularly like how he attached his to the window using a pair of alligator clips cut from a frayed jumper cable.

Got a donor microwave but not in the market for a impromptu shop fan? No worries. We recently saw a dud microwave reborn as a professional looking UV curing chamber that would be the perfect partner for your resin 3D printer. Or perhaps you’d rather turn it into a desktop furnace capable of melting aluminum, copper, or bronze.

Continue reading “Shop Exhaust Fan Salvaged From Broken Microwave”

Exhaust Fan-Equipped Reflow Oven Cools PCBs Quickly

With reflow soldering, sometimes close is good enough. At the end of the day, the home gamer really just needs a hot plate or an old toaster oven and a calibrated Mark I eyeball to get decent results. This exhaust fan-equipped reflow oven is an attempt to take control of what’s perhaps the more challenging part of the reflow thermal cycle — the cool down.

No fan of the seat-of-the-pants school of reflow soldering, [Nabil Tewolde] started with a cast-off toaster oven for what was hoped to be a more precise reflow oven. The requisite temperature sensors and solid-state relays were added, along with a Raspberry Pi Zero W and a small LCD display. Adding the cooling assist started by cutting a gaping hole cut in the rear wall of the oven, which was then filled with a short stretch of HVAC duct and a stepper-controlled damper. The far end of the duct was fitted with a PC cooling fan; while it seems sketchy to use a plastic fan to eject hot air from the oven, [Nabil] says the exhaust isn’t really that hot by the time it gets to the fan. At the end of the reflow phase of the thermal profile, the damper opens and the fan kicks on, rapidly cooling the oven’s interior.

Unfortunately, [Nabil] still needs to crack open the oven door to get decent airflow; seems like another damper to admit fresh air would help with that. That would complicate things a bit, but it still wouldn’t be as over-the-top as some reflow builds we’ve seen. Then again, that calibrated eyeball thing can work pretty well too, evenĀ without a toaster oven.

Continue reading “Exhaust Fan-Equipped Reflow Oven Cools PCBs Quickly”

Fridge Compressor Turned Into Capable Little Four-Stroke Engine

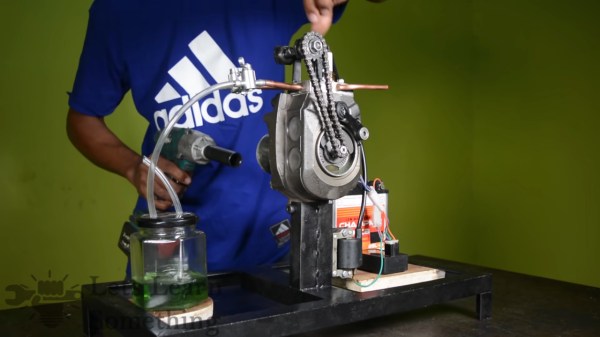
Never underestimate the power of a well-stocked junk bin. Along with a TIG welder and mechanical ingenuity bordering on genius-level, all of which come to bear on this fridge compressor to four-stroke engine build.

The video posted by [Let’s Learn Something] is long, but watching it at double speed doesn’t take away much from the enjoyment. By using a piston-type compressor, a lot of the precision machining is already taken care of here. Adding the intake and exhaust valves, camshaft, timing chain, carburetor, and ignition system are still pretty challenging tasks, though. We loved the home-made timing chain sprockets, made with nothing more than a drill and an angle grinder. In a truly inspired moment, flat-head screws are turned into valves, rocker arms are fabricated from bits of scrap, and a bolt becomes a camshaft with built-up TIG filler. Ignition and carburetion are cobbled together from more bits of scrap, resulting in an engine that fired up the first time — and promptly melted the epoxy holding the exhaust header to the cylinder head.

Now, compressor-to-engine conversions aren’t exactly new territory. We’ve seen both fridge compressors and automotive AC compressors turned into engines before. But most of what we’ve seen has been simple two-stroke engines. We’re really impressed with the skill needed to bring off a four-stroke engine like this, and we feel like we picked up quite a few junk-box tips from this one.

Continue reading “Fridge Compressor Turned Into Capable Little Four-Stroke Engine”

Building A Scooter Exhaust From Scrap Metal

When a part on a vehicle fails, oftentimes the response is to fit a new one fresh out the box. However, sometimes, whether by necessity or simply for the love of it, it’s possible to handcraft a solution instead. [Samodel] does just that when whipping up a new exhaust for his scooter out of scrap metal.

It’s a great example of classic backyard metalworking techniques. The flange is recreated using a cardboard template rubbed on the exhaust port, with the residual oil leaving a clear impression. Hard work with a grinder and drill get things started, with an insane amount of filing to finish the piece off nicely. A properly tuned pipe is then sketched out on the computer, and a paper template created. These templates are cut out of an old fridge to create the main muffler section.

There’s plenty of other hacks, too – from quick and dirty pipe bends to handy sheet forming techniques. It’s not the first time we’ve seen great metalworking with scrap material, either. Video after the break.

[Thanks to BrendaEM for the tip]

Continue reading “Building A Scooter Exhaust From Scrap Metal”

See-Through Catalytic Converter

There’s always something to be learned from taking things apart. Sometimes the parts can be used for other things, sometimes they can be repaired or improved upon, but sometimes it’s all in good fun. Especially in this case where extremely high temperatures and combustible gasses are involved. This is from the latest video from [Warped Perception] that lets us see inside of a catalytic converter as its operating.

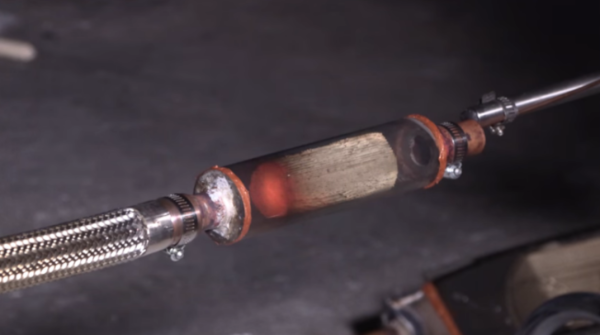
Catalytic converters are installed on most vehicles (and other internal combustion engines) in order to process unburned hydrocarbons from exhaust gasses with a catalyst. These can get extremely hot, and this high temperature complicated the build somewhat. There were two prototypes constructed for this build and the first was a cross-section of a catalytic converter with a glass window sealed on in order to allow the viewing of the catalyst during the operation of a small engine. It was easy to see the dirty exhaust gasses entering and cleaner gasses leaving, but the window eventually blew off. The second was a complete glass tube which worked much better until the fitting on the back finally failed.

A catalytic converter isn’t something we’d normally get to see the inside of, and this video was worth watching just to see one in operation in real life. You could also learn a thing or two about high-temperature fittings as well if you’re so inclined. It might be a nice pairing with another build we’ve seen which gave us a window into a different type of combustion chamber than ones normally found on combustion engines.

Thanks to [Ryoku] for the tip!

Continue reading “See-Through Catalytic Converter”