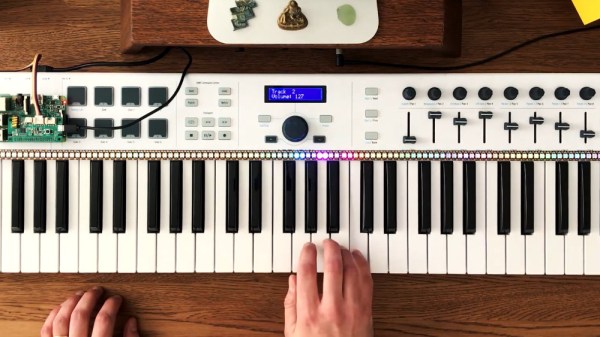
Stanislaw playing notes on his MIDI keyboard, with the LEDs on the LED strip lighting up right above the note he's playing, driven by the Raspberry Pi that runs a script based on the Pianolizer toolkit

Pianolizer Helps Your Musical Projects Distinguish Notes

[Stanislaw Pusep] has gifted us with the Pianolizer project – an easy-to-use toolkit for music exploration and visualization, an audio spectrum analyzer helping you turn sounds into piano notes. You can run his toolkit on a variety of different devices, from Raspberry Pi and PCs, to any browser-equipped device including smartphones, and use its note output however your heart desires. To show off his toolkit in action, he set it up on a Raspberry Pi, with Python code taking the note data and sending color information to the LED strip, displaying the notes in real time as he plays them on a MIDI keyboard! He also created a browser version that you can use with a microphone input or an audio file of your choosing, so you only need to open a webpage to play with this toolkit’s capabilities.

He took time to make sure you can build your projects with this toolkit’s help, providing usage instructions with command-line and Python examples, and even shared all the code used in the making of the demonstration video. Thanks to everything that he’s shared, now you can add piano note recognition to any project of yours! Pianolizer is a self-contained library implemented in JavaScript and C++ (which in turn compiles into WebAssembly), and the examples show how it can be used from Python or some other language.

[Stanislaw] also documented the principles behind the code, explaining how the note recognition does its magic in simple terms, yet giving many insights. We are used to Fast Fourier Transform (FFT) being our go-to approach for spectral analysis, aka, recognizing different frequencies in a stream of data. However, a general-purpose FFT algorithm is not as good for musical notes, since intervals between note frequencies become wider as frequency increases, and you need to do more work to distinguish the notes. In this toolkit, he used a Sliding Discrete Fourier Transform (SDFT) algorithm, and explains to us how he derived the parameters for it from musical note frequencies. In the end of the documentation, he also gives you a lot of useful references if you would like to explore this topic further!

What are you going to build with this? Maybe, a box that records you playing the flute and instantly turns it into sheet music? Or, perhaps, an AI that continues the song for you when you stop?

Continue reading “Pianolizer Helps Your Musical Projects Distinguish Notes”

Woodworking, Blinkenlites, And FFT’s Dance To The Music

We all have that one project on our minds that we’d love to build if we could just find the right combination of time, energy, and knowledge to dive right in. For [Jonathan], that project was a sound sculpture that’s finally made it from concept to complete. [Jonathan] describes the sound sculpture as the culmination of a decade of learning, and in a moment you’ll understand why.

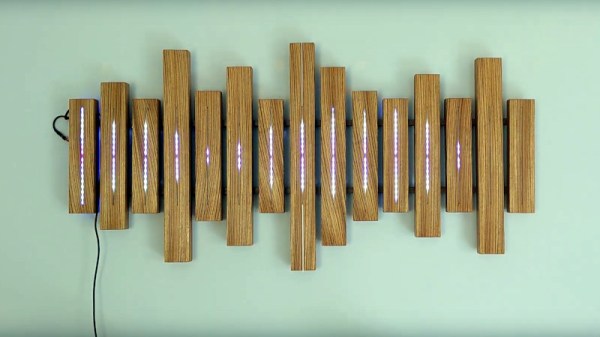
The sculpture itself is a beautiful display of woodwork mixed with what appear to be individually addressable LED’s. The varying length of the individual enclosures evokes the idea that the sculpture is somehow involved in the sound production, which is a nice touch.

An Adafruit microphone module feeds detected audio into a PSoC 5 microcontroller. You’d expect that [Jonathan] just used one of the FFT libraries that are available. But you’ll recall that this was the culmination of a decade of learning- why so? Because [Jonathan] went through the process of procuring his own grey hairs by writing his own FFT function. A homebrew FFT function and blinkenlites? What’s not to love!

You may also enjoy this discussion of Sine Waves, Square Waves, and FFT’s with our own Bil Herd.

Continue reading “Woodworking, Blinkenlites, And FFT’s Dance To The Music”

FFT display on 16x16 RGB LED grid

Art Project Fast And Fouriously Transforms Audio Into Eye Candy

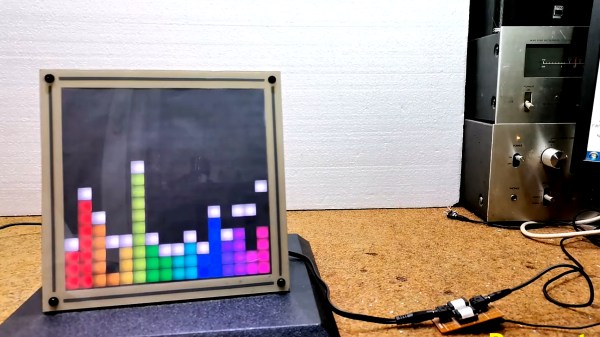
Fast Fourier Transforms. Spectrum Analyzers. Waterfall displays. Not long ago, such terms were reserved for high end test gear. But oh, how things have changed! It’s no surprise to many Hackaday readers that modern microcontrollers have transformed the scene as they become more powerful and as a result are endowed with more and more powerful software libraries. [mircemk] has used such a library along with other open source software combined with mostly off the shelf hardware to create what he calls the DIY FFT Spectrum Analyzer. Rather than being a piece of test gear, this artful project aims to please the eye.

The overall build is relatively simple. Audio is acquired via a line-in jack or a microphone, and then piped into an ESP32. The ESP32 runs the audio through the FFT routine, sampling, slicing, and dicing the audio into 16 individual bands. The visual output is displayed on a 16 x 16 WS2812 Led Matrix. [mircemk] wrote several routines for displaying the incoming audio, with a waterfall, a graph, and other visualizations that are quit aesthetically pleasing. Some of them are downright mesmerizing! You can see the results in the video below the break.

Of course the build doesn’t stop with slapping some hardware and a few passive components together. To really be finished, it needs to be encased in something worth displaying. [mircemk] does not disappoint, as a beautiful 3D-printed enclosure wraps it all up nicely.

We think that the final product is great, and it reminds us of some of the very things that inspired us early on in our hacking careers. We would love to see this project integrated with an Interactive Musical Art Installation of any kind, the more esoteric the better. Perhaps a 555 timer synth could fit the bill? Be sure to share your own hacks with us via the Tip Line!

Continue reading “Art Project Fast And Fouriously Transforms Audio Into Eye Candy”

Even Faster Fourier Transforms On The Raspbery Pi Zero

Oftentimes in computing, we start doing a thing, and we’re glad we’re doing it. But then we realise, it would be much nicer if we could do it much faster. [Ricardo de Azambuja] was in just such a situation when working with the Raspberry Pi Zero, and realised that there were some techniques that could drastically speed up Fast Fourier Transforms (FFT) on the platform. Thus, he got to work.

The trick is using the Raspberry Pi Zero’s GPU to handle the FFTs instead of the CPU itself. This netted Ricardo a 7x speed upgrade for 1-dimensional FFTs, and a 2x speed upgrade for 2-dimensional operations.

The idea was cribbed from work we featured many years ago, which provided a similar speed up to the very first Raspberry Pi. Given the Pi Zero uses the same SoC as the original Raspberry Pi but at a higher clock rate, this makes perfect sense. However, in this case, [Ricardo] implemented the code in Python instead of C as suits his use case.

[Ricardo] uses the code with his Maple Syrup Pi Camera project, which pairs a Coral USB machine learning accelerator with a Pi Zero and a camera to achieve tasks such as automatic licence plate recognition or facemask detection. Fun!

Spectrum Display Uses Tiny CPU And Many LEDs

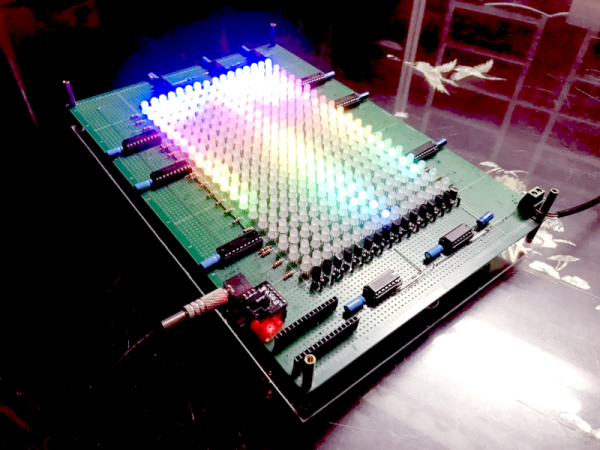
You would think the hard part about creating a spectrum analyzer using a pint-sized ATTiny85 would be the software. But for [tuenhidiy], we suspect the hard part was fabricating an array of 320 LEDs that the little processor can drive. The design does work though, as you can see in the video below.

The key is to use a TPIC6B595N which is an 8-bit shift register made to drive non-logic outputs. With all outputs on, the driving FETs can supply 150 mA per channel and the device can handle 500 mA per channel peak. At room temperature, the part can go over 1W of total power dissipation, although that goes down with temperature, of course. If you need higher power, there’s a DW-variant of the part that can handle a few hundred milliwatts more.

Continue reading “Spectrum Display Uses Tiny CPU And Many LEDs”

Real Spectrum Analysis Goes Virtual

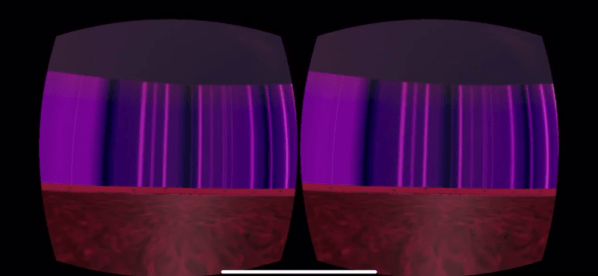
One of the hard things about electronics is that you can’t really see the working parts without some sort of tool. If you work on car engines, fashion swords, or sculpt clay, you can see with your unaided eye what’s going on. Electronic components are just abstract pieces and the real action requires a meter or oscilloscope to understand. Maybe that’s what [José] was thinking of when he built a-radio. This “humble experiment” pipes a scan from a software-defined radio into VR goggles, which can be as simple as a smartphone and some cardboard glasses.

The resulting image shows you what the radio spectrum looks like. Granted, so will a spectrum analyzer, but perhaps the immersion will provide a different kind of insight into radio frequency analysis.

Continue reading “Real Spectrum Analysis Goes Virtual”

Illuminated 3D Printed Guitar Is Ready To Rock

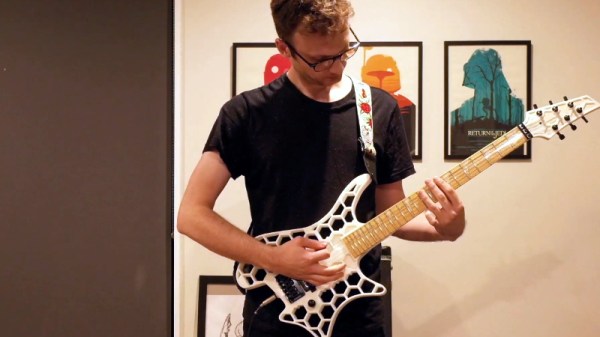
When we think of 3D printed parts for our projects, most of us imagine little bits like brackets and mounting plates. Perhaps the occasional printed project enclosure. But if you’ve got a big custom printer as [Joshendy] does, plus plenty of time, it opens up a whole new world of large scale projects. Take for example the gorgeous RGB LED guitar body he recently completed.

Despite the considerable 300 x 300 mm build area of his custom 3D printer, [Joshendy] still had to design the guitar body in sections that could be bolted together after being printed in ABS. It took around 60 hours to run off all the parts, with the large central section taking the longest to print at 28 hours. With the generous application of heat-set inserts, the assembled guitar should be plenty strong.

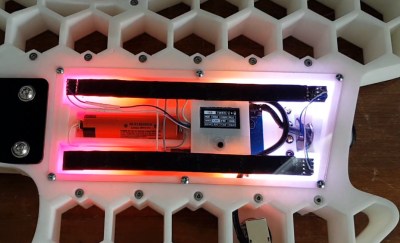
The white ABS of the guitar body helps diffuse the LEDs.

While the skeletal plastic body of the guitar is certainly visually interesting in itself, it only makes up for half of the final look. Inside the central cavity, [Joshendy] has embedded two strips of RGB LEDs, a 128×64 OLED screen, and a custom PCB that plays host to a STM32L4 microcontroller the appropriate voltage regulators necessary to run it all on a battery pack.

The board taps into the audio being produced by the guitar and uses a fast Fourier transform (FFT) to get the LEDs reacting to the beat. As demonstrated in the video after the break, you can use the screen to navigate through the different lighting modes in real-time right on the instrument itself.

We covered the equally impressive large-format 3D printer that [Joshendy] used to produce this guitar earlier in the month, and it’s quite exciting to see the sort of things he’s printing on it already. This project has already set the bar very high, and we can’t wait to see what he comes up with next.

Continue reading “Illuminated 3D Printed Guitar Is Ready To Rock”