Saving $20,000 USD With A Single LED

carrier

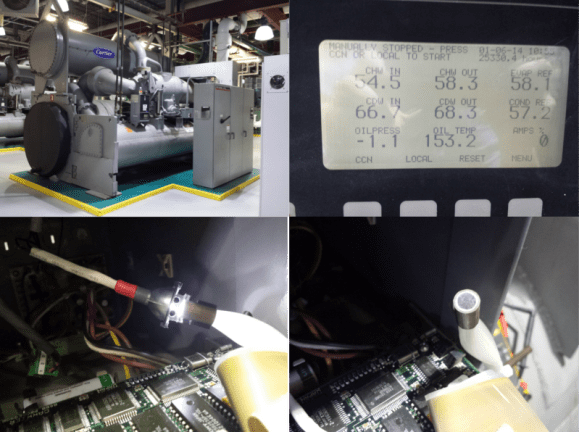
[N8Mcnasty] is a HVAC tech who works on some big machines. One of his charges is a Carrier 19EX Chiller, rated at 1350 tons of cooling. 1 ton of cooling = 12,000 BTU. This particular chiller contained an odd LCD screen. It used a fiber optic bundle and a halogen light for backlight illumination. The system worked fine for over a decade. Now though, the halogen bulb has begun melting the glue on the fiber bundle, causing a dim display. The display in question shows some very important operating parameters, such as oil temperature, current draw, and process temperatures. Since they couldn’t easily see the display, the machine’s operators weren’t running the machine, placing stress on the other chillers in the building’s physical plant. [N8Mcnasty] tried repairing the bundle, however the glue kept melting.

A replacement display was no longer available, meaning that the entire chiller control system would have to be upgraded to a newer system. The new control system uses different sensors than the old one. This is where things start getting expensive. Replacing the sensors would also require draining the 15-20 gallons of oil, 4500 lbs of R134a refrigerant, and bringing the whole system down for almost two weeks, a $20,000 job. Rather than go this route, [N8Mcnasty] found an alternative. LED’s have come a long way since 1996, when the chiller was built. He simply replaced the halogen bulb with an LED and appropriate resistor. [N8Mcnasty] was even able to reuse the halogen bulb bracket. A bit of heat shrink tube later, and the fix looks like it was a factory option. He’s documented his fix here on reddit.

Building Fiber Optic Chandeliers

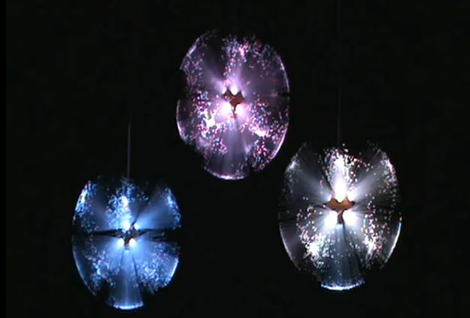
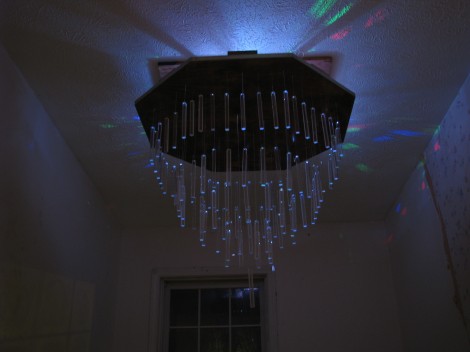
This chandelier keeps the light source hidden and uses fiber optics to illuminate the acrylic diffusers. It’s the second attempt [TheCreator] has made at building his own. Bother projects are interesting in their own way.

The first attempt used marbles as diffusers and had a much different look to it. This time around he’s using what he calls acrylic dowels. They’re not round, but square (which is why we’re not sure dowel is the right term), and he says they work better than marbles for several reasons. The marbles weren’t very heavy so they didn’t really weigh down the glass fibers to keep then straight. They were also difficult to attach to the fibers and prone to breakage.

To attach the dowels he drilled a hole in the end and epoxied a fiber optic strand in place. To direct light into the other end of the filament he built his own frustum (a pyramid with the tip cut off) of inward facing mirror. This helps to focus what is coming from the RGB LEDs in the appropriate direction so that as much light as possible makes it into the fibers.

He didn’t really give any final thoughts so we wonder if it puts out enough light for his needs. We’re sure that if it’s purely a mood piece he’s satisfied.

Optical Fiber Twin-flash Adapter

[Marcell] has always been turned off by the price tag of commercially available double flash adapters. He decided to see what kind of performance he could get out of a flash adapter which he built himself.

The raw materials used should seem quite familiar. The optical fibers act as a conduit to redirect the light from the flash, but he needed a way to hold them in place. He chose to use locline. It’s a product we often see in CNC mill builds to blow debris away from the cutter head. It’s hollow, and holds its position. This is perfect because it allows for easy adjustment and provides a channel through which the fibers can be routed. The Y adapters used here run to a hard board base which connects to the mounting lug on the bottom of the camera. [Marcell] suggests using a T-piece if available because the Y fitting made it a bit more difficult to push the fibers through.

Fiber Optic Chandelier With Wireless Controls

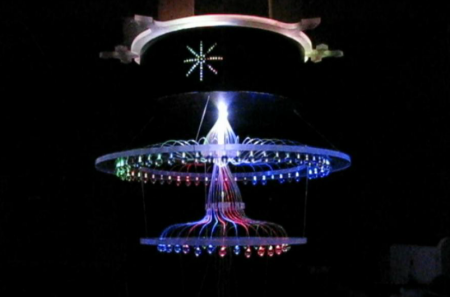
After seeing a cool fiberoptic chandelier on Ebay for over $1,000, [Apex Logic] figured he could build one himself that would not only be cheaper, but have more features. Some of the features he was after were for it to be wirelessly controlled, have the ability for full RGB control, and of course to have a custom look. He pulled it off quite nicely as you can see in the video below. He has a wireless controller with 3 sliders representing RGB that you can catch a glimpse of in the second video below.

His page with the build details and the code seems to have suffered some ill fate this morning. Here it is, for when it returns.

[via Adafruit]

Continue reading “Fiber Optic Chandelier With Wireless Controls”

[Jack]’s Solar-powered Clock

Hack A Day’s own [Jack Buffington] finally finished the solar clock he built for the buildlounge.com laser cutter giveaway.

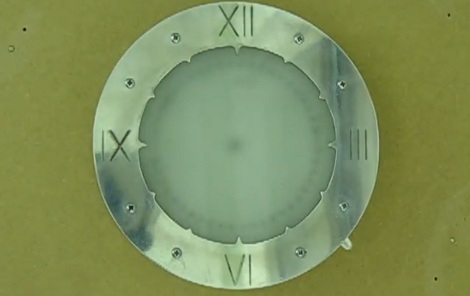
[Jack] has been putting up the build log on his blog, and now the project is finally complete. The clock operates entirely on solar power. Instead of fancy-smanchy electronics, this clock puts a new spin on the very old school sundial. A box outside [Jack]’s house captures sunlight and focuses it onto an array of optical fibers. These fibers transmit the sunlight though the wall and to the face of the clock. Only a portion of the fibers are lit at any one time, and these correspond to the time of day. With a lot of confusing fiber routing, the clock can indicate the time of day by lighting up the clock face.

We covered the nascent beginnings of this project when it was still a glimmer in [Jack]’s eye, and we’ve got to hand it to him. This is a really creative project, and the addition of the ‘daylight savings time lever’ is the icing on the cake. Check out the video after the break for a great explanation of how the clock actually works, and be sure to check out the project on BuildLounge.

Continue reading “[Jack]’s Solar-powered Clock”

A Solar Clock That Isn’t A Sundial

Hack a Day’s very own [Jack Buffington] is throwing his hat into the ring for the Buildlounge laser cutter giveaway with his solar clock that isn’t a sundial.

The theory behind [Jack]’s clock is pretty simple. The light from the sun will be captured by a camera obscura/pinhole camera. The sun’s rays shine on dozens of optical fibers that lead indoors and up to the clock. These glass fibers go to pinholes in the face of the clock which light up, showing the time.

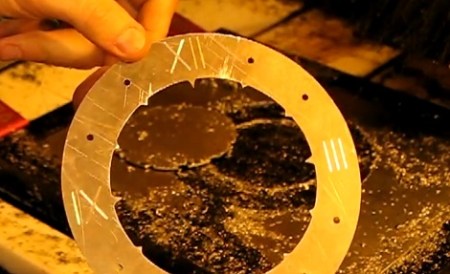
[Jack] already cut out the face of the clock on his (awesome) home-made CNC router. He hasn’t gotten around to cutting out the mechanics of the clock face so the clock can be adjusted throughout the year. We’re okay with that, because we’re really not ready to see [Jack] fiddle with his gnomon. At least before [Jack] gets his hand on the Buildlounge laser.

The next major hurdle of the build is the solar collector that collects light into different optical fibers. That’s going to involve a lot of math using the equatorial coordinate system. Help is available, though.

Check out [Jack] cutting the clock face on his router after the break.

Continue reading “A Solar Clock That Isn’t A Sundial”

RGB Upgrade For Ikea Single Color Fiber Optic Lamp

Five bucks will buy you a STRÅLA lamp from Ikea. It’s a battery operated hanging lamp that pipes the light out through multiple branches of fiber optic bundles. But you’ll only get white out of this, which is pretty boring. [Boris] decided to swap out the stock LED for an RGB unit and drive it with an Arduino.

The lamp nucleus is just a couple of pieces of plastic which can be popped apart to reveal the shard of PCB hosting one LED. The body of that diode is flat on the top, and [Boris] filed down his replacement to match the form factor. There are only two conductors in the wire that runs between that PCB and the battery pack, so he replaced them with four conductors (R,G,B, and GND). His prototype uses the Arduino’s PWM capabilities to control the colors, but [Boris] recommends transitioning to a simple chip like a PIC 12F675 or one of the smaller ATtiny microcontrollers after you’ve got the bugs worked out.

See how this turned out in the clip after the break.

Continue reading “RGB Upgrade For Ikea Single Color Fiber Optic Lamp”