Custom Camera Flash Is Built For Stealth

As [Joshua Bird] began his foray into the world of film photography, he was taken back by the old technology’s sheer hunger for light. Improvised lighting solutions yielded mixed results, and he soon realized he needed a true camera flash. However, all the options he found online were large and bulky; larger than the camera itself in some cases. To borrow his words, “[he] didn’t exactly want to show up to parties looking like the paparazzi”. So, he set about creating his own compact flash.

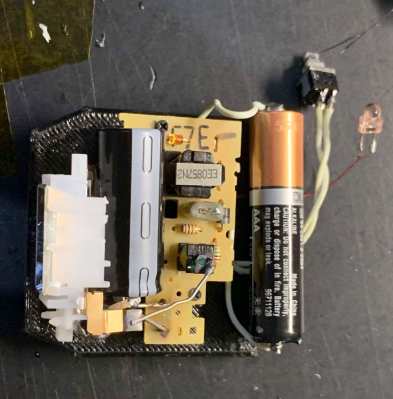
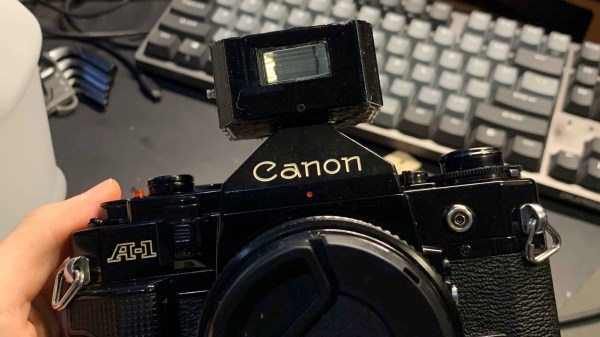
Impressed by the small size and simple operation of disposable camera flashes, [Joshua] lifted a module out of an old Fuji and based his design around it. An existing schematic allowed him to attach the firing circuitry to his Canon’s hot shoe without the risk of putting the capacitor’s 300 volts through the camera. With that done, he just had to model a 3D-printed case for the whole project and assemble it, using a few more parts from the donor disposable.

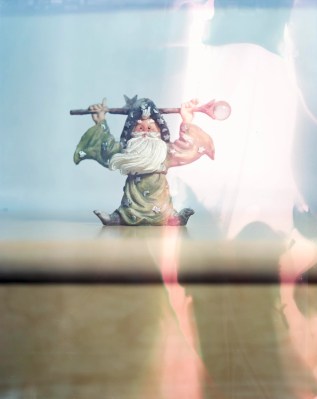
Of course, as it came from a camera that was supposed to be thrown in the trash, this flash was only designed for a specific shutter speed, aperture, and film. Bulkier off-the-shelf flashes have more settings available and are more capable in a variety of environments. But [Joshua] built exactly what he needed. He now has a sleek, low-profile external flash that works great in intimate settings. We’re excited to see the photographic results.

This is not the first photography hacker we’ve seen breathe new life into disposable flashes. Some people see far more than a piece of camera equipment in old flashes, though, with aesthetically stunning results.

[via reddit]

Large Format Lego Camera Is A Bit Near-Sighted

Photography doesn’t have to be expensive, something that’s especially true in the realm of film photography, where the imperfections of the medium can be half the appeal. There are many DIY plans and kits available for analog cameras, but [bhiga143] had couple spare components and a pile of small, colorful bricks lying around, so he decided to build a functional 4×5″ film camera out of Lego.

Details are light for this build, but with a little knowledge about camera structure we can guess at what’s going on inside. Simplicity makes for robust design, and what we have here is in effect a box with a lens on one side and photographic film on the other. The center section of the front, which actually supports the lens, is capable of sliding in and out to adjust focus. On the far side (not pictured) is a slot just wide enough to insert a standard film holder.

The camera really is a hack. [bhiga143] stayed true to the “Lego” part of Lego camera, so there is no glue, no black paper lining, and no frills. The tripod is whatever stack of books lay underneath it. The lens is, quote, “barely functional”. There are light leaks galore, and it can’t focus beyond about 3 feet (1 meter). But every one of those points just makes us love it more. Every nugget of imperfection is a few words added to the story each picture tells. And we honestly can’t wait to see more pictures.

Other Lego cameras we’ve seen have been smaller and less colorful, but using a simple pinhole lens can reduce the overall cost. Of course, you’re not limited to Lego if you want to build your own pinhole camera. Although, the ubiquitous plastic bricks can also be useful in later stages of the film photography process.

Hackaday Links: January 12, 2014

hackaday-links-chain

[Kyle] teaches photography and after being dismayed at the shuttering of film and darkroom programs at schools the world over decided to create a resource for film photography. There’s a lot of cool stuff on here like mixing up a batch of Rodinal developer with Tylenol, lye, and sodium sulphite, and assessing flea market film cameras. There are more tutorials coming that will include setting up a dark room, developing prints, and playing around with large format cameras.

[hifatpeople] built a binary calculator out of LEGO® bricks or toys. It started off as a series of logic gates built out of LEGO® bricks or toys in the LEGO® Digital Designer. These logic gates were combined into half adders, the half adders combined into full adders, and the full adders combined into a huge plastic calculator. Unfortunately, buying the LEGO® bricks or toys necessary to turn this digital design into a physical model would cost about $1000 using the LEGO® Pick-A-Brick service. Does anyone have a ton of LEGO® Technic® bricks or toys sitting around? We’d love to see this built.

Think you need a PID controller and fancy electronics to do reflow soldering in a toaster oven? Not so, it seems. [Sivan] is just using a meter with a thermocouple, a kitchen timer, and a little bit of patience to reflow solder very easily.

The folks at DreamSourceLabs realized a lot of electronic test equipment – from oscilloscopes and logic analyzers to protocol and RF analyzers were all included a sampling circuit. They designed the DSLogic that puts a sampler and USB plug on one board, with a whole bunch of different tools connected to a pin header. It’s a pretty cool idea for a modular approach to test equipment.

Adafruit just released an iDevice game. It’s a resistor color code game and much more educational than Candy Crush. With a $0.99 coupon for the Adafruit store, it’s effectively free if you’re buying anything at Adafruit anytime soon. Check out the video and the awesome adorable component “muppets”.