Blinky Business Card Plays Snake And Connect Four

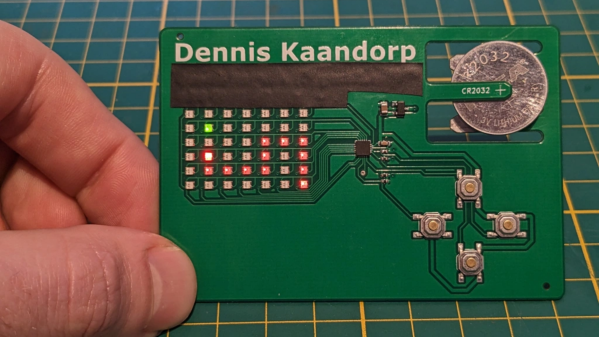
There’s no better way to introduce yourself than handing over a blinky PCB business card and challenging the recipient to a game of Connect Four. And if [Dennis Kaandorp] turns up early for a meeting, he can keep himself busy playing the ever popular game of Snake on his PCB business card.
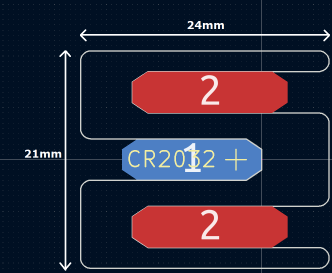
The tabs are 19 mm long and 4 mm wide.

Quite wisely, [Dennis] kept his design simple, and avoided the temptation of feature creep. His requirements were to create a minimalist, credit card sized design, with his contact details printed on the silk legend, and some blinky LED’s.

The tallest component on such a design is usually the battery holder, and he could not find one that was low-profile and cheap. Drawing inspiration from The Art of Blinky Business Cards, he used the 0.8 mm thin PCB itself as the battery holder by means of flexible arms.

Connect-Four is a two player game similar to tic-tac-toe, but played on a grid seven columns across and six rows high. This meant using 42 dual-colour LED’s, which would require a large number of GPIO pins on the micro-controller. Using a clever combination of matrix and charlieplexing techniques, he was able to reduce the GPIO count down to 13 pins, while still managing to keep the track layout simple.

It also took him some extra effort to locate dual colour, red / green LED’s with a sufficiently low forward voltage drop that could work off the reduced output resulting from the use of charlieplexing. At the heart of the business card is an ATtiny1616 micro-controller that offers enough GPIO pins for the LED matrix as well as the four push button switches.

His first batch of prototypes have given him a good insight on the pricing and revealed several deficiencies that he can improve upon the next time around. [Dennis] has shared KiCad schematic and PCB layout files for anyone looking to get inspired to design their own PCB business cards.

Continue reading “Blinky Business Card Plays Snake And Connect Four”

Dreaming Of A Transparent (PCB) Christmas

[Carl] wanted to put his force sensors on a transparent PCB and had to ask his board vendor for a special sample. Flexible PCBs are available on transparent substrates made of PET, but they are not as common as polyimide boards. As [Carl] found out, these boards are a bit thicker, a bit less flexible, and don’t hold up to very high heat as well as the standard boards. Undeterred, he designed a 3D Christmas tree using the clear boards. The result that you can see in the video below looks pretty good and would have been hard to duplicate with conventional means.

When you build the board it is as a flat spiral, but lifting it in the center allows it to expand into a conical tree shape. The circuit itself is just an LED blinker, but the flexible board is the interesting part.

Continue reading “Dreaming Of A Transparent (PCB) Christmas”

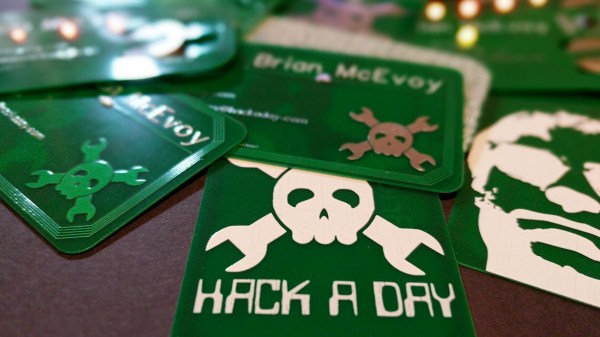
The Art Of Blinky Business Cards

Business cards are stuck somewhere between antiquity and convenience. On one hand, we have very convenient paperless solutions for contact swapping including Bluetooth, NFC, and just saying, “Hey, put your number into my phone, please.” On the other hand, holding something from another person is a more personal and memorable exchange. I would liken this to the difference between an eBook and a paperback. One is supremely convenient while the other is tactile. There’s a reason business cards have survived longer than the Rolodex.

Protocols and culture surrounding the exchange of cards are meant to make yourself memorable and a card which is easy to associate with you can work long after you’ve given your card away. This may seem moot if you are assigned cards when you start a new job, but personal business cards are invaluable for meeting people outside of work and you are the one to decide how wild or creative to make them.

Continue reading “The Art Of Blinky Business Cards”

Print A Flexible Keypad

[Micah Elizabeth Scott] needed a custom USB keyboard that wrapped around a post. She couldn’t find exactly what she wanted so she designed and printed it using flexible Nijaflex filament. You can see the design process and the result in the video below.

The electronics rely on a Teensy, which can emulate a USB keyboard easily. The keys themselves use the old resistor divider trick to allow one analog input on the Teensy to read multiple buttons. This was handy, but also minimized the wiring on the flexible PCB.

The board itself used Pyralux that was milled instead of etched. Most of the PCB artwork was done in KiCAD, other than the outline which was done in a more conventional CAD program.

Continue reading “Print A Flexible Keypad”

Print Flexible PCBs With A 3D Printer

Let’s get it out of the way right up front: you still need to etch the boards. However, [Mikey77] found that flexible plastic (Ninjaflex) will adhere to a bare copper board if the initial layer height is set just right. By printing on a thin piece of copper or conductive fabric, a resist layer forms. After that, it is just simple etching to create a PCB. [Mikey77] used ferric chloride, but other etchants ought to work, as well.

Sound simple, but as usual, the devil is in the details. [Mikey77] found that for some reason white Ninjaflex stuck best. The PCB has to be stuck totally flat to the bed, and he uses spray adhesive to do that. Just printing with flexible filament can be a challenge. You need a totally constrained filament path, for one thing.

Continue reading “Print Flexible PCBs With A 3D Printer”