More Microwave Metal Casting

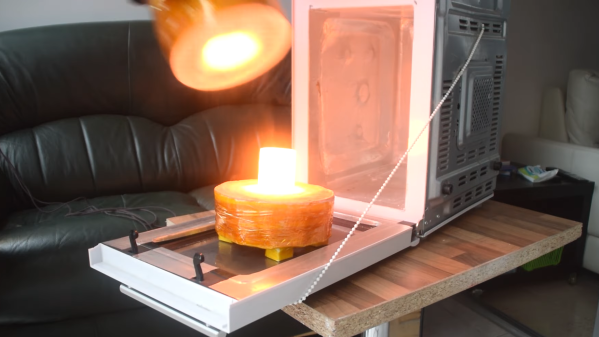
If you think you can’t do investment casting because you don’t have a safe place to melt metal, think again. Metal casting in the kitchen is possible, as demonstrated by this over-the-top bathroom hook repair using a microwave forge.

Now, just because it’s possible doesn’t mean it’s advisable. There are a lot better ways to fix something as mundane as a broken bathroom hook, as [Denny] readily admits in the video below. But he’s been at the whole kitchen forging thing since building his microwave oven forge, which uses a special but easily constructed ceramic heat chamber to hold a silicon carbide crucible. So casting a replacement hook from brass seemed like a nice exercise.

The casting process starts with a 3D-printed model of the missing peg, which gets accessories such as a pouring sprue and a thread-forming screw attached to it with cheese wax. This goes into a 3D-printed mold which is filled with a refractory investment mix of plaster and sand. The green mold is put in an air fryer to dry, then wrapped in aluminum foil to protect it while the PLA is baked out in the microwave. Scrap brass gets its turn in the microwave before being poured into the mold, which is sitting in [Denny]’s vacuum casting rig.

The whole thing is over in seconds, and the results are pretty impressive. The vacuum rig ensures metal fills the mold evenly without voids or gaps. The brass even fills in around the screw, leaving a perfect internal thread. A little polishing and the peg is ready for bathroom duty. Overly complicated? Perhaps, but [Denny] clearly benefits from the practice jobs like this offer, and the look is pretty cool too. Still, we’d probably want to do this in the garage rather than the kitchen.
Continue reading “More Microwave Metal Casting”

Radio Waves Bring The Heat With This Microwave-Powered Forge

Depending on the chef’s skill, many exciting things can happen in the kitchen. Few, however, grab as much immediate attention as when a piece of foil or a fork accidentally (?) makes it into the microwave oven. That usually makes for a dramatic light show, accompanied by admonishment about being foolish enough to let metal anywhere near the appliance. So what’s the deal with this metal-melting microwave?

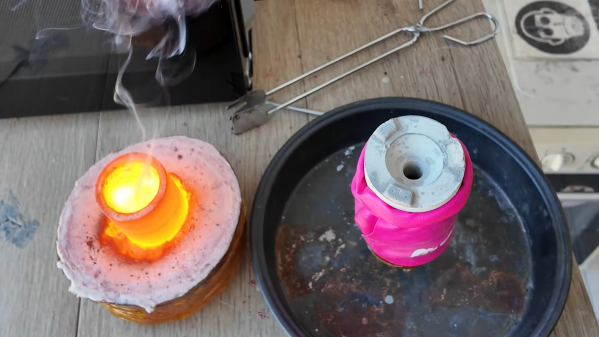
As it turns out, with the proper accessories, a standard microwave makes a dandy forge. Within limits, anyway. According to [Denny], who appears to have spent a lot of time optimizing his process, the key is not so much the microwave itself, but the crucible and its heat-retaining chamber. The latter is made from layers of ceramic insulating blanket material, of the type used to line kilns and furnaces. Wrapped around a 3D printed form and held together with many layers of Kapton tape, the ceramic is carefully shaped and given a surface finish of kiln wash.

While the ceramic chamber’s job is to hold in heat, the crucible is really the business end of the forge. Made of silicon carbide, the crucible absorbs the microwave energy and transduces it into radiant heat — and a lot of it. [Denny] shares several methods of mixing silicon carbide grit with sodium silicate solution, also known as water glass, as well as a couple of ways of forming the crucible, including some clever printed molds.

As for results, [Denny] has tried melting all the usual home forge metals, like aluminum and copper. He has also done brass, stainless steel, and even cast iron, albeit in small quantities. His setup is somewhat complicated — certainly more complex than the usual propane-powered forge we’ve seen plenty of examples of — but it may be more suitable for people with limited access to a space suitable for lighting up a more traditional forge. We’re not sure we’d do it in the kitchen, but it’s still a nice skill to keep in mind.

Continue reading “Radio Waves Bring The Heat With This Microwave-Powered Forge”

3D Printed Forge For Recycling

If you own a CNC and have kept tabs on metal prices these past few years (honestly months), you might shed a small tear as you watch chips fly off your work and into the trash. With a sigh, these flecks and pieces are consigned to be the cost of machining a part. Thankfully, the fine folks at [ActionBox] have been working on a 3d printed plaster forge for recycling their metal scraps.

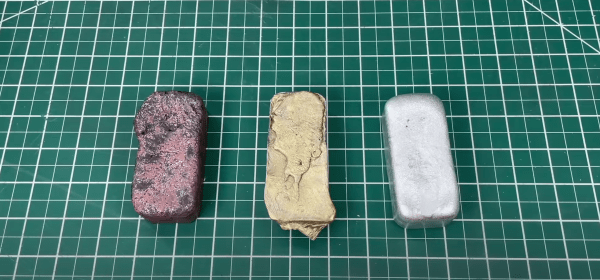
The team ordered some graphite crucibles of a few sizes from a large online bookstore and started 3D printing some molds for crucible holders. They started with a smaller version to try the method. While the walls were too thin in that initial version, the approach was proven. With slightly thicker walls, the medium-sized version worked much better. The goal of the forge was to smelt copper as they had a lot of thick copper wire lying around. Armed with several propane torches, they started melting aluminum and brass, which worked reasonably well. However, the melting point of copper continued to elude them (1984°F or 1085°C).  To counter this, the [ActionBox] team bought some new torches that provided significantly higher BTU output, while still fitting the holes in the mold. This did the trick!

The mold to accommodate the large crucible was massive and printed in four sections. The team did melt copper successfully and had four ingots to show off. We want to stress how dangerous molten copper and other metals are, particularly regarding things you might not realize have moisture soaked up inside. Proper PPE is essential to use these things without getting hurt. [ActionBox] has some helpful pointers in that area, but they admit they are relatively new to forging and casting themselves. Perhaps version two can incorporate a flip lid for added safety.

Video after the break.
Continue reading “3D Printed Forge For Recycling”

How To Forge A Skillet From Scratch

Cookware isn’t something we typically build ourselves; you’d want a well-equipped metal shop to do the job and do it right. [Torbjörn Åhman] has just that, however, and set about forging a stout-looking skillet from scratch.

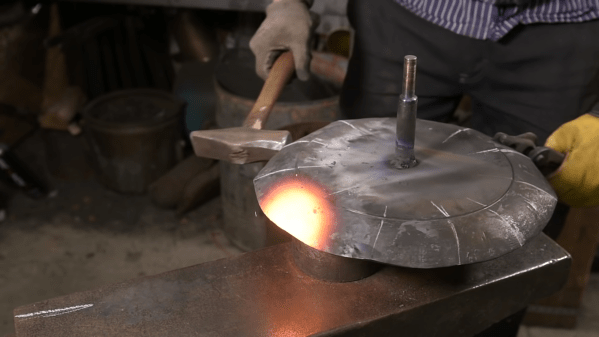
The build starts with a round disc of steel serving as a blank for the project. The blank is spun up and the outer perimeter ground down thinner with an angle grinder in what looks like a moderately sketchy operation. A forge is then used to heat the blank so that it can be shaped into a pan using a hammer. Slowly, as the metal is beaten one way and then t’other, the skillet begins to form. A belt sander takes off high points on the outside, and a torch is then used to square up the base of the pan so it sits nicely. Finally a handle attached with some stout rivets, and the newly formed piece of cookware gets a seasoning with sunflower oil.

The project shows just how many special skills are required to make even simple cookware by hand. It’s nice to see some keeping the old methods alive, too. Video after the break.

Continue reading “How To Forge A Skillet From Scratch”

A flip-top foundry for metal casting

Flip-Top Foundry Helps Manage The Danger Of Metal Casting

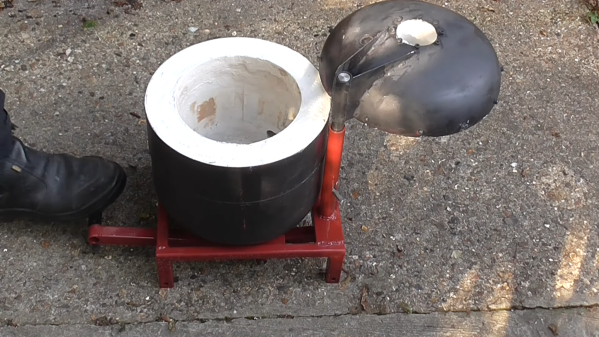
Melting aluminum is actually pretty easy to do, which is why it’s such a popular metal for beginners at metal casting. Building a foundry that can melt aluminum safely is another matter entirely, and one that benefits from some of the thoughtful touches that [Andy] built into his new propane-powered furnace. (Video, embedded below.)

The concern for safety is not at all undue, for while aluminum melts at a temperature that’s reasonable for the home shop, it’s still a liquid metal that will find a way to hurt you if you give it half a chance. [Andy]’s design minimizes this risk primarily through the hands-off design of its lid. While most furnaces have a lid that requires the user to put his or her hands close to the raging inferno inside, or that dangerously changes the center of mass of the whole thing as it opens, this one has a fantastic pedal-operated lid that both lifts and twists. Leaving both hands free to handle tongs is a nice benefit of the design, too.

The furnace follows a lot of the design cues we’ve seen before, starting as it does with an empty party balloon helium tank. The lining is a hydrid of ceramic blanket material and refractory cement; another nice safety feature is the drain channel cast into the floor of the furnace in case of a cracked crucible. The furnace is also quite large, at least compared to [Andy]’s previous DIY unit, and has a sturdy base that aids stability — another plus in the safety column.

Every time we see a new furnace design, we get the itch to start getting into metal casting. And with the barrier to entry as low as a KFC bucket or an old fire extinguisher, why not give it a try? Although it certainly pays to know what can go wrong before diving in.

Continue reading “Flip-Top Foundry Helps Manage The Danger Of Metal Casting”

Blacksmithing For The Uninitiated: Curves And Rings

You know the funny looking side of the anvil? That’s where the best curves come from. It’s called the anvil horn and is the blacksmith’s friend when bending steel and shaping it into curves.

The principle of bending a piece of steel stock is very easy to understand. Heat it up to temperature, and hammer it over a curved profile to the intended shape. A gentler touch is required than when you are shaping metal. That’s because the intent is to bend the metal rather than deform. Let’s take a look!

Continue reading “Blacksmithing For The Uninitiated: Curves And Rings”

Blacksmithing For The Uninitiated: Your First Time At The Anvil

For the past few months we’ve been running this series of Blacksmithing For The Uninitiated posts, exploring the art of forge work for a novice. It’s based upon my experience growing up around a working blacksmith’s business and becoming an enthusiastic if somewhat inexpert smith, and so far we’ve spent our time looking at the equipment you might expect to need were you embarking on your own blacksmith work. Having assembled by now a basic forge of our own it’s now time to fire it up and take to the anvil for our first bit of smithing.

Lighting a forge is easy enough. Some people do it with a gas torch, but I break a piece of firewood into sticks using a hammer with the fuller set in the hardy hole on the anvil as an impromptu splitter. Making a small fire by lighting some paper under my pile of sticks placed on the hearth next to the tuyere I start the blower and then pile coke on top of the resulting conflagration. After about ten minutes I will have a satisfying roar and a heap of glowing coals, and as they burn there will be some slag collecting in the bottom of the fire that I will eventually need to rake out. Continue reading “Blacksmithing For The Uninitiated: Your First Time At The Anvil”