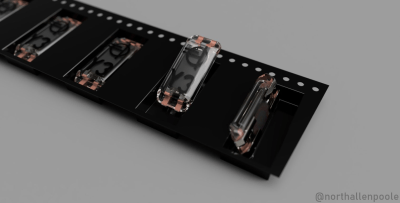
[Nick Poole] shared his circuitous journey into the obscure world of homemade vacuum tubes on the Supercon 2022 stage. It began innocently enough when he saw [Usagi Electric]’s single bit computer vacuum tube computer, which uses dozens of vacuum tubes. He got to wondering, could you make vacuum-tube-like devices containing multiple elements? There are some examples, like the 256-bit memory Selectron tube from the 1950’s, but nothing general purpose like a 555 timer or quad NAND gate packages. Unencumbered by a deep understanding of how vacuum tubes work, [Nick] proceeds to fill this void by imagining Integrated Thermionic, a fictitious company that exists in an alternate history where transistors were not invented and the vacuum tube reigns supreme. He also showcases a variety of innovative products that Integrated Thermionics manufactured over the decades, including surface mount tubes.
He quickly became inspired by folks who were making their own vacuum tubes in a variety of environments, like [JDFlyback] who is making tubes in his garage to [Dalibor Farný] who is making artisan Nixie tubes from his large workshop in a 17th century castle. At this point, [Nick] takes a deep dive down the rabbit hole and starts accumulating the equipment and supplies for making tubes.
There’s a good chance you haven’t worked with tubes or learned their theory of operation. [Nick] gives a very approachable overview of vacuum tube technology, building up from the very basic of diodes, triodes, and pentodes. And then he digs into all the supplies one needs to make these yourself. Except in specialized applications, vacuum tubes are rarely used anymore, so it is no surprise that there the companies making the necessary bits and pieces are few and far between. The few that do exist have large minimum orders not exactly suitable to the hobbyist, although in some cases [Nick] succeeded in getting samples.
When obtaining the necessary equipment to build your own vacuum tubes, you’ll run in to similar issues as with supplies. There are few companies with tooling that is both suitable and affordable. [Nick] succeeded by outfitting his lab with a combination of home-built tools and surplus equipment. In fact, he’s started in open source hardware project called Foton that’s a glass working lathe designed specifically for small scale vacuum tubes manufacturing — no repository yet, it’s a work in progress.
Be aware of inherited wisdom — it turns out that large, expensive systems foster superstitions because gremlins are difficult to diagnose.
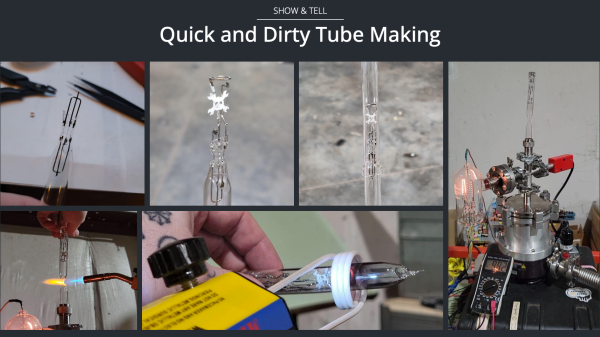
[Nick] wraps up with a show-and-tell describing a special Hackaday diode vacuum tube that he completed just days before the presentation, featuring a Jolly-Wrencher-shaped anode cut from a thin sheet of nickel. It does work as a diode, although it won’t be winning any efficiency awards — the filament requires 22 W of heater power ( 10 V @ 2 A ), and at 60 V plate potential it can only pass 2 mA. [Nick] was hoping to make the anode glow by coating it with a cathodoluminescent phosphor, the technique used in vacuum fluorescent displays. Despite jumping through hoops and obtaining a sample of the necessary phosphor powder, the application process has so far eluded him.
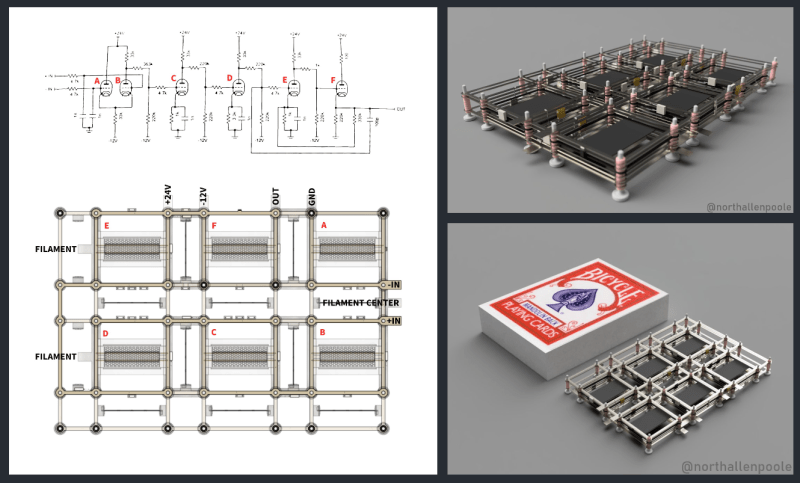
[Nick] has a great presentation style and is clearly passionate about this topic. There are so many fields involved in making vacuum tubes, each section of this talk could itself be an entire presentation. We hope [Nick]’s vacuum-tube-making skills and lab continue to grow. And we eagerly anticipate seeing his Planar Element Multi-Valve, a six-pentode array the size of a pack of playing cards (demonstrated next year?). The slide presentation from the talk is available here (PDF).