Everything You Didn’t Know You Need To Know About Glitching Attacks

If you’ve always been intrigued by the idea of performing hardware attacks but never knew where to start, then we’ve got the article for you: an in-depth look at the hows and whys of hardware glitching.

Attentive readers will recall that we’ve featured [Matthew Alt]’s reverse engineering exploits before, like the time he got root on a Linux-based arcade cabinet. For something a bit more challenging, he chose a Trezor One crypto wallet this time. We briefly covered a high-stakes hack (third item) on one of these wallets by [Joe Grand] a while back, but [Matthew] offers much, much more detail.
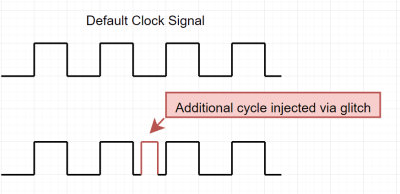
After introducing the theory of glitching attacks, which seek to force a processor into an undefined state using various methods, [Matthew] discusses the specifics of the Trezor wallet and how the attack was planned.

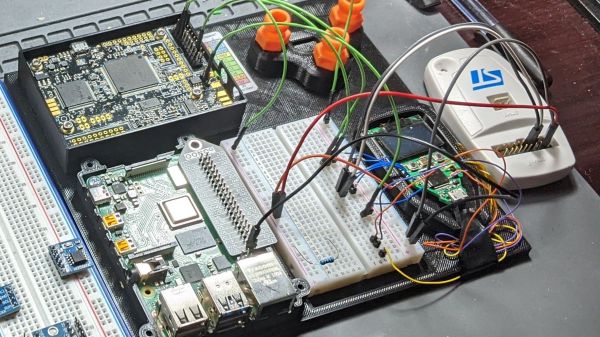
His target — the internal voltage regulator of the wallet’s STM32 microcontroller — required desoldering a few caps before the attack could begin, which was performed with a ChipWhisperer. After resolving a few initial timing issues, he was able to glitch the chip into dropping to the lowest level of readout protection, which gave access to the dongle’s SRAM through an ST-Link debugger.

While this summary may make the whole thing sound trivial, it’s obvious that the attack was anything but, nor was the effort that went into writing it all up. The whole thing reads a little like a techno-thriller, and there’s plenty of detail there if you’re looking for a tutorial on chip glitching. We’re looking forward to part 2, which will concentrate on electromagnetic fault-injection using a PicoEMP and what looks like a modified 3D printer.

BBQ lighter fault injector

Blast Chips With This BBQ Lighter Fault Injection Tool

Looking to get into fault injection for your reverse engineering projects, but don’t have the cash to lay out for the necessary hardware? Fear not, for the tools to glitch a chip may be as close as the nearest barbecue grill.

If you don’t know what chip glitching is, perhaps a primer is in order. Glitching, more formally known as electromagnetic fault injection (EMFI), or simply fault injection, is a technique that uses a pulse of electromagnetic energy to induce a fault in a running microcontroller or microprocessor. If the pulse occurs at just the right time, it may force the processor to skip an instruction, leaving the system in a potentially exploitable state.

EMFI tools are commercially available — we even recently featured a kit to build your own — but [rqu]’s homebrew version is decidedly simpler and cheaper than just about anything else. It consists of a piezoelectric gas grill igniter, a little bit of enameled magnet wire, and half of a small toroidal ferrite core. The core fragment gets a few turns of wire, which then gets soldered to the terminals on the igniter. Pressing the button generates a high-voltage pulse, which gets turned into an electromagnetic pulse by the coil. There’s a video of the tool in use in the Twitter thread, showing it easily glitching a PIC running a simple loop program.

To be sure, a tool as simple as this won’t do the trick in every situation, but it’s a cheap way to start exploring the potential of fault injection.

Thanks to [Jonas] for the tip.

PicoEMP EMFI tool

Glitch Your Way To Reverse-Engineering Glory With The PicoEMP

Most of our projects are, to some extent, an exercise in glitch-reduction. Whether they’re self-inflicted software or hardware mistakes, or even if the glitches in question come from sources beyond our control, the whole point of the thing is to get it running smoothly and predictably.

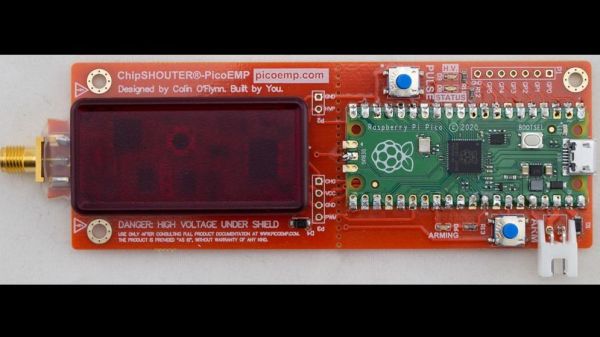
That’s not always the case, though. Sometimes inducing a glitch on purpose can be a useful tool, especially when reverse engineering something. That’s where this low-cost electromagnetic fault injection tool could come in handy. EMFI is a way to disrupt the normal flow of a program running on an embedded system; properly applied and with a fair amount of luck, it can be used to put the system into an exploitable state. The PicoEMP, as [Colin O’Flynn] dubs his EMFI tool, is a somewhat tamer version of his previous ChipSHOUTER tool. PicoEMP focuses on user safety, an important consideration given that its business end can put about 250 volts across its output. Safety features include isolation for the Raspberry Pi Pico that generates the PWM signals for the HV section, a safety enclosure over the HV components, and a switch to discharge the capacitors and prevent unpleasant surprises.

In use, the high-voltage pulse is applied across an injection tip, which is basically a ferrite-core antenna. The tip concentrates the magnetic flux in a small area, which hopefully will cause the intended glitch in the target system. The video below shows the PicoEMP being used to glitch a Bitcoin wallet, as well as some tests on the HV pulse.

If you’re interested in the PicoEMP and glitching in general, be sure to watch out for [Colin]’s 2021 Remoticon talk on the subject. Until that comes out, you might want to look into glitching attacks on a Nintendo DSi and a USB glitch on a Wacom tablet.

Continue reading “Glitch Your Way To Reverse-Engineering Glory With The PicoEMP”

555 timer circuit for the contest

Doing The Right Thing The Wrong Way: Dumping STM8 Firmware With 555 Timers

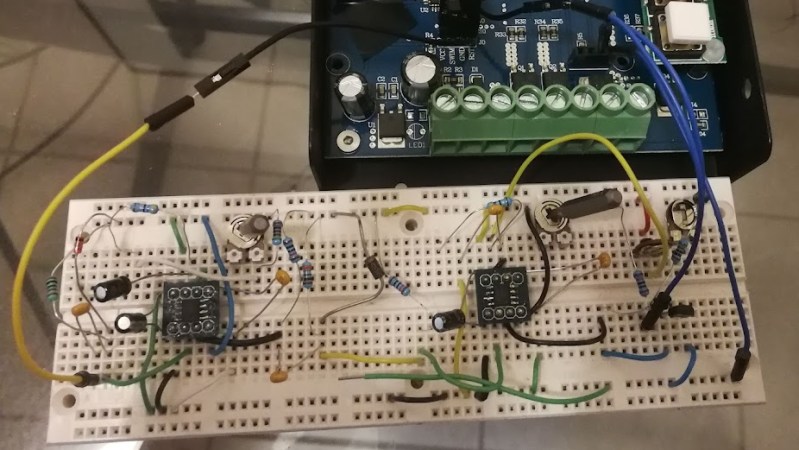
When [Jarrett] decided to enter the 555 Contest that’s just wrapped up, he leaned up on an idea that’s been rattling around in his noggin for a few years: Using 555 timers to trigger a firmware dump on a microcontroller. It’s definitely the wrong tool for the job, but [Jarrett] got it working and documented it nicely at Hackaday.io.

The premise is that by interrupting the power supply to the STM8 microcontroller at just the right time and for just the right duration, it would skip the instruction telling it not to allow its firmware to be read. Time and duration… things the 555 is well known for being capable of. There was a problem, however.

The first problem is that the duration was to be measured in nanoseconds. A garden variety 555 has can only pulse down to about 10 microseconds. The solution? Well, you’ll have to read the excellent project page to find out, but don’t worry- it’s a 555. The second problem? He was using 555’s!

Was [Jarrett] successful? After much fiddling and twiddling, he absolutely was! The old firmware was dumped from the STM8 processor and the new firmware could be flashed with impunity.

This 555 contest has seen some truly epic entries, including but not limited to this 555 based accordion like instrument that this particular author just can’t get enough of!


EM-Glitching For Nintendo DSi Boot ROMs

Some hacker events are muddy and dusty affairs in distant fields, others take place in darkened halls, but I went to one that can be experienced as a luxury break in a European city steeped in culture and history. Newline takes place at Hackerspace Gent, in the Belgian city of that name, and I was there last weekend to catch the atmosphere as well as the programme of talks and workshops. And of those a good start was made by [PoroCYon], whose fascinating introduction to the glitching techniques involved in recovering the boot ROMs from a Nintendo DSi taught us plenty of things we hadn’t seen before.

The talk which you’ll find below the break starts by describing the process of glitching — using power supply interference to interrupt the operation of a microprocessor and avoid certain instructions — to bypass security code. It then moves on to some of the protection mechanisms used in the various generations of Nintendo consoles and handhelds, before moving on to the work on the DSi at which point the talk moved onto a field which may be old hat in glitching circles but was new to me; that of EM glitching.

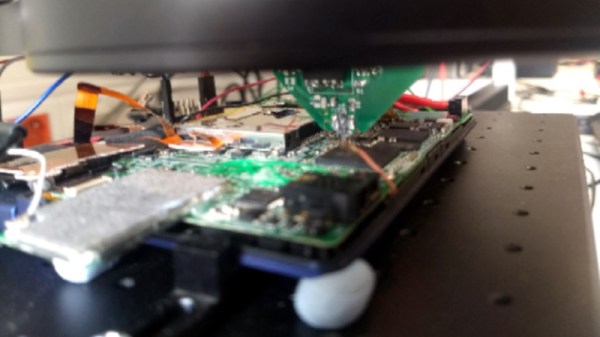
EM glitching involves using a small coil to generate precisely timed electromagnetic pulses which induce the glitch voltages in the chip. The fascinating part is that the EM probe can be made small enough to target individual areas of the chip, so using it involves a brute-force technique trying all combinations of timing and position with the probe held in a computer-controlled X-Y mount.

The DSi has two processors on board, this achieves success with the ARM7 but leaves its companion ARM9 as yet untapped. There are a promising set of attack vectors left to try, of which the ARM7 placing the ARM9 into a state from which it can be glitched seems to be the most promising. It’s fairly obvious that there’s plenty more to come from this quarter.

More details of the talk can be found in this repository, and for those interested in EM glitching you can find out more in this video and in this project using it to attack a Gecko microcontroller.

Continue reading “EM-Glitching For Nintendo DSi Boot ROMs”

The Cheap Way To Glitch An STM8 Microcontroller

Reverse engineering or modifying a device often requires you to access the firmware stored on a microcontroller. Since companies are usually not fond of people who try to peek into their proprietary data, most commercial devices are readout protected. [rumpeltux] ran into this problem when he tried to dump the firmware on an HC-12 wireless serial communication module for yet undisclosed reasons. Hacking into the device was a challenge that he gladly accepted and in the end, he succeeded by building a low-cost setup for voltage glitching.

Voltage glitching is a form of fault injection that has, e.g., been successfully used to hack the Playstation Vita. It involves the injection of voltage spikes on the power line in order to force the bootloader to skip security checks. The hard thing is trying to find the right shape of the waveform and the best way to inject the signal.

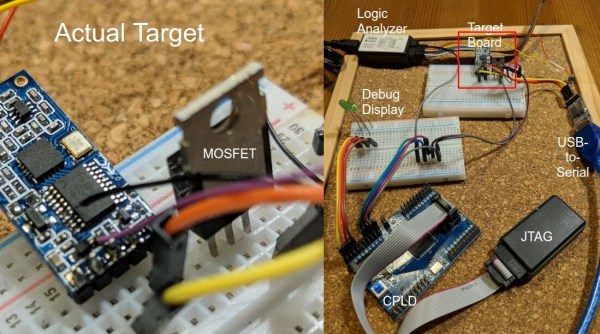
While there are already open-source boards for fault injection like ChipWhisperer, [rumpeltux] chose to build his own setup around an FPGA. By using a cheap EPM240 board, some MOSFET, and a USB-to-Serial converter, the total costs of the glitching setup were under 20 Euros. [rumpeltux] then recorded a larger number of voltage traces on the VCC pin around the reset phase and analyzed the differences. This helped him to pinpoint the best time for injecting the signal and refine the search space. After some unsuccessful attempts to glitch the VCC and GND pins, he got lucky when using one of the voltage regulator pins instead.

Be sure not to miss Samy Kamkar’s talk at Supercon 2019 if you want to know more about hardware attacks or how to eavesdrop on people using a bag of potato chips.

The ESP32, Laid Bare

Most readers will be familiar with the ESP32, Espressif’s dual-core processor with integrated WiFi and Bluetooth. Few of us though will have explored all of its features, including its built-in encryption facilities and secure booting capability. With these, a developer can protect and secure their code, and keep their devices secure.

That sense of security may now be illusory though, thanks to [LimitedResults] who has developed a series of attacks on the chip that compromise its crypto core, secure boot, and flash encryption. This enables both the chance of arbitrary code execution and firmware extraction on locked-down ESP32 devices.

To achieve all this he used a glitching technique on the device’s power supply, inserting a carefully timed glitch in the rail to coincide with a particular instruction being executed. For those of us who are not experts in this technique, he provides a basic primer with a description of his home-made glitcher made using a CMOS switch chip.

It appears that there is no solution to this attack short of new silicon, however, it should be borne in mind that it’s something that depends upon a specialist hacker with a well-equipped bench, and is thus only likely to be a significant headache to manufacturers. But it undermines a key feature of a major line of microcontrollers, and as such it remains a significant piece of work.