See How To Effectively Use A Green Screen In A Limited Space

Virtual green screens are pretty neat, but for results, nothing beats the real thing. But what if you have limited space? [Fred Emmott] had about 30 inches behind his desk to work with, and shares what it took to make a green screen work reliably in a limited space.
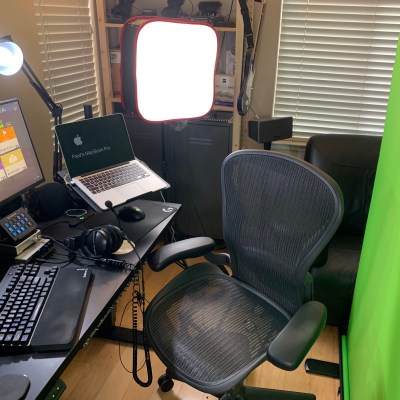
Even (and consistently deployable) lighting is even more important than the camera.

When it comes right down to it, the fundamentals of camera work (lighting, angles, and so on) are unchanged, but hanging a green screen only 30 inches behind one’s desk does make it a bit more challenging to dial in the right environment. In addition, [Fred] wanted a solution that could be deployed and packed away without much of a hassle, and without taking up too much storage space. He ended up using a collapsible green screen that can be pulled straight up and out from its container, similar to portable stand-up banners used at trade shows.

As for the camera end of things, [Fred] found that reliable, quality lighting was critically important, even more so than the camera used. For repeatable results, he suggests disabling any automatic features (such as low light enhancement, or auto white balance, and settings of that nature) and to use LED lighting in the ‘daylight’ range for illumination and fill. The key to good green screen results is to light things evenly, and this is a bit more challenging when working in such a tight space.

To deal with this, [Fred] suggests lights that can be easily repositioned, and put them as far back from things as you can. Get the lighting as even as possible, then adjust your software to match ([Fred] uses OBS Studio) for best results. Once that’s done, it can be more easily set up and torn down with minimal fiddling.

Computers sure make all this much easier than it was back in the day, and if you’re curious, here is all about how green screens were done before the digital age.

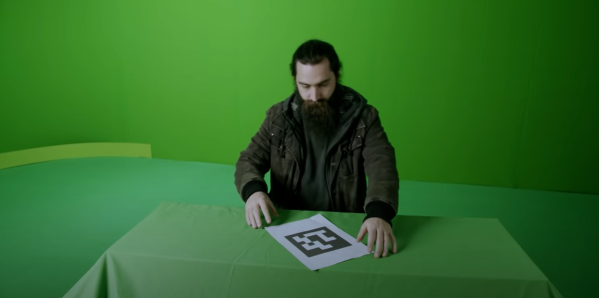
Someone setting down an arUco tag

Make Your Own Virtual Set

An old adage says out of cheap, fast, and good, choose two. So if you’re like [Philip Moss] and trying to make a comedy series on a limited budget rapidly, you will have to take some shortcuts to have it still be good. One shortcut [Philip] took was to do away with the set and make it all virtual.

If you’ve heard about the production of a certain western-style space cowboy that uses a virtual set, you probably know what [Philip] did. But for those who haven’t been following, the idea is to have a massive LED wall and tracking of where the camera is. By creating a 3d set, you can render that to the LED wall so that the perspective is correct to the camera. While a giant LED wall was a little out of budget for [Philip], good old green screen fabric wasn’t. The idea was to set up a large green screen backdrop, put some props in, get some assets online, and film the different shots needed. The camera keeps track of where in the virtual room it is, so things like calculating perspective are easy. They also had large arUco tags to help unreal know where objects are. You can put a wall right where the actors think there’s a wall or a table exactly where you put a table covered in green cloth.

Initially, the camera was tracked using a Vive tracker and LiveLink though the tracking wasn’t smooth enough while moving to be used outside of static shots. However, this wasn’t a huge setback as they could move the camera, start a new shot, and not have to change the set in Unreal or fiddle with compositing. Later on, they switched to a RealSense camera instead of the Vive and found it much smoother, though it did tend to drift.

The end result called ‘Age of Outrage’, was pretty darn good. Sure, it’s not perfect, but it doesn’t jump out and scream “rendered set!” the way CGI tv shows in the 90’s did. Not too shabby considering the hardware/software used to create it!

The World Is Your Green Screen

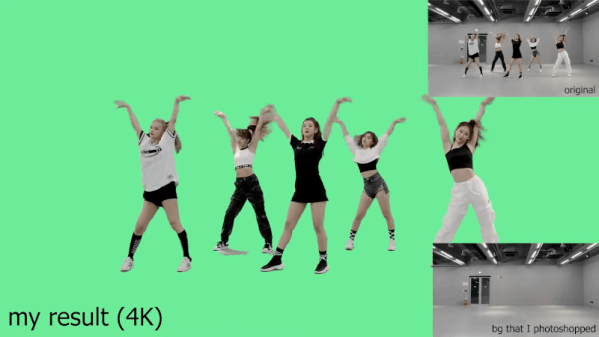
This year has been the year of home video conferencing. If you are really on the ball, you’ve managed to put some kind of green screen up so you can hide your mess and look as though you are in your posh upper east side office space. However, most of the consumer video conferencing now has some way to try to guess what your background is and replace it even without a green screen. The results, though, often leave something to be desired. A recent University of Washington paper outlines a new background matting procedure using machine learning and, as you can see in the video below, the results are quite good. There’s code on GitHub and even a Linux-based WebCam filter.

The algorithm does require a shot of the background without you in it, which we imagine needs to be relatively static. From watching the video, it appears the acid test for this kind of software is spiky hair. There are several comparisons of definitely not bald people flipping their hair around using this method and other background replacers such as the one in Zoom.

Continue reading “The World Is Your Green Screen”

Background Substitution, No Green Screen Required

All this working from home that people have been doing has a natural but unintended consequence: revealing your dirty little domestic secrets on a video conference. Face time can come at a high price if the only room you have available for work is the bedroom, with piles of dirty laundry or perhaps the incriminating contents of one’s nightstand on full display for your coworkers.

There has to be a tech fix for this problem, and many of the commercial video conferencing platforms support virtual backgrounds. But [Florian Echtler] would rather air his dirty laundry than go near Zoom, so he built a machine-learning background substitution app that works with just about any video conferencing platform. Awkwardly dubbed DeepBackSub — he’s working on a better name — the system does the hard work of finding the person in the frame with Tensorflow Lite. After identifying everything in the frame that’s a person, OpenCV replaces everything that’s not with whatever you choose, and the modified scene is piped over a virtual video device to the videoconferencing software. He’s tested on Firefox, Skype, and guvcview so far, all running on Linux. The resolution and framerates are limited, but such is the cost of keeping your secrets and establishing a firm boundary between work life and home life.

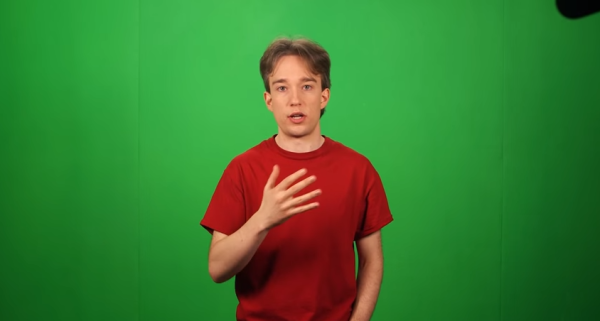
[Florian] has taken the need for a green screen out of what’s formally known as chroma key compositing, which [Tom Scott] did a great primer on a few years back. A physical green screen is the traditional way to do this, but we honestly think this technique is great and can’t wait to try it out with our Hackaday colleagues at the weekly videoconference.

GreenScreen

How Green Screen Worked Before Computers

If you know anything about how films are made then you have probably heard about the “green screen” before. The technique is also known as chroma key compositing, and it’s generally used to merge two images or videos together based on color hues. Usually you see an actor filmed in front of a green background. Using video editing software, the editor can then replace that specific green color with another video clip. This makes it look like the actor is in a completely different environment.

It’s no surprise that with computers, this is a very simple task. Any basic video editing software will include a chroma key function, but have you ever wondered how this was accomplished before computers made it so simple? [Tom Scott] posted a video to explain exactly that.

In the early days of film, the studio could film the actor against an entirely black background. Then, they would copy the film over and over using higher and higher contrasts until they end up with a black background, and a white silhouette of the actor. This film could be used as a matte. Working with an optical printer, the studio could then perform a double exposure to combine film of a background with the film of the actor. You can imagine that this was a much more cumbersome process than making a few mouse clicks.

For the green screen effect, studios could actually use specialized optical filters. They could apply one filter that would ignore a specific wavelength of the color green. Then they could film the actor using that filter. The resulting matte could then be combined with the footage of the actor and the background film using the optical printer. It’s very similar to the older style with the black background.

Electronic analog video has some other interesting tricks to perform the same basic effect. [Tom] explains that the analog signal contained information about the various colors that needed to be displayed on the screen. Electronic circuits were built that could watch for a specific color (green) and replace the signal with one from the background video. Studios even went so far as to record both the actor and a model simultaneously, using two cameras that were mechanically linked together to make the same movements. The signals could then be run through this special circuit and the combined image recorded all simultaneously.

There are a few other examples in the video, and the effects that [Tom] uses to describe these old techniques go a long way to help understand the concepts. It’s crazy to think of how complicated this process can be, when nowadays we can do it in minutes with the computers we already have in our homes. Continue reading “How Green Screen Worked Before Computers”