Mokeylaser: A DIY Laser Engraver That You Can Easily Build

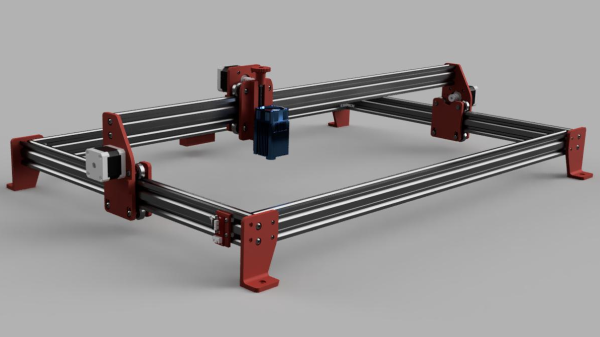
[Mark aka Mokey] borrowed his friend’s open-frame laser engraver for a while, and found it somewhat lacking in features and a bit too pricey for what it was. Naturally, he thought he could do better (video, embedded below.) After a spot of modelling in Fusion 360, and some online shopping at the usual places, he had all the parts needed to construct an X-Y bot, and we reckon it looks like a pretty good starting point. [Mark] had a Sainsmart FL55 5.5W laser module kicking around, so that was dropped into the build, together with the usual Arduino plus CNC shield combo running GRBL.

[Mark] has provided the full F360 source (see the mokeylaser GitHub) and a comprehensive bill-of-materials, weighing in at about $400, and based upon the usual 2040 aluminium extrusions. This makes MokeyLaser a reasonable starting point for further development. Future plans include upgrading the controller to something a bit more modern (and 32-bits) as well as a more powerful laser (we do hope he’s got some proper laser glasses!) and adding air assist. In our experience, air assist will definitely improve matters, clearing out the smoke from the beam path and increasing the penetration of the laser significantly. We think there is no need for more optical power (and greater risk) for this application. [Mark] says in the video that he’s working on an additional build video, so maybe come by later and check that out?

Obviously, MokeyLaser is by no means the only such beast we’ve featured, here’s the engravinator for starters. For even more minimalism, we covered a build with some smart optics doing all the work. But what if you don’t happen to have a 5W laser module “lying around” then perhaps try a more natural heat source instead?

Continue reading “Mokeylaser: A DIY Laser Engraver That You Can Easily Build”

ESP32 Camera Slider Build Keeps Things In Perspective

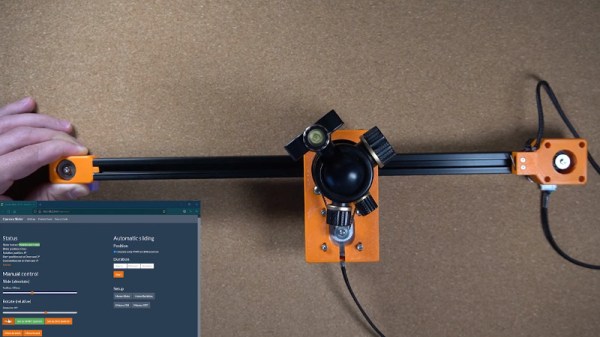
We’ve seen a lot of camera slider builds here at Hackaday, and for good reason: having one really lets you take your project documentation, especially videos, to the next level. It’s one of those force multiplier builds — after you’ve completed it, it can help you make all your future projects just that much better. But we’re also no strangers to seeing these projects become overly complex, which can often make it difficult for others to replicate.

But that’s not the case here. The motorized camera slider that [Sasa Karanovic] recently sent our way does exactly what you’d expect, and little else. That’s not meant as a dig — sometimes the best approach is to keep it simple. Unless you’re a professional photographer or videographer, it’s unlikely you need a complicated motion rig. This design is perfect for the hacker or maker who wants to spruce up their project videos, but doesn’t want to spend months fiddling with the design. Continue reading “ESP32 Camera Slider Build Keeps Things In Perspective”

Stitching Up Custom Belts

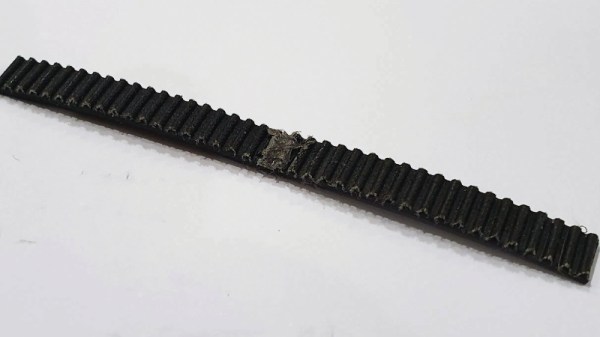
If you’ve got a 3D printer, you’re probably familiar with the reinforced belts that are commonly used on the X and Y axis. These belts either come as long lengths that you attach to the machine on either end, or as a pre-sized loop. Traditional wisdom says you can’t just take a long length of belt and make your own custom loops out of it, but [Marcel Varallo] had his doubts about that.

This is a simple tip, but one that could get you out of a bind one day. Through experimentation, [Marcel] has found that you can use a length of so-called GT2 belt and make your own bespoke loop. The trick is, you need to attach the ends with something very strong that won’t hinder the normal operation of the belt. Anything hard or inflexible is right out the window, since the belt would bind up as soon as it had to go around a pulley.

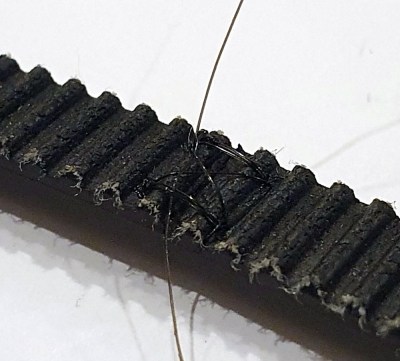
It seems the key is to cut both ends of the belt very flat, making sure the belt pattern matches perfectly. Once they’ve been trimmed and aligned properly, you stitch them together with nylon thread. You want the stitches to be as tight as possible, and the more you do, the stronger the end result will be.

[Marcel] likes to follow this up with a bit of hot glue, being careful to make sure the hardened glue takes the shape of the belt’s teeth. The back side won’t be as important, but a thin layer is still best. The end result is a belt strong enough for most applications in just a few minutes.

Would we build a 3D printer using hand-stitched GT2 belts? Probably not. But during a global pandemic, when shipments of non-essential components are often being delayed, we could certainly see ourselves running some stitched together belts while we wait for the proper replacement to come in. Gotta keep those face shields printing.

GT2 Belt Drive Conversion Of Printrbot Simple

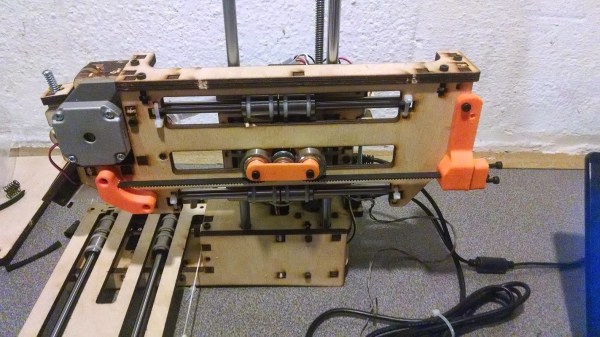
The early versions of the Printrbot Simple at about $300 were cheap enough for even the most cash-strapped hackers to put on their desks. Obviously, for that cost, a lot of design compromises were needed to keep it cheap. Sometimes, changes carry forward to the next iteration at no cost increase. One such improvement in the current version of the Printrbot is the belt drive. Unfortunately, if you have one of the late 2013 – early 2014 wood models, it is most likely being driven by a fishing line that loops over a rubber hose attached to the stepper motor. [jason] describes the process of upgrading the Printrbot Simple to a GT2 belt drive , using the designs posted by Thingiverse contributor [iamjonlawrence].

The trouble with the fishing line drive was that it would tend to get loose over time and needed to be pulled taut. Also, it affected precision when the line tended to wander over the drive shaft. The good thing with having rapid prototyping tools is you can make bootstrap improvements using them. Once the parts for the upgrade were printed, [jason] only needed some bearings, GT2 belts and pulleys to complete the upgrade. For those wanting to upgrade their old Printrbot Simple machines, [jason] guides you through the whole process via some detailed photographs and listing out the gotcha’s that you need to be careful about.