WOPR: Building Hardware Worth Sharing

It wouldn’t be much of a stretch to assume that anyone reading Hackaday regularly has at least progressed to the point where they can connect an LED to a microcontroller and get it to blink without setting anything on fire. We won’t even chastise you for not doing it with a 555 timer. It’s also not a stretch to say if you can successfully put together the “Hello World” of modern electronics on a breadboard, you’re well on the way to adding a few more LEDs, some sensors, and a couple buttons to that microcontroller and producing something that might come dangerously close to a useful gadget. Hardware hacking sneaks up on you like that.

Here’s where it gets tricky: how many of us are still stuck at that point? Don’t be shy, there’s no shame in it. A large chunk of the “completed” projects that grace these pages are still on breadboards, and if we had to pass on every project that still had a full-on development board like the Arduino or Wemos D1 at its heart…well, let’s just say it wouldn’t be pretty.

Of course, if you’re just building something as a personal project, there’s often little advantage to having a PCB spun up or building a custom enclosure. But what happens when you want to build more than one? If you’ve got an idea worth putting into production, you’ve got to approach the problem with a bit more finesse. Especially if you’re looking to turn a profit on the venture.

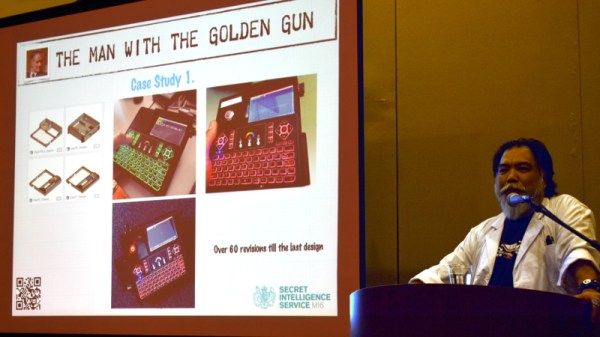
At the recent WOPR Summit in Atlantic City, there were a pair of presentations which dealt specifically with taking your hardware designs to the next level. Russell Handorf and Mike Kershaw hosted an epic four hour workshop called Strategies for your Projects: Concept to Prototype and El Kentaro gave a fascinating talk about his design process called Being Q: Designing Hacking Gadgets which together tackled both the practical and somewhat more philosophical aspects of building hardware for an audience larger than just yourself.

Continue reading “WOPR: Building Hardware Worth Sharing”

Retrotechtacular: Field Assembling Airplanes Like Wartime “Ikea”

Imagine it’s 1943, and you have to transport 1,000 P-47 fighter planes from your factory in the United States to the front lines in Europe, roughly 5,000 miles over the open ocean. Flying them isn’t an option, the P-47 has a maximum range of only 1,800 miles, and the technology for air-to-air refueling of fighter planes is still a few years off. The Essex class aircraft carriers in use at this time could carry P-47s in a pinch, but the plane isn’t designed for carrier use and realistically you wouldn’t be able to fit many on anyway. So what does that leave?

It turns out, the easiest way is to simply ship them as freight. But you can’t exactly wrap a fighter plane up in brown paper and stick a stamp on it; the planes would need to be specially prepared and packed for their journey across the Atlantic. To get the P-47 inside of a reasonably shaped shipping crate, the wings, propeller, and tail had to come off and be put into a separate crate. But as any reader of Hackaday knows, getting something apart is rarely the problem, it’s getting the thing back together that’s usually the tricky part.

So begins the 1943 film “Uncrating and Assembly of the P-47 Thunderbolt Airplane which has been digitally restored and uploaded to YouTube by [Zeno’s Warbirds]. In this fascinating 40 minute video produced by the “Army Air Forces School of Applied Tactics”, the viewer is shown how the two crates containing the P-47 are to be unpacked and assembled into a ready-to-fly airplane with nothing more than manpower and standard mechanic’s tools. No cranes, no welders, not even a hanger: just a well-designed aircraft and wartime ingenuity.

Continue reading “Retrotechtacular: Field Assembling Airplanes Like Wartime “Ikea””

Building The Hackaday Superconference Badge

The best hardware conference is just a few weeks away. This is the Hackaday Superconference, and it’s two days of talks, an extra day of festivities, soldering irons, and an epic hardware badge. We’ve been working on this badge for a while now, and it’s finally time to share some early details. This is an awesome badge and a great example of how to manufacture electronics on an extremely compressed timetable. This is badgelife, the hardware demoscene of electronic conference badges.

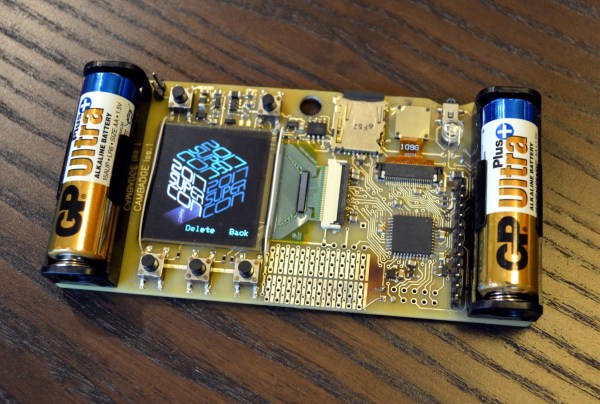
So, what does this badge do? It’s a camera. It has games, and it’s designed by [Mike Harrison] of Mike’s Electric Stuff. He designed and prototyped this badge in a single weekend. On board is a PIC32 microcontroller, an OV9650 camera module, and a bright, crisp 128×128 resolution color OLED display. Tie everything together with a few buttons, and you have a badge that’s really incredible.

So, how do you get one? You’ve got to come to the Hackaday Superconference. This year we’re doing things a bit differently and opening the doors a day early to get the hacker village started with badge hacking topped off by a party that evening and everyone coming to Supercon is invited! This is a badge full of games, puzzles, and video capture and isn’t something to miss. We have less than 30 tickets left so grab your ticket now and read on.

Continue reading “Building The Hackaday Superconference Badge”

What Makes The Perfect Hardware Badge

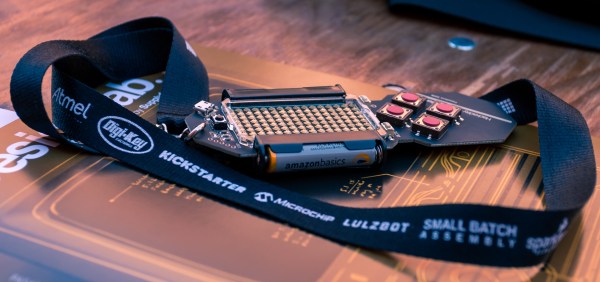
There are only a handful of people who can say they’ve built several successful electronic badges for conferences. Voja Antonic is not just on that list, he’s among the leaders in the field. There are a lot of pressures in this type of design challenge: aesthetics, functionality, and of course manufacturability. If you want to know how to make an exposed-PCB product that will be loved by the user, you need to study Voja’s work on the 2016 Hackaday SuperConference Badge. The badge is completely open, with all the design files, firmware, and a manual on the badge project page.

Between travelling from Belgrade to Pasadena and guiding production of 300 badges across the finish line before the conference deadline Voja took ill. He made it to the conference but without a voice he asked me to give his badge design talk for him. You can check that talk out below but let’s touch briefly on why Voja’s design is so spectacular.

Continue reading “What Makes The Perfect Hardware Badge”