The Simplest Possible DIY Ultrasonic Levitator

We thought that making things levitate in mid-air by the power of sound was a little bit more like magic, or at least required fancy equipment. It turns out that you can do it yourself easily enough with parts that any decent hacker’s closet should have in abundance: a motor-driver IC, two ultrasonic distance pingers, and a microcontroller. This article shows you how (translated here, scroll down).

But aside from a few clever tricks, there’s not that much to show. The two HC-SR04 ultrasonic distance sensors are standard fare, and are just being used as a cheap source of 40 kHz transducers. The circuit uses a microcontroller, but any source of 40 kHz square waves should suffice. Those of you who could do that with a 555 (or a Raspberry Pi), this one’s for you! A stepper motor driver bumps up the voltage applied to the transducers, but you could use plain-vanilla transistors as well.

It’s all the little details that count, however. You need to position the two ultrasonic drivers fairly precisely to create a standing wave, and while you can start at 8.25 mm and trial-and-error it, the article demonstrates using an oscilloscope to align the capsules by driving one and reading the signal out of the other and tweaking them until they’re in phase. Clever!

The author also takes the ultrasonic-transparent grille from one of the unused receivers and uses it as a spoon to help position the styrofoam bits in the sound waves. We always wondered how you’d do that!

It turns out that it’s easy to make a DIY ultrasonic levitation desk toy, and none of the parts are expensive or critical. The missing ingredient is just the gumption to try it, and now we have that, too.

As cool as they are, the HC-SR04 modules aren’t perfect for all distance sensing applications. Here’s everything you need to know about them, including hacks to make them work up-close. And since HC-SR04 sensors come cheapest in ten-packs, you’ll be wondering what you’re going to do with the other eight. That problem has apparently also been solved.


A Bar Graph For Beer Fridge Vitals

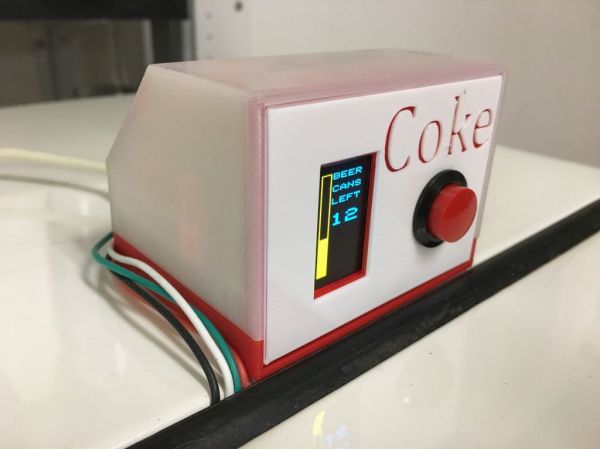
[ChrisN219] has an antique Coke machine that used to hold glass bottles. Now it holds around 30 tall boy cans of his favorite post-work suds. The only problem is that [Chris] has no idea how many cans are in it without opening up the door or keeping tally on a nearby slate board. Enter the Arduino.

He wanted to make something completely non-invasive to the machine (phew!) while using as many parts he already had as possible. The result is a simple circuit that uses an ultrasonic sensor mounted inside the machine to ping the depths, and a Nano in a nifty 3D printed box up top to do some math and display the number of cans remaining as a simple bar graph. The sensor reads one bay, and the code multiplies by two to get the total. It was touch and go there for a minute as he wasn’t sure that the HC-SR04s would get a good response from the cylindrical cans. Not only did they give a good reading, the first test was quite accurate.

[Chris] recently finished Mk. II, which replaces the momentary (and the Coke logo) with a second HC-SR04. The first version required the push of a button to do inventory, but now he simply walks up to the machine and knows at a glance if it’s time to make a beer run.

Okay, so maybe you don’t have cool old Coke machine problems. But surely you can find something that needs pinging, like an inconvenient rain barrel.

Ultrasonic Array Gets Range Data Fast And Cheap

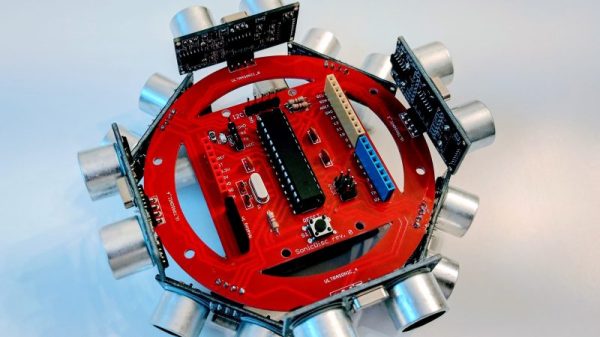
How’s your parallel parking? It’s a scenario that many drivers dread to the point of avoidance. But this 360° ultrasonic sensor will put even the most skilled driver to shame, at least those who pilot tiny remote-controlled cars.

Watch the video below a few times and you’ll see that within the limits of the test system, [Dimitris Platis]’ “SonicDisc” sensor does a pretty good job of nailing the parallel parking problem, a driving skill so rare that car companies have spent millions developing vehicles that do it for you. The essential task is good spatial relations, and that’s where SonicDisc comes in. A circular array of eight HC-SR04 ultrasonic sensors hitched to an ATmega328P, the SonicDisc takes advantage of interrupts to make reading the eight sensors as fast as possible. The array can take a complete set of readings every 10 milliseconds, which is fast enough to allow for averaging successive readings to filter out some of the noise that gets returned. Talking to the car’s microcontroller over I2C, the sensor provides a wealth of ranging data that lets the car quickly complete a parallel parking maneuver. And as a bonus, SonicDisc is both open source and cheap to build — about $10 a copy.

Rather use light to get your range data? There are some pretty cheap LIDAR units on the market these days.

Continue reading “Ultrasonic Array Gets Range Data Fast And Cheap”

Garage Distance Sensor Kicks Tennis Ball To Curb

Those with small garages might be familiar with the method of hanging a tennis ball from a ceiling to make sure they don’t hit the back wall with their car. If the car isn’t in the garage, though, the tennis ball dangling from a string tends to get in the way. To alleviate this problem, [asaucet] created a distance sensor that can tell him when his car is the perfect distance from the garage wall.

At the heart of the distance sensor is an HC-SR04 ultrasonic rangefinder and a PIC16F88 microcontroller. [asaucet] uses a set of four LEDs to alert the driver how close they are to the garage wall. [asaucet] also goes into great detail about how to use an LCD with this microcontroller for setting up the project, and the amount of detail should be enough to get anyone started on a similar project.

While this isn’t a new idea, the details that [asaucet] goes into in setting up the microcontroller, using the distance sensor, and using an LCD are definitely worth looking into. Even without this exact application in mind, you’re sure to find some helpful information on the project page.

Continue reading “Garage Distance Sensor Kicks Tennis Ball To Curb”

Measuring Air Flow With Ultrasonic Sensors

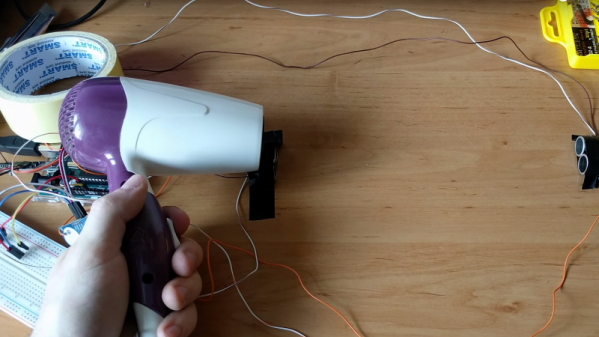
Measuring air flow in an HVAC duct can be a tricky business. Paddle wheel and turbine flow meters introduce not only resistance but maintenance issue due to accumulated dust and debris. Being able to measure ducted airflow cheaply and non-intrusively, like with this ultrasonic flow meter, could be a big deal for DIY projects and the trades in general.

The principle behind the sensor [ItMightBeWorse] is working on is nothing new. He discovered a paper from 2015 that describes the method that measures the change in time-of-flight of an ultrasonic pulse across a moving stream of air in a duct. It’s another one of those “Why didn’t I think of that?” things that makes perfect sense in theory, but takes some engineering to turn into a functional sensor. [ItMightBeWorse] is using readily available HC-SR04 sensor boards and has already done a proof-of-concept build. He’s getting real numbers back and getting close to a sensor that will go into an HVAC automation project. The video below shows his progress to date and hints at a follow-up video with more results soon.

Here’s wishing [ItMightBeWorse] the best of luck with his build. But if things go sideways, he might look to our post-mortem of a failed magnetic flow meter for inspiration.

Continue reading “Measuring Air Flow With Ultrasonic Sensors”

Ultrasonic Raspberry Pi Piano

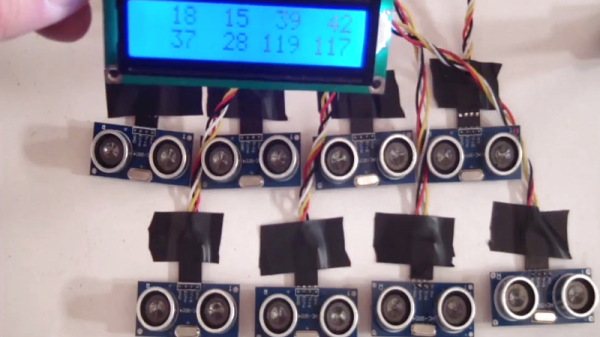
Cheap stuff gets our creative juices flowing. Case in point? [Andy Grove] built an eight-sensor HC-SR04 breakout board, because the ultrasonic distance sensors in question are so affordable that a hacker can hardly avoid ordering them by the dozen. He originally built it for robotics, but then it’s just a few lines of code to turn it into a gesture-controllable musical instrument. Check out the video, embedded below, for an overview of the features.

His Octasonic breakout board is just an AVR in disguise — it reads from eight ultrasonic sensors and delivers a single SPI result to whatever other controller is serving as the brains. In the “piano” demo, that’s a Raspberry Pi, so he needed the usual 5 V to 3.3 V level shifting in between.

The rest is code on the Pi that enables gestures to play notes, change musical instruments, and even shut the Pi down. The Pi code is written in Rust, and up on GitHub. An Instructable has more detail on the hookups.

All in all, building a “piano” out of robot parts is surely a case of having a hammer and every problem looking like a nail, but we find some of the resulting nail-sculptures arise that way. This isn’t the first time we’ve seen an eight-sensor ultrasonic setup before, either. Is 2017 going to be the year of ultrasonic sensor projects? Continue reading “Ultrasonic Raspberry Pi Piano”

Octosonar Is 8X Better Than Monosonar

The HC-SR04 sonar modules are available for a mere pittance and, with some coaxing, can do a pretty decent job of helping your robot measure the distance to the nearest wall. But when sellers on eBay are shipping these things in ten-packs, why would you stop at mounting just one or two on your ‘bot? Octosonar is a hardware and Arduino software library that’ll get you up and running with up to eight sonar sensors in short order.

Octosonar uses an I2C multiplexer to send the “start” trigger pulses, and an eight-way OR gate to return the “echo” signal back to the host microcontroller. The software library then sends the I2C command to select and trigger a sonar module, and a couple of interrupt routines watch the “echo” line to figure out the time of flight, and thus the distance.

Having two sonars on each side of a rectangular robot allows it move parallel to a wall in a straightforward fashion: steer toward or away from the wall until they match. Watch the video below for a demo of this very simple setup. (But also note where the robot’s 45-degree blind spot is: bump-bump-bump!)

Continue reading “Octosonar Is 8X Better Than Monosonar”