Retrotechtacular: The Nernst Lamp

After dominating the illumination market for more than a century, it’s easy to think of the glowing filament of the standard incandescent lamp as the only way people found to turn electricity into light. But plenty of fertile minds turned out alternative designs, one of which is the fascinating Nernst lamp, which we’d previously never heard of.

If the name sounds familiar, it’s likely through exposure to [Walther Nernst]’s equation for electrochemistry, or for his “New Heat Theorem” which eventually became the Third Law of Thermodynamics. Pal of [Einstein] and eventual Nobel laureate, [Nernst] was also a bit of a tinkerer, and he came up with a design for an incandescent lamp in 1897 that was twice as efficient as carbon-filament lamps. The video below, from the Edison Tech Center, details the design, which used a ceramic “glower rod” that would incandesce when current flowed through it. The glower, though, was not conductive until it was quite hot, so separate heater coils that gave the glower a start on the process were included; these were switched off by a relay built into the base of the lamp once the glower started conducting.

It’s a complicated design, but its efficiency, coupled with a better light spectrum and the fact that it didn’t need a vacuum bulb since the glower wouldn’t oxidize like a carbon or tungsten filament, gave it certain advantages that let it stake out a decent share of the early market for electric illumination. It was even the light source for one of the first facsimile machines. We find it a very clever use of what were at the time exotic materials, and wonder if this could have lead to something like vacuum tubes without the vacuum.

Continue reading “Retrotechtacular: The Nernst Lamp”

Thermochromic Display Tells You The Temperature Despite Your Current Mood

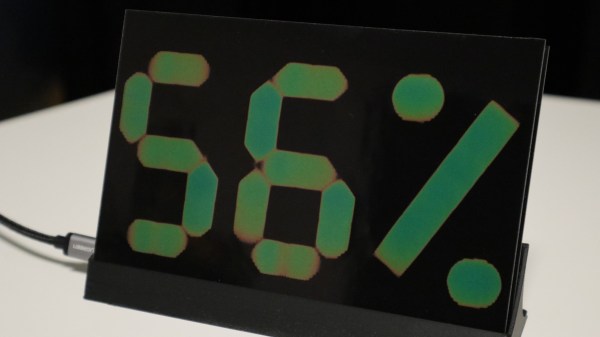
Readers who survived the 1970s will no doubt remember the “mood ring” fad, where a liquid crystal mounted to a ring would magically reveal your current emotional state to all and sundry by changing color. This nifty thermochromic display is based on the same principle, and while it might not start a new craze, it’s still pretty mesmerizing to watch.

This isn’t [Moritz v. Sivers]’ first attempt at a thermochromic display. His earlier version was far more complicated, using separate copper plates clad with thermochromic film for each segment, with Peltier devices to cool and heat them individually. Version two is much simpler, using a printed circuit board with heating elements in the shape of seven-segment displays etched into it. The thermochromic film sits directly on the heater PCB; a control PCB below has the MCU and sensors on it. The display alternates between temperature and humidity, with the segments fading in an uneven and ghostly way that really makes this fun to watch. [Moritz] has made the build files available, and there’s a detailed Instructable as well.

We’re always on the lookout for alternate display modalities, especially when they look this cool. We’ve seen other thermochromic displays before, of course, and persistence of phosphorescence looks great, too.

Continue reading “Thermochromic Display Tells You The Temperature Despite Your Current Mood”

Intelligent Control For That Cheap Diesel Heater

If you own a caravan or a boat, you’ll know that keeping it warm can present something of a struggle. Open-flame gas heaters carry a risk of carbon monoxide poisoning, while solid fuel stoves are heavy and require safe flues. The prospect of a diesel heater then is enticing, bringing as they use a safer fuel and allow for easy external exhaust. Unfortunately they’ve been something of an expensive option, but the arrival of cheap imported heaters in recent years has made them an attractive choice. [Ray Jones] has improved upon their sometimes basic control electronics with the Afterburner, an intelligent controller that packs both ESP32 and HC-05 modules to both enhance the feature set and the connectivity of the devices.

The full list of capabilities is somewhat exhaustive but has a few stand-outs such as the ability to connect 1-wire temperature sensors to the system. It’s not compatible with all the heaters on the market, but there is a comprehensive guide to those models with which it can work. Meanwhile, all the code and other resources are available on GitLab should you wish to try it for yourself.

Diesel is something of a dirty word in 2019, but maybe biodiesel will save devices like this one.

Thanks [Bob] for the tip!

Raspberry Pi Tracks Humans, Blasts Them With Heat Rays

Given how long humans have been warming themselves up, you’d think we would have worked out all the kinks by now. But even with central heating, and indeed sometimes because of it, some places we frequent just aren’t that cozy. In such cases, it often pays to heat the person, not the room, but that can be awkward, to say the least.

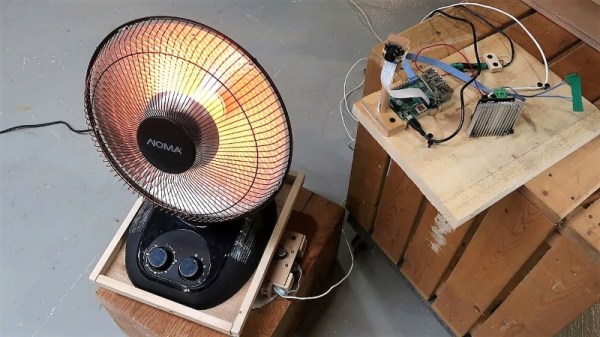
Hacking polymath [Matthias Wandel] worked out a solution to his cold shop with this target-tracking infrared heater. The heater is one of those radiant deals with the parabolic dish, and as anyone who’s walked past one on demo in Costco knows, they throw a lot of heat in a very narrow beam. [Matthias] leveraged a previous project that he whipped up for offline surveillance as the core of the project. Running on a Raspberry Pi with a camera, the custom software analyzes images and locates motion across the width of a frame. That drives a stepper that swivels a platform for the heater. The video below shows the build and the successful tests; however, fans of [Matthias] should prepare themselves for a shock as he very nearly purchases a lazy susan to serve as the base for the heater rather than building one.

We’re never disappointed by [Matthias]’ videos, and we’re always impressed by his range as a hacker. From DIY power tools to wooden logic circuits to his recent Lego chocolate engraver, he always finds ways to make things interesting.

Continue reading “Raspberry Pi Tracks Humans, Blasts Them With Heat Rays”

Kinematic Mount For 3D Printer Bed Shows Practical Design

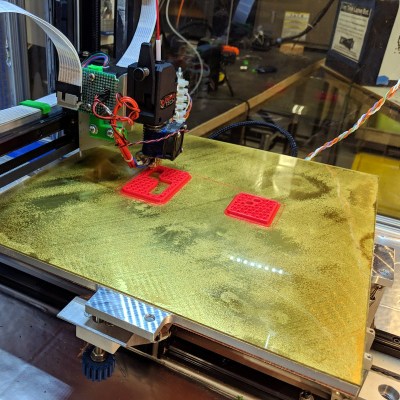
Aluminum bed with new kinematic mount and base on printer Son of Megamax, at the Milwaukee Makerspace

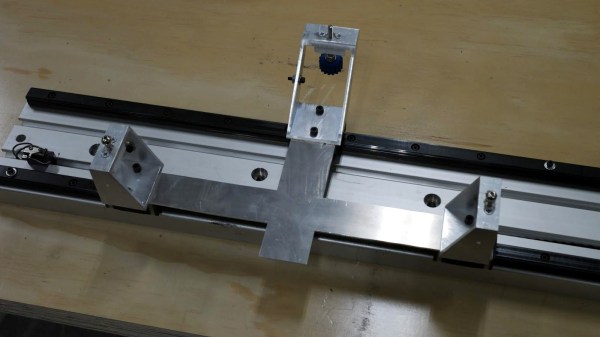
[Mark Rehorst] has been busy designing and building 3D printers, and Son of Megamax — one of his earlier builds — needed a bed heater replacement. He took the opportunity to add a Kelvin-type kinematic mount as well. The kinematic mount and base efficiently constrain the bed in a controlled way while allowing for thermal expansion, providing a stable platform that also allows for removal and repeatable re-positioning.

After a short discussion regarding the heater replacement, [Mark] explains the design and manufacture of his kinematic mount. Of particular note are the practical considerations of the design; [Mark] aimed to use square aluminum tubing as much as possible, with machining requirements that were easily done with the equipment he had available. Time is a resource after all, and design decisions that help one get something working quickly have a value all their own.

If you’re still a bit foggy on kinematic mounts and how they work, you’re not alone. Check out our coverage of this 3D-printed kinematic camera mount which should make the concept a bit clearer.

Heated DryBox Banishes Filament Moisture For Under $20

There has been a lot of activity from [Richard Horne] regarding 3D printing filaments lately; most recently he has shared two useful designs for upping one’s filament storage and monitoring game. The first is for a DIY Heated DryBox for 3D printing filament. It keeps filament dry not just by sealing it into a plastic box with some desiccant, but by incorporating a mild and economical heater intended for reptile habitats inside. Desiccant is great, but a gently heated enclosure can do wonders for driving away humidity in the right environment. The DryBox design also incorporates a handy little temperature and humidity sensor to show how well things are working.

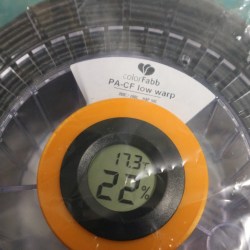
Spool-mounted adapter for temperature and humidity sensor (and desiccant) to monitor storage bag conditions.

The second design is a simple spin-off that we particularly liked: a 3D printed adapter that provides a way to conveniently mount one of the simple temperature and humidity sensors to a filament spool with a desiccant packet. This allows storing a filament spool in a clear plastic bag as usual, but provides a tidy way to monitor the conditions inside the bag at a glance. The designs for everything are on Thingiverse along with the parts for the Heated DryBox itself.

[Richard] kindly shares the magic words to search for on eBay for those seeking the build’s inexpensive key components: “15*28CM Adjustable Temperature Reptile Heating Heater Mat” and “Mini LCD Celsius Digital Thermometer Hygrometer Temperature Humidity Meter Gauge”. There are many vendors selling what are essentially the same parts with minor variations.

Since the DryBox is for dispensing filament as well as storing it, a good spool mounting system is necessary but [Richard] found that the lack of spool standardization made designing a reliable system difficult. He noted that having spool edges roll on bearings is a pretty good solution, but only if one doesn’t intend to use cardboard-sided spools, otherwise it creates troublesome cardboard fluff. In the end, [Richard] went with a fixed stand and 3D printable adapters for the spools themselves. He explains it all in the video, embedded below.

Continue reading “Heated DryBox Banishes Filament Moisture For Under $20”

Gas Heater Gets A Battery Backup

With the availability of cheap modules, it has become easy to hack/make stuff at home and home appliances see the most creative hacks of all. In one such hack, [Vadim] takes the DIY route to adding battery backup to his gas heater.

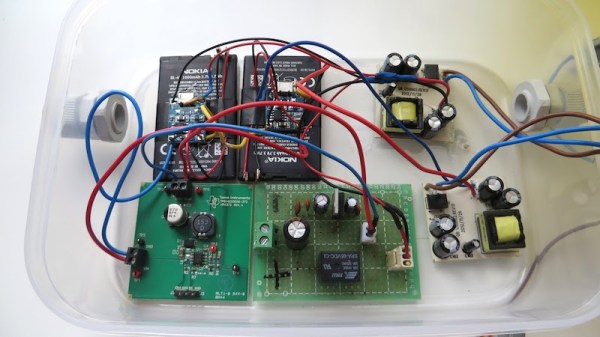
His existing unit operates on two D-type batteries which need to be replaced once they are depleted. [Vadim] wanted to implement a reversible method since he lives in a rented place. He replaced the original cells with battery adaptors and brought out the connections using two wires. He then proceeded to add two cellphone batteries with a TPS54233 regulator so as to supply the desired voltage to the gas heater. This is interesting since the module used is an official Texas Instruments EVM instead of the traditional eBay purchase.

The batteries in question are charged using modules based on the TP4056 which in turn are fed 5V from power supply modules. The DC voltage is coupled with a LM1117 to provide power to the heater from the mains and the switch over is accomplished using an SPDT relay. The enclosure is a humble box which resembles a plastic food container and is fitted with PG9 cable glands along with a fuse holder to boot. Take a look at the original post for a plethora of images and details of construction.

This an excellent example of a project that came together using available parts to solve a problem without the frills. The DIY fish feeder is another example of a project with functional design and is a great example of DIY.