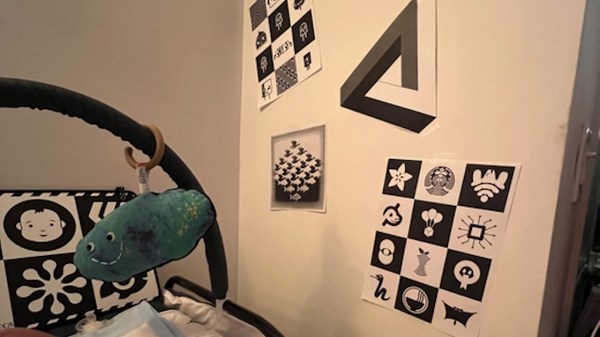
There’s a new addition to the Adafruit family, and it’s not a microcontroller board as you’d expect – however, we will still find plenty to learn from. On the Adafruit blog, [Phillip Torrone] shares a set of high-contrast images with us; the idea for such images is that they’re more appealing for a child during the first few months of its life, and not just that – they can support a kid’s development, too. The idea behind high-contrast images is twofold. During the first few months of life, a baby’s visual systems are only taking shape, and are nowhere near being advanced – so, sources of easily discernible and varied visual input can help it develop, as well as, perhaps, aid in holding attention.
The second part is – they look nice in their own way, and one would hope that a baby can appreciate them in the same way parents do. The images are quite varied, with some being somewhat electronics-themed (including an Adafruit logo, of course) and many being fairly neutral, which has to be an upside for us hackers when it comes to the spouse acceptance factor. For any of us interested, there are downloadable PDFs and
In a way, these are just like AprilTags – aiming to be helpful in development of visual algorithms. With such a family, we can’t wait to see what comes next – computer engineering books? Baby monitors with machine learning? Sleep-data-driven knit blankets? No matter what’s in store for us, we hope that for the Adafruit family, this journey will be smooth sailing.