Raspberry Pi Pico “Modchip” Unlocks The GameCube

In terms of units sold, it’s no secret that the GameCube was one of Nintendo’s poorest performing home consoles. You could argue increased competition meant sales of the quirky little machine were destined to fall short of the system’s legendary predecessors, but that didn’t keep the Wii from outselling it by a factor of five a few years later. Still, enough incredible games were released for the GameCube that the system still enjoys a considerable fanbase.

Now, with the release of PicoBoot by [webhdx], we suspect the GameCube is about to gain a whole new generation of fans. With just a Raspberry Pi Pico, some jumper wires, and a widely available third-party SD card adapter, this open source project bypasses the console’s original BIOS so it can boot directly into whatever homebrew application the user selects. With how cheap and easy to perform this modification is, we wouldn’t be surprised if it kicked off something of a renaissance for GameCube homebrew development.

Installation takes just five wires.

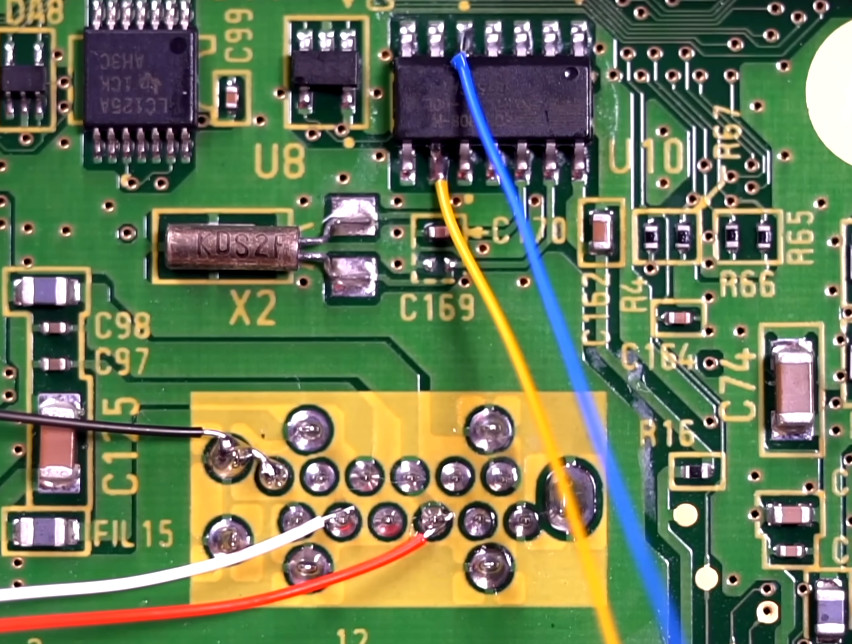
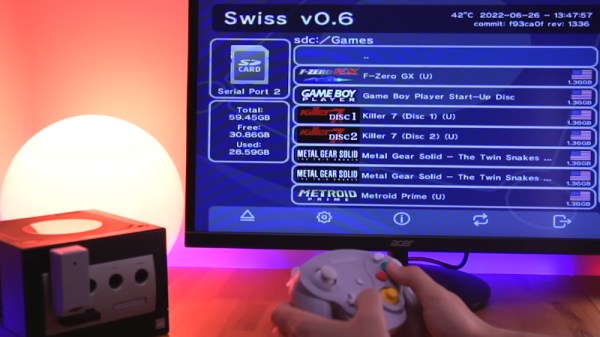
In the video after the break, [Tito] of Macho Nacho Productions provides a rundown of this new project, including a fantastic step-by-step installation guide that covers everything from soldering the jumper wires to the console’s motherboard to getting the firmware installed on the Pico. He then demonstrates booting the console into various community developed front-ends and tools, showing just how versatile the modification is. While some will see this as little more than an easier way to run bootleg games, we can’t help but be excited about what the future holds now that getting your own code to run on the system is so easy.

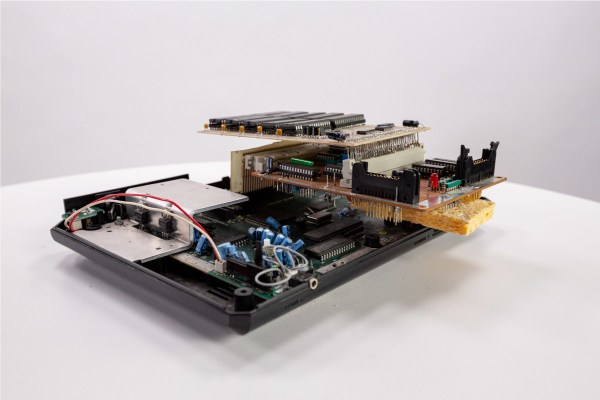
Alright, maybe it’s not so easy. To solder on the five wires that will eventually snake their way to the GPIO pins of the Pi Pico, you’ll need to strip the console all the way down to the main board. That wouldn’t be too bad itself, but unfortunately to reach two of the connections you’ll need to remove the system’s massive heatsink — which means you’ll need to clean up the old sticky thermal pads and apply new ones if you don’t want your GameCube to turn into a GameCrisp. It’s nothing that would scare off the average Hackaday reader, but it might give pause to those less handy with an iron.

The release of PicoBoot comes hot on the heels of the revelation that the Raspberry Pi Pico can be used not only as an N64 flash cart but as a supercharged PlayStation Memory Card. These projects would all be significantly improved with a custom RP2040 board, and no doubt that’s the direction they’ll eventually head, but it’s hard not to be impressed by what the low-cost microcontroller development board is capable of in its native form. Especially now that it comes in WiFi flavor.

Continue reading “Raspberry Pi Pico “Modchip” Unlocks The GameCube”

Nintendo Switch Runs Vita Software With Vita2hos

Good news for fans of PlayStation Vita — a new project from [Sergi “xerpi” Granell] allows users to run software written for Sony’s erstwhile handheld system on Nintendo’s latest money printing machine, the Switch. To be clear, there’s a very long road ahead before the vita2hos project is able to run commercial games (if ever). But it’s already able to run simple CPU-rendered Vita homebrew binaries on the Switch, demonstrating the concept is sound.

Running a Vita CHIP-8 emulator on the Switch. Credit: Modern Vintage Gamer

On a technical level, vita2hos is not unlike WINE, which enables POSIX-compliant operating systems such as Linux, Mac OS, and BSD to run Windows programs so long as they use the same processor architecture. Since the Switch’s ARM v8 processor is capable of executing code compiled for the Vita’s ARM v7 while running in 32-bit compatibility mode, there’s no emulation necessary. The project simply needs to provide the running program with work-alike routines fast enough, and nobody is the wiser. Of course, that’s a lot easier said than done.

According to the project page, the big hurdle right now is 3D graphics support. As you could imagine, many Vita games would have been pushing the system’s graphical hardware to the limit, making it exceptionally difficult to catch all the little edge cases that will undoubtedly come up when and if the project expands to support commercial titles. But for homebrew Vita games and utilities that may not even utilize the system’s 3D hardware, adding compatibility will be much easier. For instance, it’s already able to run [xerpi]’s own CHIP-8 emulator.

[xerpi] provides instructions on how to install vita2hos and the Vita executable to be tested onto an already hacked Nintendo Switch should you want to give it a shot. But unless you’ve got experience developing for the Vita or Switch and are willing to lend a hand, you might want to sit this one out until things mature a bit.

Thanks to [NeoTechni] for the tip.

PS2 Memory Card ISO Loader Offers Classic Gaming Bliss

It used to be that to play a console game, you just had to plug in a cartridge or put a CD/DVD in the optical drive. But these days, with modern titles ballooning up to as much as 100 GB, you’ve got no choice but to store them on the system’s internal hard disk drive. While that can lead to some uncomfortable data management decisions, at least it means you don’t have to get up off the couch to switch games anymore.

Which is precisely why the MC2SIO project for the PlayStation 2 is so exciting. As [Tito] explains in his latest
Macho Nacho Productions video, this simple adapter lets you connect an SD card up to the console’s Memory Card slots and use that to hold ISOs of your favorite games. With the appropriate homebrew software loaded up, your PS2 becomes a veritable jukebox of classic games.

Continue reading “PS2 Memory Card ISO Loader Offers Classic Gaming Bliss”

Reverse Engineering The SEGA Mega Drive

With the widespread adoption of emulators, almost anyone can start playing video games from bygone eras. Some systems are even capable of supporting homebrew games, with several having active communities that are still creating new games even decades later. This ease of programming for non-PC platforms wasn’t always so easy, though. If you wanted to develop games on a now-antique console when it was still relatively new, you had to jump through a lot of hoops. [Tore] shows us how it would have been done with his Sega Mega Drive development kit that he built from scratch.

While [Tore] had an Atari ST, he wanted to do something a little more cutting edge and at the time there was nothing better than the Mega Drive (or the Genesis as it was known in North America). It had a number of features that lent the platform to development, namely the Motorola 68000 chip that was very common for the time and as a result had plenty of documentation available. He still needed to do quite a bit of reverse engineering of the system to get a proper dev board running, though, starting with figuring out how the cartridge system worked. He was able to build a memory bank that functioned as a re-writable game cartridge.

With the hard parts out of the way [Tore] set about building the glue logic, the startup firmware which interfaced with his Atari ST, and then of course wiring it all together. He was eventually able to get far enough along to send programs to the Mega Drive that would allow him to control sprites on a screen with the controller, but unfortunately he was interrupted before he could develop any complete games. The amount of research and work to get this far is incredible, though, and there may be some helpful nuggets for anyone in the homebrew Mega Drive community today. If you don’t want to get this deep into the Mega Drive hardware, though, you can build a cartridge that allows for development on native Sega hardware instead.

Retro League GX Homebrew on CRT

Rocket League Inspired Homebrew Reverses Onto Nintendo GameCube

Would it have been too obvious to call a game about soccer playing RC cars, Soc-Car? Well [Martin] thought so and opted to call his Nintendo GameCube homebrew game, Retro League GX. The game clearly takes inspiration from Rocket League developed by Psyonix, as it pits teams of cars on a pitch plus comes complete with boosts to boot. There are some impressive physics on display here, and according to Krista over at GBATemp everything is playable on original hardware. Though those without a GameCube can certainly get a match in via the Dolphin emulator.

There are a number of ways to boot homebrew on a Nintendo GameCube, however, the most essential piece of software would be Swiss. Swiss is a homebrew utility that interfaces with all the myriad of ways to load code onto a GameCube these days. Common ways loading homebrew include saving files onto an SD card then using a SDGecko device that plugs into the memory card ports, or a SD2SP2 device that plugs into one of the GameCube’s expansion ports located on the bottom of the console. Those who prefer ditching the disc drive entirely can load homebrew via a optical disc emulator device like the GC Loader.

Still on the roadmap Retro League GX are ports for 3DS, PSP, Wii, and Linux. LAN and Online multiplayer are in the works as well. So at least that way GameCube broadband adapter owners may get to branch out beyond Phantasy Star Online for once. Best of all, [Martin] stated that the code for Retro League GX will be open sourced sometime next year.

Continue reading “Rocket League Inspired Homebrew Reverses Onto Nintendo GameCube”

VGA From Scratch On A Homebrew 8-bit Computer

[James Sharman] has built an impressive 8-bit homebrew computer. Based on TTL logic chips, it has a pipelined design which makes it capable of Commodore-level computing, but [James] hasn’t quite finished everything yet. While it is currently built on its own custom PCB, it has a limiting LCD display which isn’t up to the standards of the rest of the build. To resolve this issue, he decided to implement VGA from scratch.

This isn’t a bit-bang VGA implementation, either. He plans for full resolution (640×480) which will push the limits of his hardware. He also sets goals of a 24-bit DAC which will allow for millions of colors, the ability to use sprites, and hardware scrolling. Since he’s doing all of this from scratch, the plan is to keep it as simple as possible and make gradual improvements to the build as he goes. To that end, the first iteration uses a single latching chip with some other passive components. After adding some code to the CPU to support the new video style, [James] is able to display an image on his monitor.

While the image of the parrot he’s displaying isn’t exactly perfect yet, it’s a great start for his build and he does plan to make improvements to it in future videos. We’d say he’s well on his way to reproducing a full 8-bit retrocomputer. Although VGA is long outdated for modern computers, the standard is straightforward to implement and limited versions can even be done with very small microcontrollers.

Thanks to [BaldPower] for the tip!

Continue reading “VGA From Scratch On A Homebrew 8-bit Computer”

Dreamcast Homebrew Gets Boost From SD Card Cache

While it might have been a commercial failure compared to contemporary consoles, the Sega Dreamcast still enjoys an active homebrew scene more than twenty years after its release. Partly it’s due to the fact that you can burn playable Dreamcast discs on standard CD-Rs, but fans of the system will also point out that the machine was clearly ahead of its time in many respects, affording it a bit of extra goodwill in the community.

That same community happens to be buzzing right now with news that well-known Dreamcast hacker [Ian Micheal] has figured out how to cache data to an SD card via the console’s serial port. At roughly 600 KB/s the interface is too slow to use it as swap space for expanding the system’s paltry 16 MB of memory, but it’s more than fast enough to load game assets which otherwise would have had to be loaded into RAM.

A third-party Dreamcast SD adapter.

In the video below, [Ian] shows off his new technique with a port of DOOM running at 640×480. He’s already seeing an improvement to framerates, and thinks further optimizations should allow for a solid 30 FPS, but that’s not really the most exciting part. With the ability to load an essentially unlimited amount of data from the SD card while the game is running, this opens the possibility of running mods which wouldn’t have been possible otherwise. It should also allow for niceties like saving screenshots or game progress to the SD card for easy retrieval.

[Ian] says he’ll be bringing the same technique to his Dreamcast ports of Quake and Hexen in the near future, and plans on posting some code to GitHub that demonstrates reading and writing to FAT32 cards so other developers can get in on the fun. The downside is that you obviously need to have an SD card adapter plugged into your console to make use of this technique, which not everyone will have. Luckily they’re fairly cheap right now, but we wouldn’t be surprised if the prices start climbing. If you don’t have one already, now’s probably the time to get one.

To be clear, this technique is completely separate from replacing the Dreamcast’s optical drive with an SD card, which itself is a very popular modification that’s helped keep Sega’s last home console kicking far longer than anyone could have imagined.

Continue reading “Dreamcast Homebrew Gets Boost From SD Card Cache”