Old Game Development IDE Goes FPGA

If you have a thing for old game development — things like the Atari 2600 or similar period arcade games — you might already know about the 8bitworkshop IDE. There you can develop code in your browser for those platforms. In a recent blog post, the site announced you can now also do FPGA development in the IDE.

According to the site:

Most computers are fast enough to render a game at 60 Hz, which requires simulating Verilog at almost 5 million ticks per second.

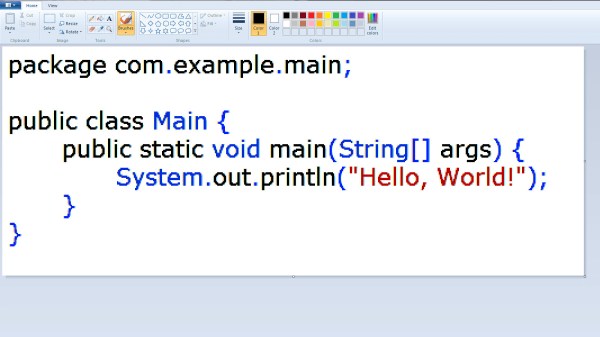
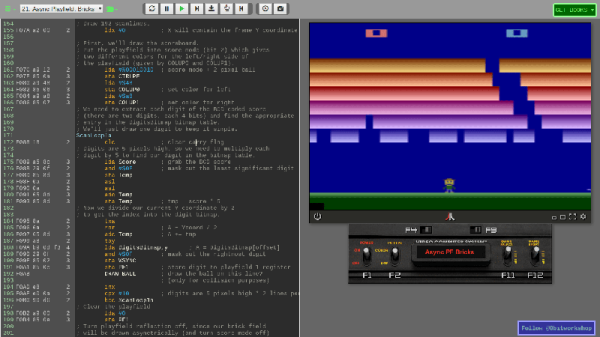
To activate Verilog, you need to select the hamburger menu to the top left, select Platform, and then under Hardware, check Verilog. What makes this different from, say, EDA Playground, is that the output can be waveforms or the output to a virtual TV monitor. For example, here’s one of the examples:

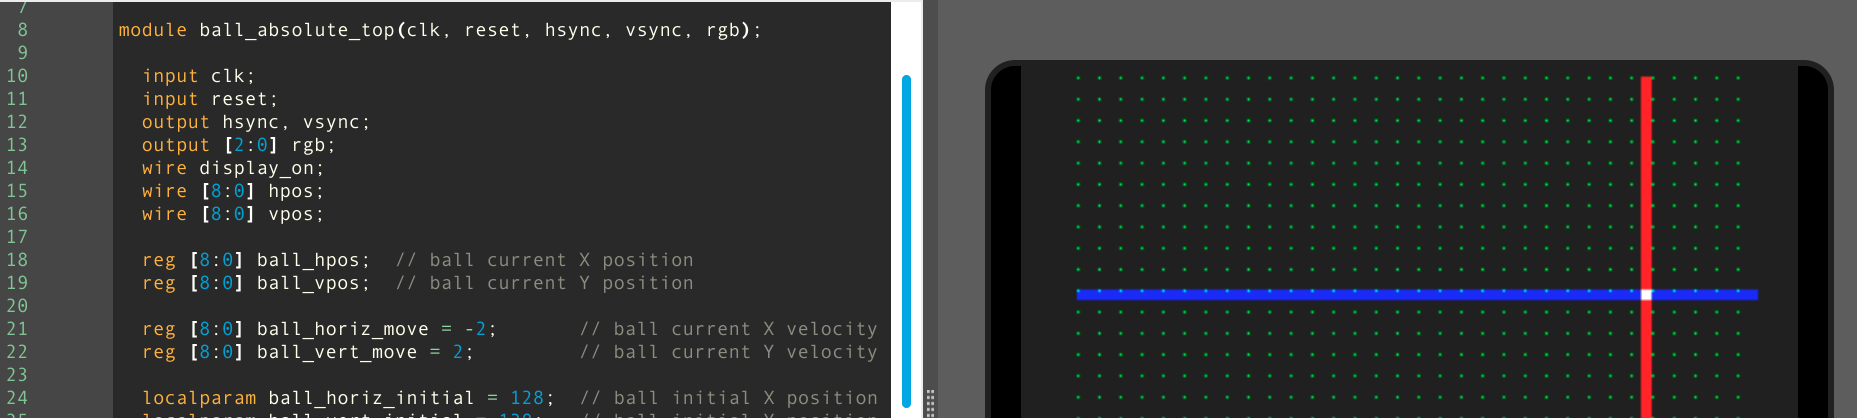
The Verilog code is generating horizontal and vertical sync along with an RGB output and the results appear on the monitor to the right. There is a handle at the bottom of the screen. If you drag it up you will see the logic analyzer output. Drag it down and you’ll see the screen again. The examples include an 8-bit and 16-bit CPU, and example games that can even read the mouse.

Honestly, we don’t think anyone would suggest using Verilog to write in-browser games. That isn’t really the point here. However, if you are trying to learn Verilog, it is great fun to be able to produce something other than just abstract waveforms from simulation. The only downside is that to move to a real piece of hardware, you’d need to duplicate the interfaces provided by the IDE. That would not be very hard, and — of course — if you are just using it to learn you can try a different project for the real world.

If you need help getting going in Verilog, we have a series of boot camps that can help. Those tutorials use EDA Playground, but they’d probably work here, too. If you try them in the IDE, be sure to let us know your experience.

A Whole Other Kind Of Graphical Programming

Java isn’t everyone’s cup of tea. With all its boilerplate and overhead, you’re almost always better off with a proper IDE that handles everything under the hood for you. However, if you learn a new language, you don’t really want to be bothered setting up a clunky and complex IDE. If only you could use a simple, standard Windows program that you are most likely already familiar with. This wish led [RubbaBoy] to create the MSPaintIDE, a Java development environment that let’s you write your code in — yes — MS Paint.

If you’re thinking now that you will end up writing your program with MS Paint’s text tool and create a regular image file from it — then you are right. Once set up, MSPaintIDE will compile all your PNG source files into a regular Java JAR file. And yes, it has syntax highlighting and a dark theme. [RubbaBoy] uses a custom-made OCR to transform the image content into text files and wraps it all into few-button-click environment — including git integration. You can see a demonstration of it in the video after the break, and find the source code on GitHub.

One has to truly admire how far [RubbaBoy] went, considering the tongue-in-cheek nature of this project. And all joking aside, if you’re interested in OCR, this might just be simple enough to begin with. Or you could expand it with some text to speech functionality.
Continue reading “A Whole Other Kind Of Graphical Programming”

Friday Hack Chat: Making Programming Easier

There is a long history of graphical programming languages. Some people don’t like to code, and for them, graphical programming languages replace semicolons and brackets with easy-to-understand boxes and wires.

This Friday, we’re going to be talking about graphical programming languages with [Boian Mitov]. He’s a software developer, founder of Mitov Software, and the creator of Visuino, a graphical programming language for the embedded domain. He specialized in video, audio, DSP, DAQ, industrial automation, communications, computer vision, artificial intelligence, as well as parallel and distributed computing. [Boian] is the author of the OpenWire open source technology, the IGDI+ open source library, the VideoLab, SignalLab, AudioLab, PlotLab, InstrumentLab, VisionLab, IntelligenceLab, AnimationLab, LogicLab, CommunicationLab, and ControlLab libraries, OpenWire Studio, Visuino, and author of the “VCL for Visual C++” technology.

For this Hack Chat, we’re going to be talking about ways to make programming microcontrollers easier. The focus of this discussion is Visuino, a graphical programming environment. Visuino allows anyone to program an Arduino, Teensy, or an ESP simply by connecting wires and choosing some logic. Think of it as a step above the programming environment that came with the Lego Mindstorms, Scratch, or whatever else MIT was coming out with in the early ‘aughts.

You are, of course, encouraged to add your own questions to the discussion. You can do that by leaving a comment on the Hack Chat Event Page and we’ll put that in the queue for the Hack Chat discussion.join-hack-chat

Our Hack Chats are live community events on the Hackaday.io Hack Chat group messaging. This week is just like any other, and we’ll be gathering ’round our video terminals at noon, Pacific, on Friday, May 25th.  Here’s a clock counting down the time until the Hack Chat starts.

Click that speech bubble to the right, and you’ll be taken directly to the Hack Chat group on Hackaday.io.

You don’t have to wait until Friday; join whenever you want and you can see what the community is talking about.

Programming Linux Devices With Arduino And The Cloud

Back in the olden days, when the Wire library still sucked, the Arduino was just a microcontroller. Now, we have single board computers and cheap microcontrollers with WiFi built in. As always, there’s a need to make programming and embedded development more accessible and more widely supported among the hundreds of devices available today.

At the Embedded Linux Conference this week, [Massimo Banzi] announced the beginning of what will be Arduino’s answer to the cloud, online IDEs, and a vast ecosystem of connected devices. It’s Arduino Create, an online IDE that allows anyone to develop embedded projects and manage them remotely.

As demonstrated in [Massimo]’s keynote, the core idea of Arduino Create is to put a connected device on the Internet and allow over-the-air updates and development. As this is Arduino, the volumes of libraries available for hundreds of different platforms are leveraged to make this possible. Right now, a wide variety of boards are supported, including the Raspberry Pi, BeagleBone, and several Intel IoT boards.

The focus of this development is platform-agnostic and focuses nearly entirely on ease of use and interoperability. This is a marked change from the Arduino of five years ago; there was a time when the Arduino was an ATmega328p, and that’s about it. A few years later, you could put Arduino sketches on an ATtiny85. A lot has changed since then. We got the Raspberry Pi, we got Intel stepping into the waters of IoT devices, we got a million boards based on smartphone SoCs, and Intel got out of the IoT market.

While others companies and organizations have already made inroads into an online IDE for Raspberry Pis and other single board computers, namely the Adafruit webIDE and Codebender, this is a welcome change that already has the support of the Arduino organization.

You can check out [Massimo]’s keynote below.

Continue reading “Programming Linux Devices With Arduino And The Cloud”

Machine Learning IDE In Alpha

Machine is an IDE for building machine learning systems using TensorFlow. You can sign up for the alpha, but first, have a look at the video below to see what it is all about.

You’ll see in the video, that you can import data for a model and then do training (in this case, to find a mustache in an image). You’ll see the IDE invites an iterative approach to development since you can alter parameters, run experiments, and see the results.

The IDE syncs with “the cloud” so you can work on it from multiple computers and roll back to previous results easily. We don’t know when the IDE will leave alpha status (or beta, for that matter), but the team’s goal is to release a free version of Machine to encourage widespread adoption.

If you want to learn more about TensorFlow, you are in the right place. We’ve also covered a bare-bones project if you’d rather get started that way. You can also find some good background material going all the way back to the early perceptron-based neural networks.

Codebender Rises From The Ashes

If you were sad that Codebender had bit the dust, cheer up. A site called codeanywhere has acquired the online Arduino development environment and brought it back to life. In addition to the main Codebender site, the edu and blocks sites are also back on the air.

Not only is this great news, but it also makes sense. The codeanywhere site is a development IDE in the cloud for many different programming languages. The downside? Well, all the people who said they’d be glad to pay to keep Codebender alive will get a chance to put their money where their mouth is.

Continue reading “Codebender Rises From The Ashes”

The Raspberry Pi Becomes A SCSI Device

SCSI devices were found in hundreds of different models of computers from the 80s, from SUN boxes to cute little Macs. These hard drives and CDROMs are slowly dying, and with that goes an entire generation of technology down the drain. Currently, the best method of preserving these computers with SCSI drives is the SCSI2SD device designed by [Michael McMaster]. While this device does exactly what it says it’ll do — turn an SD card into a drive on a SCSI chain — it’s fairly expensive at $70.

[GIMONS] has a better, cheaper solution. It’s a SCSI device emulator for the Raspberry Pi (original link dead, here’s the new location of this writeup). It turns a Raspberry Pi into a SCSI hard drive, magneto-optical drive, CDROM, or an Ethernet adapter using only some glue logic and a bit of code.

As far as the hardware goes, this is a pretty simple build. The 40-pin GPIO connector on the Pi is attached to the 50-pin SCSI connector through a few 74LS641 transceivers with a few resistor packs for pullups and pulldowns. The software allows for virtual disk devices – either a hard drive, magneto-optical drive, or a CDROM – to be presented from the Raspberry Pi. There’s also the option of putting Ethernet on the SCSI chain, a helpful addition since Ethernet to SCSI conversion devices are usually rare and expensive.

Officially, [GIMONS] built this SCSI hard drive emulator for the x68000 computer, developed by Sharp in the late 80s. While these are popular machines for retrocomputing aficionados in Japan, they’re exceptionally rare elsewhere — although [Dave Jones] got his mitts on one for a teardown. SCSI was extraordinarily popular for computers from the 70s through the 90s, though, and since SCSI was a standard this build should work with all of them.

If your retrocomputer doesn’t need a SCSI drive, and you’re feeling left out of the drive-emulation club, the good news is there’s a Raspberry Pi solution for that, too: this Hackaday Prize entry turns a Pi into an IDE hard drive.

Thanks [Gokhan] for the tip!