A Stylish Home For Your Next ESP Project

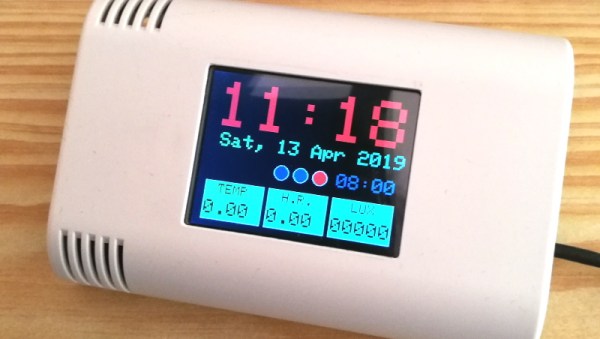
The ESP8266 and ESP32 are fast becoming the microcontroller of choice for, well, everything. But one particular area we’ve seen a lot of activity in recently is home automation; these boards make it so incredibly easy and cheap to get your projects online that putting together your own automation system is far more appealing now than it’s ever been. Capitalizing on that trend, [hwhardsoft] has been working on a ESP enclosure that’s perfect for mounting on the living room wall.

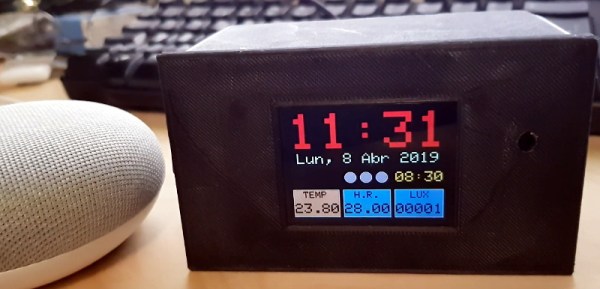
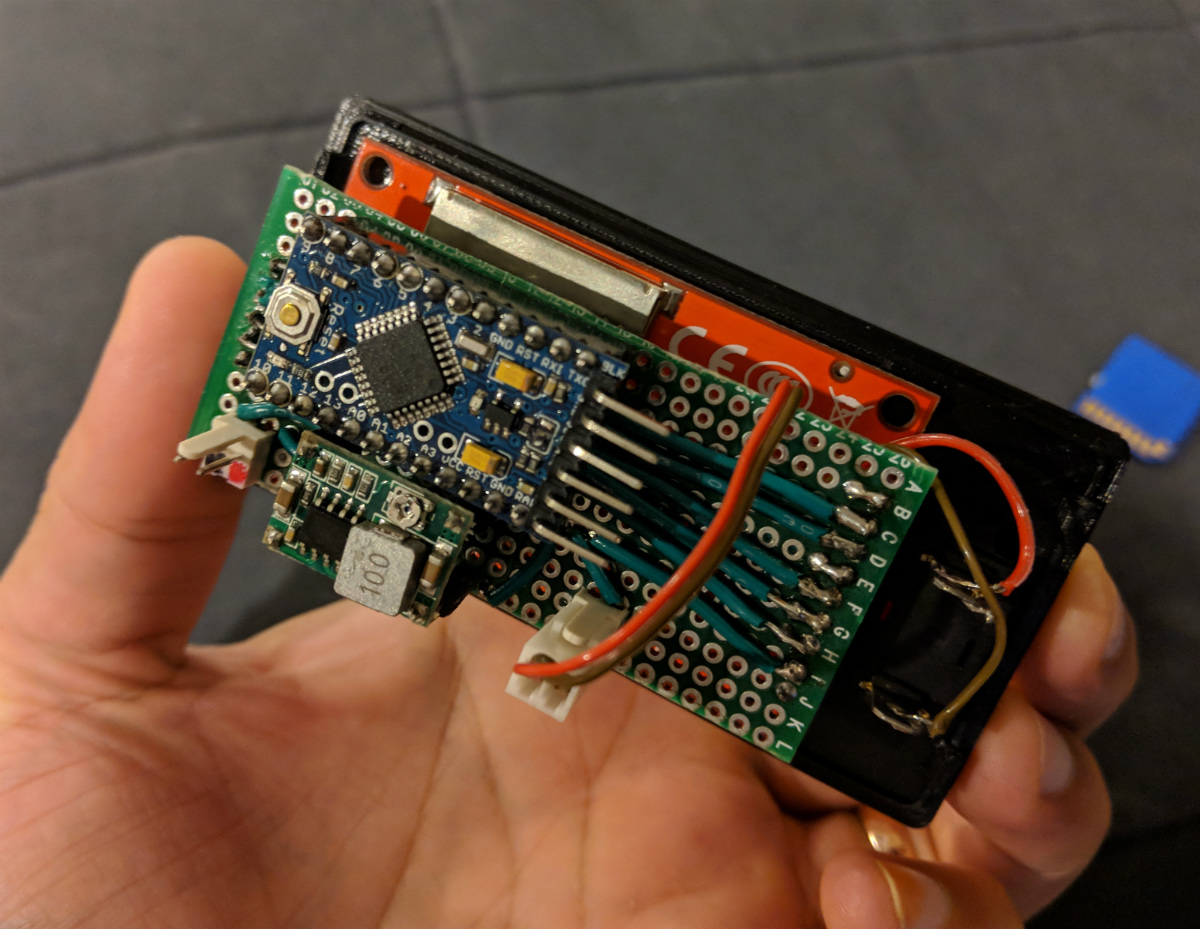
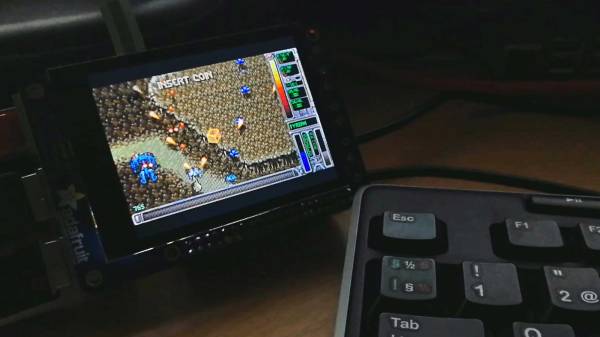
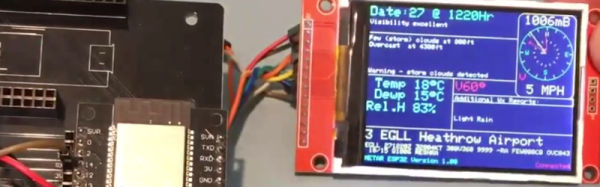
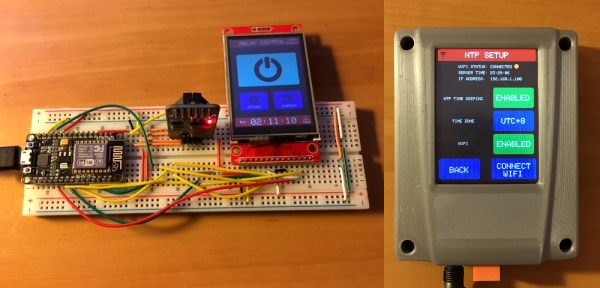
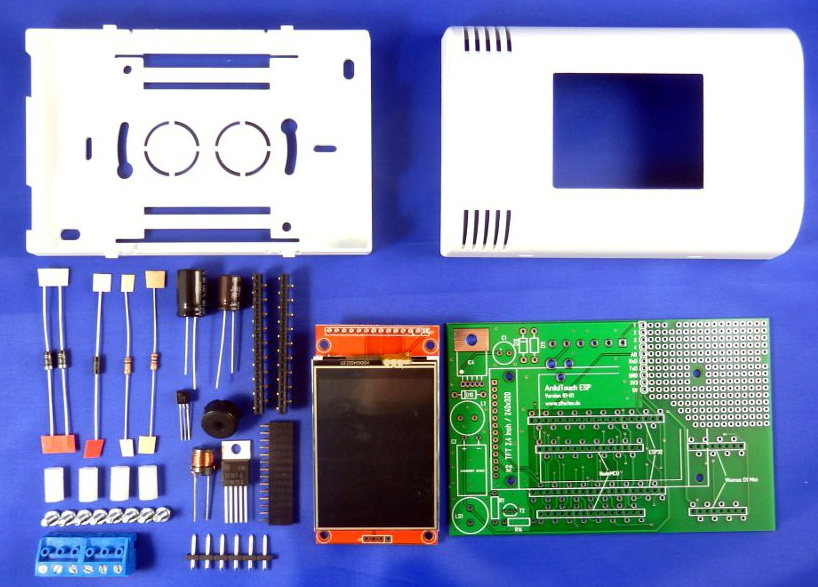
Of course, there’s more to this project than an admittedly very nice plastic box. The system also includes a ILI9341 2.4 inch touch screen LCD, an integrated voltage regulator, and even a section of “perfboard” that gives you a spot to easily wire up ad-hoc circuits and sensors. You don’t even need to switch over to the bare modules either, as the PCB is designed to accommodate common development boards such as the Wemos D1 Mini and NodeMCU.

Despite its outward appearance, this project is very much beginner friendly. Utilizing through hole components, screw down terminals, and a impeccably well-labeled silkscreen, you won’t need to be a hardware expert to produce a very slick gadget the whole family can appreciate.

Much like the HestiaPi project we covered a few months back, this project takes a cheap and readily available development board and turns it into something that has all the trappings of a commercial offering. These projects are reminders that the line between built and bought is only getting blurrier as time goes on.

Continue reading “A Stylish Home For Your Next ESP Project”

ESP32 Alarm Clock Doesn’t Skimp On The Features

The ESP family of microcontrollers is absolutely on fire right now, with a decent chunk of the projects that come our way now based on one of the impossibly cheap WiFi-enabled boards. In fact, they are so cheap and popular that we’ve started to see a somewhat unexpected trend; people have a tendency to use them as drop-in replacements, despite the more modern boards being considerably more powerful than required. The end result is a bunch of projects in which the ESP is simply underutilized. It’s not a big deal, but somewhat disappointing to see.

But we can assure you this ESP32 alarm clock created by [Pangodream] is absolutely not one of them. He’s packed an impressive number of features into this unassuming little timepiece, and it’s really an excellent example of how much these boards are capable of without breaking a sweat. From DIY touch sensors to the Android application used to configure the clock over the network, this project is overflowing with neat hardware and software tricks worth taking a closer look at.

Inside the 3D printed case, the clock features a BH150 light sensor, the very popular DHT-11 for detecting temperature and humidity, as well as a ILI9341 2.8 inch LCD for the display. In a particularly clever touch (get it?), [Pangodream] used three coins connected to the digital pins of the ESP32 as capacitive sensors. These allow him to interact with the click just by tapping the top of the case, and saved him the trouble of adding traditional switches or buttons. We might have put some indentations in the top case to make identifying which of the three “buttons” you’re pushing, but we suppose the invisible interface does make things look a little more futuristic.

But if even that is too much physical touching for you, then [Pangodream] has come up with a fairly robust system for controlling and interacting with the clock over the network. It’s not just a convenient way of setting the time, a good number of the clock’s functions can be polled and configured in this manner; everything from the sensitivity of the touch sensors to how many times it will beep when the alarm goes off. To make things easier, he’s even wrapped it all up in a handy Android application for on the go configuration.

If this clock doesn’t offer you the level of over-engineering you require, check out this build that uses no less than five ESP32s to get the job done. Or maybe this one that hooks into NASA’s Deep Space Network.

Continue reading “ESP32 Alarm Clock Doesn’t Skimp On The Features”

ESP8266 Gets Its Game On With Open Source Engine

This is likely not to come as much of a shock to you, but the ESP8266 is pretty popular. At this point, we’re more surprised when a project that hits the tip line doesn’t utilize this incredibly cheap WiFi-enabled microcontroller. If you’re making a gadget that needs to connect to the Internet, there’s a good chance some member of the ESP family is going to be a good choice. But is it a one-trick MCU?

ESP Little Game Engine Logo

Well, judging by software frameworks like the “Little Game Engine” created by [Igor], it looks like the ESP is expanding its reach into offline projects as well. While it might not turn the ESP8266 into a next-gen gaming powerhouse, we’ve got to admit that the demos shown off so far are pretty impressive. When paired with a couple of buttons and a TFT display such as the ILI9341, the ESP could make for a particularly pocket-friendly game system.

The game engine that [Igor] has developed provides the programmer with a virtual screen resolution of 128×128, a background layer, and 32 sprites which offer built-in tricks like collision detection and rotation. All while running at a respectable 20 frames per second. This environment is ideal for the sort of 2D scrolling games that dominated the 8 and 16-bit era of gaming, and as seen in the video after the break, it can even pull off a fairly decent clone of “Flappy Bird”.

In addition, [Igor] created an online emulator and compiler which allows you to develop games using his engine right in your web browser. You can load up a selection of example programs and execute them to see what the engine is capable of, then try your hand at developing your own game before ever having to put the hardware together. Incidentally, the performance of this online development environment is fantastic; with even the fairly complex “Flappy Bird” example code compiling and starting in the emulator nearly instantaneously.

This isn’t the first handheld game we’ve seen powered by the ESP8266, but it would be fair to say this one is a generational leap over its predecessors. Of course, if you really want to start throwing around some pixels, you might want to make the leap to the ESP32; which is the heart of the incredibly awesome (and tiny) PocketSprite.

Continue reading “ESP8266 Gets Its Game On With Open Source Engine”

Burn Some Time With This Arduino Reddit Browser

If you’re like us, you probably spend more time browsing Reddit than you’d like to admit to your friends/family/boss/therapist. A seemingly endless supply of knowledge, wisdom, and memes; getting stuck on Reddit is not unlike looking something up on Wikipedia and somehow managing to spend the next couple hours just clicking through to new pages. But we’re willing to bet that none of us love browsing Reddit quite as much as [Saad] does.

He writes in to tell us about the handheld device he constructed which lets him view random posts from the popular /r/showerthoughts sub. Each press of the big red button delivers another slice of indispensable Internet wisdom, making it a perfect desk toy to fiddle with when you need a little extra push to get you through the day. Like one of those “Word a Day” calendars, but one that you’ll actually read.

For those curious as to how [Saad] is scraping Reddit with an Arduino, the short answer is that he isn’t. Posts are pulled from Reddit using an online tool created for the project by his wife (/r/relationshipgoals/), and dumped into a text file that can be placed on the device’s SD card. With 1500 of the all-time highest rated posts from /r/showerthoughts onboard, he should be good on content for awhile.

[Saad] has done an excellent job documenting the hardware side of this build, providing plenty of pictures as well as a list of the parts he used and a few tips to help make assembly easier. Overall it’s not that complex a project, but his documentation is a big help for those who might not live and breathe this kind of thing.

For the high-level summary: it uses an Arduino Pro Mini, a ILI9341 screen, and a 3.3 V regulator to step down 5 V USB instead of using batteries. A bit of perfboard, a 3D printed case, and a suitably irresistible big red button pulls the whole thing together.

We’ve seen a similar concept done in a picture frame a couple of years back, but if that’s not interactive enough you could always build yourself a Reddit “controller”.

Blazing Fast Raspberry Pi Display Driver Will Melt Your Face Then Teach You How

Reader [poipoi] recently wrote into our tip line to tell us about an “amazingly fast” Raspberry Pi display driver with a README file that “is an actual joy to read”. Of course, we had to see for ourselves. The fbcp-ili9341 repo, by [juj], seems to live up to the hype! The software itself appears impressive, and the README is detailed, well-structured, educational, and dare we say entertaining?

The driver’s main goal is to produce high frame rates — up to around 60 frames per second — over an SPI bus, and it runs on various Raspberry Pi devices including the 2, 3 and Zero W. Any video output that goes to the Pi’s HDMI port will be mirrored to a TFT display over the SPI bus. It works with many of the popular displays currently out there, including those that use the ILI9341, ILI9340, and HX8357D chipsets.

The techniques that let [juj] coax such frame rates out of a not-terribly-fast serial bus are explained in detail in the README’s How it Works section, but much of it boils down to the fact that it’s only sending changed pixels for each frame, instead of the full screen. This cuts out the transmission of about 50% of the pixels in each update when you’re playing a game like Quake, claims the author. There are other interesting performance tweaks as well, so be sure to check out the repo for all the details.

There’s a video comparing the performance of fbcp-ili9341 to mainline SPI drivers after the break.

Continue reading “Blazing Fast Raspberry Pi Display Driver Will Melt Your Face Then Teach You How”

ESP32 Display Is Worth A Thousand Words

The ESP32 is the successor to the wildly popular ESP8266. There seems to be no end to what the chips can do. However, despite all the wireless communication capabilities, the module doesn’t have a display. [G6EJD] wanted to connect an ILI9341 TFT display and he put the code and information on GitHub. You can also see a video of his work, below.

Since the display uses a serial interface, there isn’t much wiring required. The Adafruit GFX library does the heavy lifting, utilizing the SPI library for the actual communications. The first demo shown on the hardware can pull weather data decoded. If you want more details on the display’s operation, check out [G6EJD’s] YouTube channel and you’ll find other videos that go into more detail.

We’ve seen these displays married to an ESP8266 with an integrated PCB, too. There’s a choice of libraries, and perhaps we’ll see a similar range of choice for the ESP32.

Continue reading “ESP32 Display Is Worth A Thousand Words”

Everyone Loves Faster ESP8266 TFT Libs

Reader [Jasper] writes in with glowing praise for the TFT_eSPI library for the ESP8266 and the various cheap 480×320 TFT displays (ILI9341, ILI9163, ST7735, S6D02A1, etc.) that support SPI mode. It’s a drop-in replacement for the Adafruit GFX and driver libraries, so you don’t need to rework your code to take advantage of it. If you’re looking to drive an LCD screen with an ESP8266 and Arduino, check this out for sure.

As a testbed, [Jasper] ported his Tick Tock Timer project over to the new library. He got a sevenfold increase in draw speed, going from 500 ms to 76 ms. That’s the difference between a refresh that’s visibly slow, and one that looks like it happens instantly. Sweet.

Improving software infrastructure isn’t one of the sexiest or most visible hacks, but it can touch the lives of many hackers. How many projects have we featured with an ESP8266 and a screen? Thanks, [Bodmer] for the good work, and [Jasper] for bringing it to our attention.