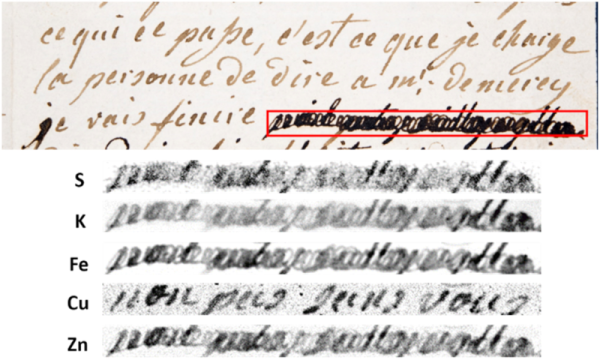
Even if you aren’t a giant history buff, you probably know that the French royal family had some difficulties in the late 1700s. The end of the story saw the King beheaded and, a bit later, his wife the famous Marie Antoinette suffered the same fate. Marie wrote many letters to her confidant, and probable lover, Swedish count Axel von Fersen. Some of those letters have survived to the present day — sort of. An unknown person saw fit to blot out parts of the surviving letters with ink, rendering them illegible. Well, that is, until now thanks to modern x-ray technology.
Anne Michelin from the French National Museum of Natural History and her colleagues were able to foil the censor and they even have a theory as to the ink blot’s origin: von Fersen, himself! The technique used may enable the recovery of other lost portions of historical documents and was published in the journal Science Advances.
Changing colors during a 3D print is notoriously difficult. Either you need multiple heads ready to go during the print which increases operating and maintenance costs for your printer, or you need to stop the print to switch the filament and then hope that everything matches up when the print is resumed. There are some workarounds to this problem, but not many of them are as smooth an effortless as this one which uses erasable pen ink to add colors to the filament on the fly.
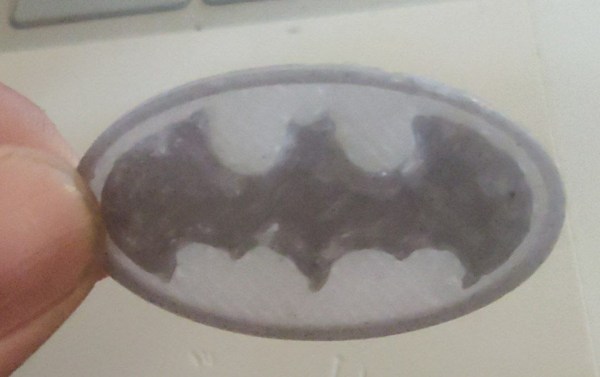
Erasable pen ink is a thermochromic material that doesn’t get removed from paper when erased like graphite from a pencil. Instead the heat from the friction of erasing causes it to become transparent. By using this property for a 3D print, the colors in the print can be manipulated simply by changing the temperature of the hot end. Of course the team at [Autodrop3d] had quite a learning curve when experimenting with this method, as they had to run the extruder at a much lower temperature than normal to have control over the ink’s color, had to run the print much slower than normal, and were using a very sticky low-temperature plastic for the print.
With all of these modifications to the print setup, there are bound to be some limitations in material and speed, but the results of the project speak for themselves. This allows for stock 3D printers to use this method with no hardware modifications, and the color changes can be done entirely in software. While everyone catches up with this new technology, there are some other benefits to a 3D printer with multiple print heads, though, and some clever ways of doing the switching without too much interruption.
Meme investing is all the rage these days, and what better way to get in on the loss fun than with your very own old-timey mechanical stock ticker? Unfortunately, they’re about as expensive and rare as you might expect for a piece of Victorian-era electronics. Lucky for us, [secretbatcave] has shown that you can put together a functional look-alike that costs about as much as a GameStop (GME) share was worth before it started heading to the Moon.
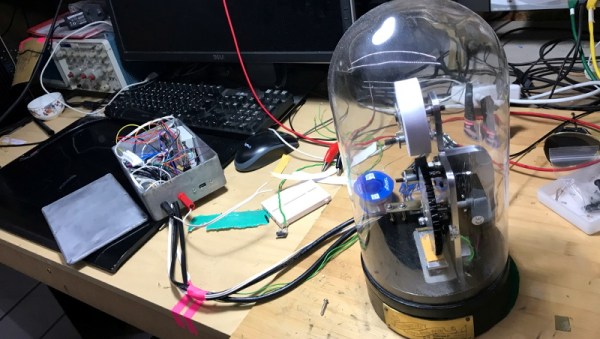
This might seem like an ambitious project, but in actuality the machine only has a few moving parts. There’s a stepper motor to feed the paper, another to spin an inked embossing wheel, and a couple of solenoids attached to a pusher plate. Rather than trying to move the heavy wheel, the pusher plate smashes the paper up into it. The fact that this produces a satisfying “clack” sound as each character is printed is just an added bonus.
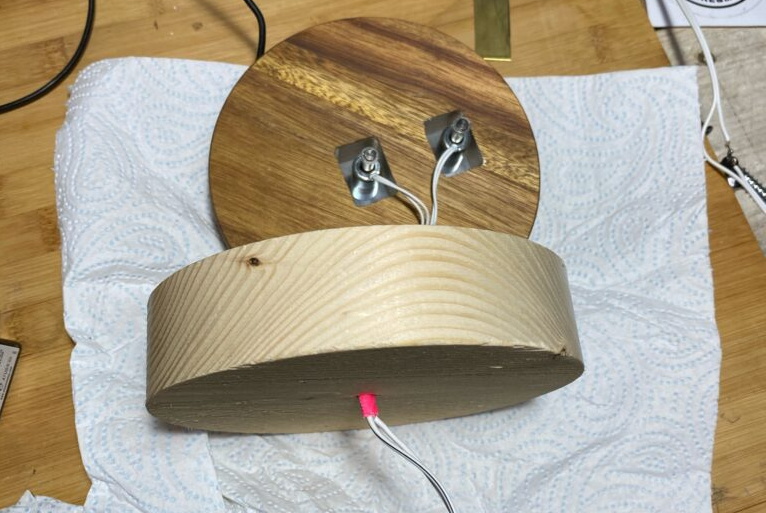
Extending the base to hold the solenoids.
To sell the look, [secretbatcave] put the whole mechanism inside a tall glass dome from IKEA. The matching wooden base was extended so the pusher plate solenoids could fit inside, after which it was dunked in ink and sprayed with a gloss sealer to give it that shiny black finish people seemed to love in the 1900s. With the addition of an engraved brass nameplate, it looks like the machine fell out of a time warp.
In terms of electronics, there’s an ESP32, a pair of stepper motor controllers, and a relay for the solenoids. As of right now it all lives in a rather utilitarian box that’s tethered to the ticker, but we’re sure the lot could get tucked under the base with the help of a custom PCB should you be so inclined.
With an ESP32 at the helm, the ticker could easily be configured to print out whatever data it receives over the network or picks up from MQTT. With hardware like this and a pair of Diamond Hands, those tendies are as good as yours.
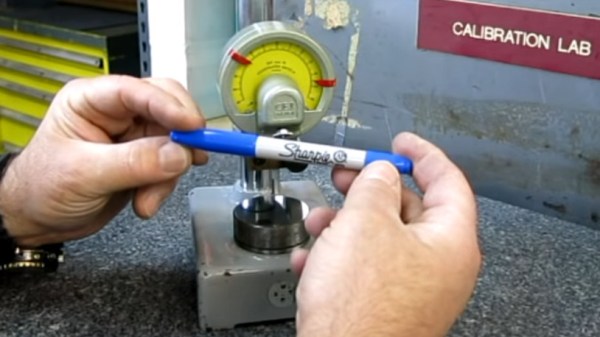
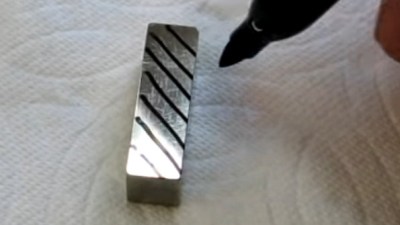
[Tom] from [oxtoolco] got his hands on a tool that measures in 1/10,000,000th (that’s one ten-millionth) increments and was wondering what kind of shenanigans you can do with this Lamborghini of dial indicators. It’s one thing to say you’re going to measure ink, but coming up with the method is the leap. In this case it’s a gauge block — a piece of precision ground metal with precise dimensions and perfectly perpendicular faces. By zeroing the indicator on the block, then adding lines from the Sharpie and measuring again, you can deduce the thickness of the ink markings.
After arraying diagonal lines on the gauge block it is placed lines-down under the dial indicator. This distributes the ink layer across a larger area, as probing the ink line directly would likely result in inaccurate readings. On that topic the gauge block is moved using pliers, as introducing heat from your fingers could result in expansion of the metal upsetting the readings.
The results? Black, blue, and red Sharpie were all tested, alongside blue and black Dykem layout fluid. Ten samples of each were run and the readings were all very close, save a couple of obvious outliers. Clocking in the thinnest is black Sharpie at about 118 millionths of an inch (~30 microns) and blue Dykem was the thickest at 314 millionths (86 microns). [Tom] quips that since we now know the thickness, you could even use ink as a shim.
Inkjet printers are cheap to buy, but expensive to run. Replacement cartridges can easily cost double the price of the hardware itself, leading many to decry the technology entirely. However, the hackers of the world have the problem licked – enter the continuous ink system.
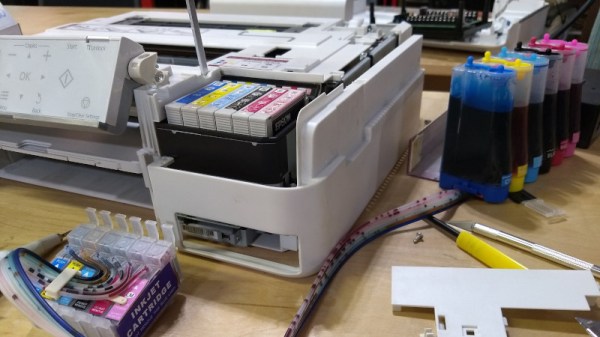
[cprossu] wanted an affordable color printing solution for the hackerspace. A cheap printer was sourced from a thrift store. The model chosen was selected for its lack of cartridge DRM and the availability of kits on eBay for conversion to a continuous ink system. This involves running large refillable tanks of ink instead of small individual cartridges which must be thrown away when empty.
[cprossu] discusses both the challenges you’ll likely face in a general build, as well as the specific work required to handle the conversion on an Epson Artisan 725. There’s also excessive label-maker abuse, which always brings a smile to our face. It’s a conversion well worth considering if you find yourself regularly purchasing expensive cartridges. We’ve even seen similar builds as far back as 2009, right from the ground up!
Ink! No matter the printer you’ve got, whether it be inkjet, laser or otherwise, it’s the consumables that will send you broke. At times, the cost of Hewlett-Packard black ink has exceeded the price per volume of human blood, and shareholders around the world have rejoiced.
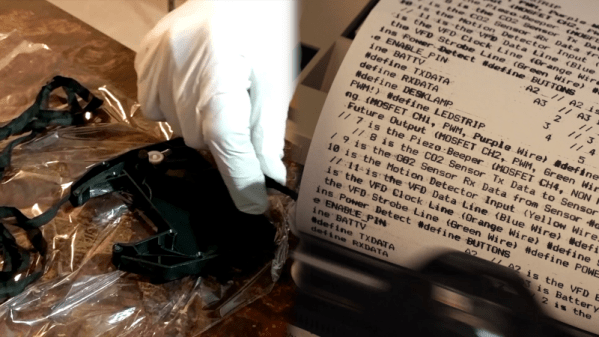
As a retrocomputing reprobate, I have a personal dilection for printers of the vintage persuasion. My previous dalliances have involved fully fledged office copiers, but lately I’ve found myself tinkering with dot matrixes of a 1980s vintage. These workhorses are now reaching middle age, and as you’d expect, their ribbons are a little worse for wear after all this time.
Replacements are cheap enough for the most common printers, but shipping takes weeks and hackers are an impatient bunch. Plus, if you’ve got one of the more obscure models, it’s unlikely you’ll find a fresh cart just sitting on the shelf. It was these factors that spurred my good friend [Cosmos2000] and I into action.
[HomoFaciens] is always making us feel silly about our purchases. Did we really need to buy a nice set of stepper motors for that automation project? Couldn’t we have just used some epoxy and a threaded rod to make an encoder? Did we need to spend hours reading through the documentation for an industrial inkjet head? Couldn’t we just have asked ourselves, “What would [HomoFaciens] do?” and then made a jailhouse tattoo gun attached to a broken printer carriage and some other household tech trash?
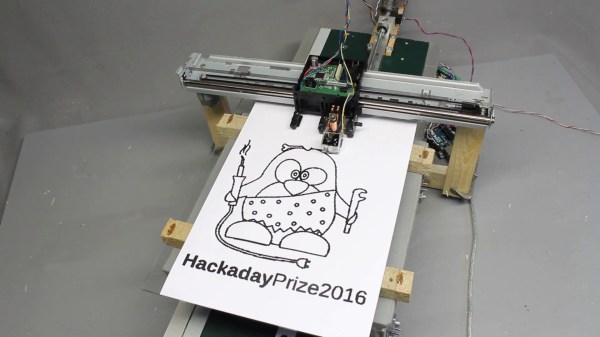
In his continuing work for his Hackaday prize entry, which we have covered before, his latest is a ink (…drop? ) printer. We think the goal is a Gingery book for CNC. He begins to combine all his previous work into a complete assembly. The video, viewable after the break, starts by explaining the function of a salvaged printer carriage. A motor attached to a belt moves the carriage back and forth; the original linear encoder from the printer is used for positional feedback.
The base of the printer is a homemade y-carriage with another salvaged printer motor and encoder driving a threaded rod. The positional feedback for this axis is provided by a optical mouse gliding on a sheet of graph paper. The printer nozzle is a cup of ink with a solenoid actuated needle in it. When the needle moves in a hole at the bottom, it dispenses ink.
As always, [HomoFaciens] makes something that is the very definition of a hack. Commenters will have to go elsewhere to leave their favorite debasement.
 [Tom] from [oxtoolco] got his hands on a tool that measures in 1/10,000,000th (that’s one ten-millionth) increments and was wondering what kind of shenanigans you can do with this Lamborghini of dial indicators. It’s one thing to say you’re going to measure ink, but coming up with the method is the leap. In this case it’s a gauge block — a piece of precision ground metal with precise dimensions and perfectly perpendicular faces. By zeroing the indicator on the block, then adding lines from the Sharpie and measuring again, you can deduce the thickness of the ink markings.