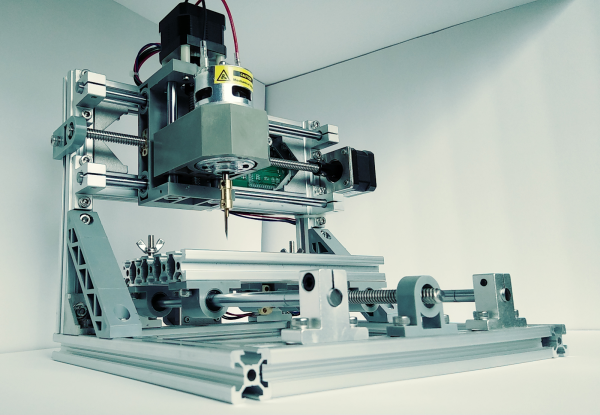
Review: LinkSprite Mini CNC

It’s a great time to be a hobbyist. No matter how you feel about the Arduino/Raspberry Pi effect, the influx of general enthusiasm and demand it has created translates to better availability of components, a broader community, and loads of freely available knowledge. When people have access to knowledge and ideas, great things can happen. Tools that were once restricted to industrial use become open source, and the price of entry-level versions goes into a nosedive.

As we’ve seen over the last several years, the price of cheap 3D printers keeps falling while the bar of quality keeps rising. It’s happening with laser cutters and carving tools, too. Strolling through Microcenter a few weeks ago, I spotted a new toy on the back wall next to the 3D printers. It was LinkSprite’s desktop mini CNC. They didn’t have one out on display, but there were two of them in boxes on the shelf. And boy, those boxes were small. Laughably small. I wondered, could this adorable machine really be any good? To some, the $200 price tag suggests otherwise. To me, the price tag made it justifiable, especially considering that the next price point for a hobby CNC mill is at least twice as much. I took my phone out and stood there frantically looking for reviews, documentation, anything that was available. It seemed that the general, if sparse consensus is that this thing isn’t a total waste of money. Oh, and there’s a wiki.

According to LinkSprite’s wiki, this little machine will engrave wood, plastic, acrylic, PVC, and PCBs. It will specifically not engrave metal (PCB copper notwithstanding). I’m a bit leery of the chemicals used in the PCB etching process, so the idea of engraving them instead was especially tempting. I pulled the trigger.

Continue reading “Review: LinkSprite Mini CNC”

Custom PCB Revives A Vintage Tree Stand

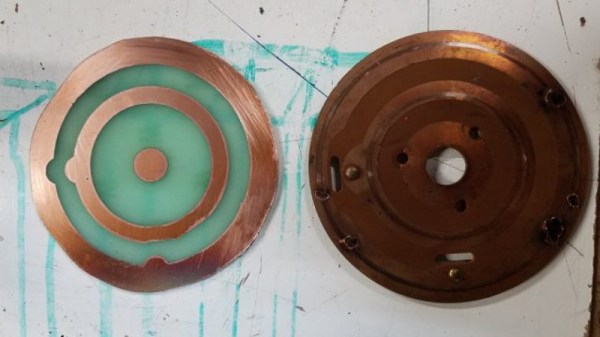
After 56 years, [Jeff Cotten]’s rotating Christmas tree stand had decided enough was enough. While its sturdy cast aluminum frame was ready for another half-century of merriment, the internal mechanism that sent power up through the rotating base had failed and started tripping the circuit breaker. The problem itself seemed easy enough to fix, but the nearly 60 year old failed component was naturally unobtanium.

But with the help of his local makerspace, he was able to manufacture a replacement. It’s not exactly the same as the original part, and he may not get another 56 years out of it, but it worked for this season at least so that’s a win in our books.

The mechanism inside the stand is fairly simple: two metal “wipes” make contact with concentric circle traces on a round PCB. Unfortunately, over the years the stand warped a bit and the wipe made contact with the PCB where it wasn’t intended do. This caused an arc, destroying the PCB.

The first step in recreating the PCB was measuring the wipes and the distance between them. This allowed [Jeff] to determine how thick the traces needed to be, and how much space should be between them. He was then able to take that data and plug it into Inkscape to come up with a design for his replacement board.

To make the PCB itself, he first coated a piece of copper clad board with black spray paint. Using the laser cutter at the makerspace, he was then able to blast away the paint, leaving behind the two concentric circles. A quick dip in acid, a bit of polishing with toothpaste, and he had a replacement board that was close enough to bolt up in place of the original hardware.

If you’d like to see the kind of hacks that take place above the stand, we’ve got plenty to get you inspired before next Christmas.

Lasering Axonometric Fonts

I am something of an Inkscape fan. If you’re not familiar with the application, it’s like an Open Source version of Adobe Illustrator. Back when I was a production artist I’d been an Illustrator master ninja but it’s been four years and my skills are rusty. Plus, Inkscape is just enough different in terms of menus and capabilities that I had a hard time adapting.

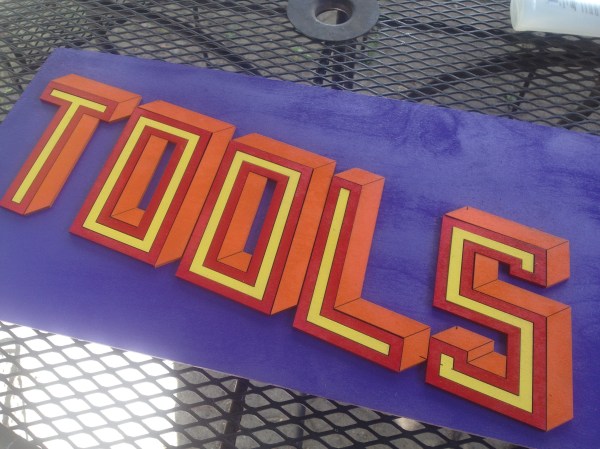
So I created some wooden lettering with the help of Inkscape and a laser cutter, and I’m going to show you how I did it. If you’re interested in following along with this project, you can find it on Hackaday.io.

While playing around with Inkscape, I noticed you can create a variety of grids, including axonometric grids. This term refers to the horizon lines in an orthographic projection. In other words, it helps make things look 3D by providing perspective lines.

Continue reading “Lasering Axonometric Fonts”

Drop-in Controller For EBay K40 Laser Engraver Gets Results

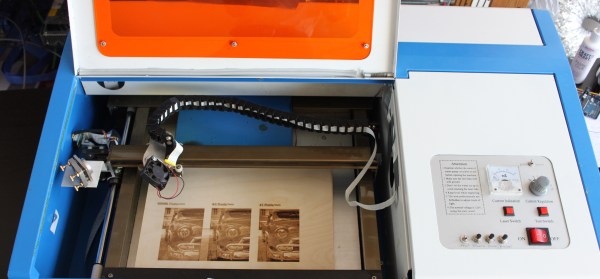
[Paul de Groot] wrote in to let us know about a drop-in controller replacement he designed for those economical K40 laser engravers that are everywhere on eBay. With the replacement controller, greatly improved engraving results are possible along with a simplified toolchain. Trade in the proprietary software and that clunky security dongle for Inkscape and a couple of plugins! [Paul] felt that the work he accomplished was too good to keep to himself, and is considering a small production run.

Laser engravers are in many ways not particularly complex devices; a motion controller moves the head in x and y, and the laser is turned on or off when needed. But of course, the devil is in the details and there can be a surprising amount of stuff between having a design on your screen and getting it cut or engraved in the machine. Designing in Inkscape, exporting to DXF, importing the DXF to proprietary software (which requires a USB security dongle to run), cleaning up any DXF import glitches, then finally cutting the job isn’t unusual. And engraving an image with varying shades and complex dithering? The hardware may be capable, but the stock software and controller? Not so much. It’s easy to see why projects to replace the proprietary controllers and software with open-source solutions have grown.

Cheap laser engravers may come with proprietary controllers and software, but they don’t need to stay that way. Other efforts we have seen in this area include LaserWeb, which provides a browser-based interface to a variety of open-source motion controllers like Grbl or Smoothieware. And if you’re considering a laser engraver, take a few minutes to learn from the mistakes of other people.

Meet Cartesio, Robot Artist

[Robottini] released plans for his robot, Cartesio, that is essentially an Arduino-controlled plotter made to create artwork. The good part about Cartesio is the low cost. [Robottini] claims it cost about $60 to produce.

The robot has an A3-size drawing bed and is practically the XY part of a 3D printer. In fact, most of the parts are 3D printed and the mechanical parts including M8 smooth rod. LM8UU bearings, and GT2 belts and pulleys. If you’ve built a 3D printer, those parts (or similar ones) should sound familiar.

The Arduino uses GRBL to drive the motors from GCODE. [Robottini] has three different workflows to produce drawings from applications like Inkscape. You can see some of the resulting images below.

We’ve covered GRBL before, and it is the heart of many motion control projects. If you’d rather draw on something less permanent, you might try this project.

Continue reading “Meet Cartesio, Robot Artist”

Development Tools Of The Prop-Making World

We’ve seen them before. The pixel-perfect Portal 2 replica, the Iron Man Arc Reactor, the Jedi Lightsaber. With the rise of shared knowledge via the internet, we can finally take a peek into a world hidden behind garage doors, basements, and commandeered coffee tables strewn with nuts, bolts, and other scraps. That world is prop-making. As fab equipment like 3D printers and laser cutters start to spill into the hands of more people, fellow DIY enthusiasts have developed effective workflows and corresponding software tools to lighten their loads. I figured I’d take a brief look at a few software tools that can open the possibilities for folks at home to don the respirator and goggles and start churning out props.

Continue reading “Development Tools Of The Prop-Making World”

Fitting 3D Prints On Eagle Boards

One of the hardest things you’ll ever do is mesh your electronic design with a mechanical design. Getting holes for switches in the right place is a pain, and if you do it enough, you’ll realize the beauty of panel mount jacks. This is especially true when using Eagle to design a PCB, but with a few tricks, it’s possible to build 3D printable pieces directly from Eagle designs.

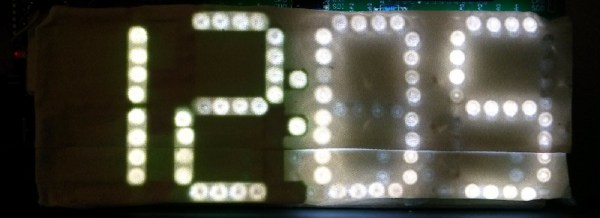
[Tyler] built a clock with a bunch of LEDs. While the clock worked great, there was a lot of light leakage around the segments of his custom seven-segment numbers. The solution is a light mask, and [Tyler] figured out how to make one in Eagle.

The first step is to draw a new layer on the Eagle board that defines the light mask. This is exported as an EPS file in the CAM processor that gives him a 2D drawing. At least it’s to scale.

The next step is to install Inkscape and install paths2openscad. This turns the two-dimensional drawing into a 2D object that can be rendered in OpenSCAD and exported as a 3D printable STL file.

Does the project work? The results are great – the entire light mask is a single-wall print, and since this light mask doesn’t need any mechanical strength, it should hold up well. The clock looks much better than before, and [Tyler] has a new technique for making 3D objects for his 2D PCBs.