Custom Font Generation Means Boss Embossing

[Attoparsec] loves learning languages, but says they have a hard time retaining anything. We find that hard to believe given the number of tongues that [Attoparsec] was able to translate into embossing plastic. That’s right, this project is about making custom font wheels for an embosser, formerly known as a label maker.

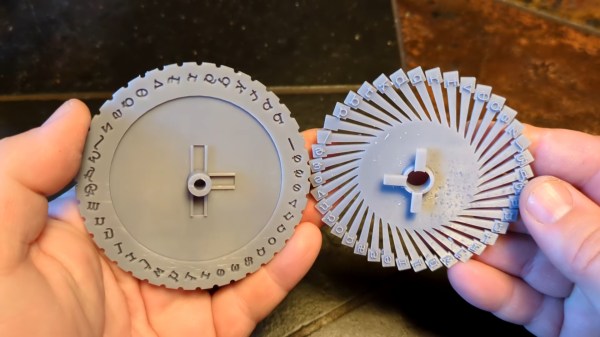
If you think this seems like a finicky and perhaps lengthy mission to undertake, you’re right. In case you’re unfamiliar, ye olde embosser uses both a positive and a negative of each glyph in order to impress the sticky-backed plastic strip. It all started when [Attoparsec] found out about the Dymo 1595, which comes with font wheels for both Japanese hiragana and katakana in addition to English.

After sacrificing the English wheel, it was time to model the wheel part itself. That was easy enough, but the characters themselves were another story. Because of how the thing works, the negative has to be bigger than the positive to provide enough room for the tape. After trying to achieve the right draft angle on the characters in several CAD packages, [Attoparsec] was told that it should be fairly easy in OpenSCAD, and it was.

Printing in resin took about five hours to do both wheels at once. Once [Attoparsec] had the workflow down, they were off to the races. In this video alone, they made Old English, Esperanto, the International Phonetic Alphabet, an alphabet created by playwright George Bernard Shaw, Palm Pilot input script, and of course, Tolkein’s Tengwar. Be sure to check out the video after the break.

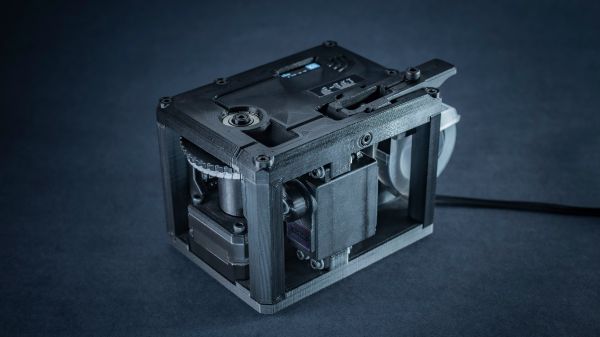
Tired of turning the wheel of your embosser to make labels? Automate the process with a stepper motor or two.

Continue reading “Custom Font Generation Means Boss Embossing”

DIY Automated Printer Kerchunks Out Classic Embossed Labels

For our money, the best label for pretty much any purpose is one of those embossed Dymo-style stick-on labels, the kind with the raised white letters. There’s just something about them — the raised letters just beg to be touched, their legibility is outstanding, they lend an unmatched retro feel to a project, and the experience of creating one with one of those manual kerchunkers is oddly satisfying.

But alas, those manual label makers aren’t what they used to be, as [Andrei Speridião] discovered when his fell apart in his hands. Rather than complain, he automated his label maker and turned it into a computer peripheral.  Dubbed “E-TKT”, the DIY label printer takes the daisy-wheel embossing die from his defunct labeler and puts it under computer control. Rather than the ratchet mechanism of the original, a stepper motor advances the tape, another stepper rotates the wheel to the correct position, and a servo does the kerchunking duty. The process repeats until the label is complete and neatly cut off, ready to apply. An ESP32 runs the mechanism and serves up a web application to compose labels and control the printer. There’s also an OLED display and, of course, an embossed label. Video demo below.

We don’t care what [Bart Simpson] thinks, embossed labels are cool, and this makes them even cooler. And as [Andrei] points out, this is also a neat way around the nasty DRM trick that some companies are foisting on the label-making public. That alone is reason to cheer this project on — but we won’t complain about the beautiful photography and excellent documentation, either.

Continue reading “DIY Automated Printer Kerchunks Out Classic Embossed Labels”

Script Makes Custom Pinout Labels For Your Chips

cusom-pinout-labels

After years of prototyping hobby electronics we’ve learned (several times actually) that when something’s not working it’s a problem with the hardware. Usually the jumper wires aren’t hooked up correctly, or we needed to throw a pull-up resistor in and forgot to. One thing that can really help sort these problems out quickly is a pinout label for each chip like the ones seen above. This is a project which [John Meacham] came up with. It uses a script to generate chip pinouts on a label maker.

The label maker he started with is a Brother PT-1230PC. It connects to a computer via USB and can use a few different widths of self adhesive label tape. [John] found that the 1/4″ wide tape is nearly a perfect fit for PDIP components.

His script takes a YAML file as the input. This formatting standard makes is quick an easy to whip up a label for a new chip using just your text editor. From there his Pearl script turns the data into a Portable Network Graphics (.png) file with the labels spaced for the 0.1″ pitch of the chip. Send this graphic to your label maker and you’ve got an adhesive reminder that will help reduce the time you spend pawing through datasheets just for the pinouts.