Hackaday Podcast 071: Measuring Micrometers, The Goldilocks Fit, Little Linear Motors, And 8-bit Games On ESP32

Hackaday editors Mike Szczys and Elliot Williams fan through a fantastic week of hacking. Most laser cutters try to go bigger, but there’s a minuscule one that shows off a raft of exotic components you’ll want in your bag of tricks. Speaking of tricks, this CNC scroll saw has kinematics the likes of which we’ve never seen before — worth a look just for the dance of polar v. Cartesian elements. We’ve been abusing printf() for decades, but it’s possible to run arbitrary operations just by calling this Turing-complete function. We wrap the week up with odes to low-cost laptops and precision measuring.

Take a look at the links below if you want to follow along, and as always, tell us what you think about this episode in the comments!

Direct download (60 MB or so.)

Continue reading “Hackaday Podcast 071: Measuring Micrometers, The Goldilocks Fit, Little Linear Motors, And 8-bit Games On ESP32”

Taking The Pulse (Width Modulation) Of An FPGA

I like to think that there are four different ways people use FPGAs:

  1. Use the FPGA as a CPU which allows you to add predefined I/O blocks
  2. Build custom peripherals for an external CPU from predefined I/O blocks
  3. Build custom logic circuitry from scratch
  4. Projects that don’t need an FPGA, but help you learn

I’d bet the majority of FPGA use falls into categories one and two. Some FPGAs even have CPUs already built-in. Even without an onboard CPU, you can usually put a CPU “core” (think reusable library) into the chip. Either way, you can always add other cores to create UARTs, USB, Ethernet, PWM, or whatever other I/O you happen to need. You either connect them to a CPU on the chip, or an external one. With today’s tools, you often pick what you want from a list and then your entire project becomes a software development effort.

Continue reading “Taking The Pulse (Width Modulation) Of An FPGA”

Mystery FPGA Circuit Feels The Pressure

You have an FPGA circuit and you want the user to interact with your circuit by pushing a button. Clearly, you need a button, right? Not so fast! [Clifford Wolf] recently found a mysterious effect that lets him detect when someone pushes on his iCEstick board.

The video below shows the mystery circuit (which is just the stock iCEstick board), which appears to react any time you flex the PC board. The Verilog implements a simple ring oscillator (basically an inverter with its output tied to its input).

Continue reading “Mystery FPGA Circuit Feels The Pressure”

Learning Verilog For FPGAs: Hardware At Last!

Getting into FPGA design isn’t a monolithic experience. You have to figure out a toolchain, learn how to think in hardware during the design, and translate that into working Verliog. The end goal is getting your work onto an actual piece of hardware, and that’s what this post is all about.

In the previous pair of installments in this series, you built a simple Verilog demonstration consisting of an adder and a few flip flop-based circuits. The simulations work, so now it is time to put the design into a real FPGA and see if it works in the real world. The FPGA board we’ll use is the Lattice iCEstick, an inexpensive ($22) board that fits into a USB socket.

Like most vendors, Lattice lets you download free tools that will work with the iCEstick. I had planned to use them. I didn’t. If you don’t want to hear me rant about the tools, feel free to skip down to the next heading.

Continue reading “Learning Verilog For FPGAs: Hardware At Last!”

Learning Verilog For FPGAs: Flip Flops

Last time I talked about how to create an adder in Verilog with an eye to putting it into a Lattice iCEstick board. The adder is a combinatorial circuit and didn’t use a clock. This time, we’ll finish the demo design and add two clocked elements: a latch that remembers if the adder has ever generated a carry and also some counters to divide the 12 MHz clock down to a half-second pulse to blink some of the onboard LEDs.

Why Clocks?

Clocks are an important part of practical digital design. Suppose you have a two input AND gate. Then imagine both inputs go from zero to one, which should take the output from zero to one, also. On paper, that seems reasonable, but in real life, the two signals might not arrive at the same time. So there’s some small period of time where the output is “wrong.” For a single gate, this probably isn’t a big deal since the delay is probably minuscule. But the errors will add up and in a more complex circuit it would be easy to get glitches while the inputs to combinatorial gates change with different delays.

Continue reading “Learning Verilog For FPGAs: Flip Flops”

Learning Verilog For FPGAs: The Tools And Building An Adder

Over the last year we’ve had several posts about the Lattice Semiconductor iCEstick which is shown below. The board looks like an overgrown USB stick with no case, but it is really an FPGA development board. The specs are modest and there is a limited amount of I/O, but the price (about $22, depending on where you shop) is right. I’ve wanted to do a Verilog walk through video series for awhile, and decided this would be the right target platform. You can experiment with a real FPGA without breaking the bank.

In reality, you can learn a lot about FPGAs without ever using real hardware. As you’ll see, a lot of FPGA development occurs with simulated FPGAs that run on your PC. But if you are like me, blinking a virtual LED just isn’t as exciting as making a real one glow. However, for the first two examples I cover you don’t need any hardware beyond your computer. If you want to get ready, you can order an iCEstick and maybe it’ll arrive before Part III of this series if published.

Continue reading “Learning Verilog For FPGAs: The Tools And Building An Adder”

Open Source FPGA Toolchain Builds CPU

When you develop software, you need some kind of toolchain. For example, to develop for an ARM processor, you need a suitable C compiler, a linker, a library, and a programmer. FPGAs use a similar set of tools. However, instead of converting source code to machine language, these tools map the intent of your source code into configuration of FPGA elements and the connections between them.

There’s some variation, but the basic flow in an FPGA build is to use a synthesizer to convert Verilog or VHDL to a physical design. Then a mapper maps that design to the physical elements available on a particular FPGA. Finally, a place and route step determines how to put those elements in a way that they can be interconnected. The final step is to generate a bitstream the chip understands and somehow loading it to the chip (usually via JTAG or by programming a chip or an external EEPROM).

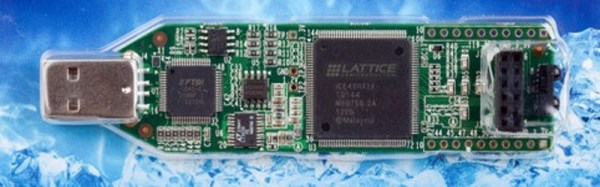
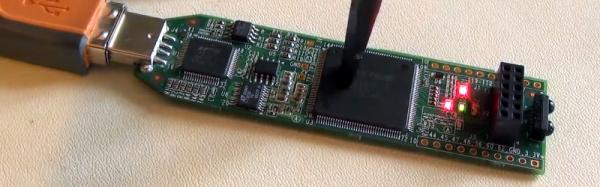
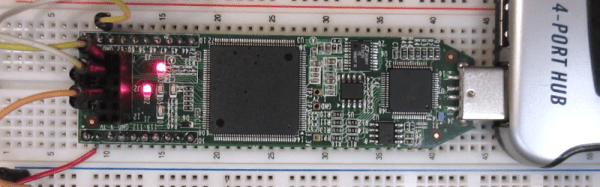
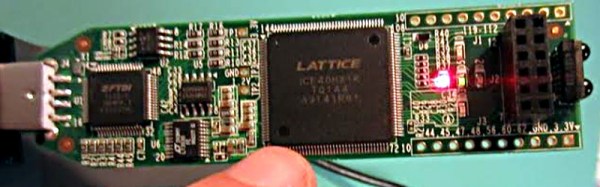
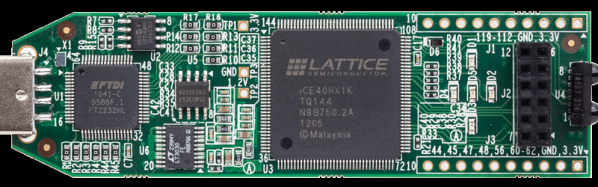
One problem with making your own tools is that the manufacturers typically hold the bitstream format and other essential details close to their chest. Of course, anything can be reverse engineered (with difficulty) and [James Bowman] was able to build a minimal CPU using  an open source Lattice toolchain. The project relies on several open source projects, including  IceStorm, which provides configuration tools for Lattice iCE40 FPGAs (there is a very inexpensive development platform available for this device).

We’ve covered IceStorm before. The IceStorm project provides three tools: one to produce the chip’s binary format from an ASCII representation (and the reverse conversion), a programmer for the iCEstick and HX8K development boards, and database that tells other open source tools about the device.

Those tools blend with other open source tools to form a complete toolchain–a great example of open source collaboration. Yosys does the synthesis (one of the tools available on the EDAPlayground site). The place and route is done by Arachne. The combined tools are now sufficient to build the J1A CPU and can even run a simple version of Forth. If you’ve ever wanted to play with an FPGA-based CPU design, you now have a $22 hardware option and free tools.

Continue reading “Open Source FPGA Toolchain Builds CPU”