This LED Cube Is One Heck Of An ICEBreaker

Like the tastes of the makers that build them, LED cubes come in all shapes and sizes. From the simplest 3x3x3 microcontroller test, to fancier bespoke installations, they’re a great way to learn a bunch of useful embedded techniques and show off at the same time. [kbob] has done exactly that in spades, with a glittering cube build of his own and published a repository with all the files.

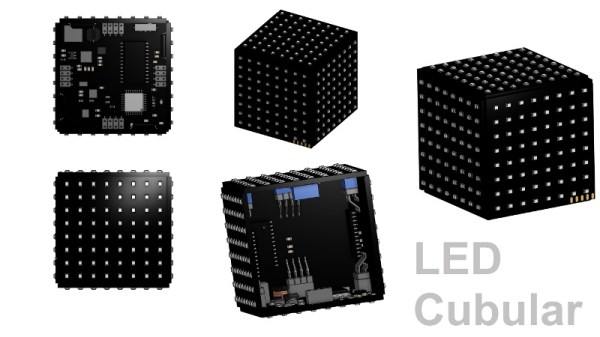
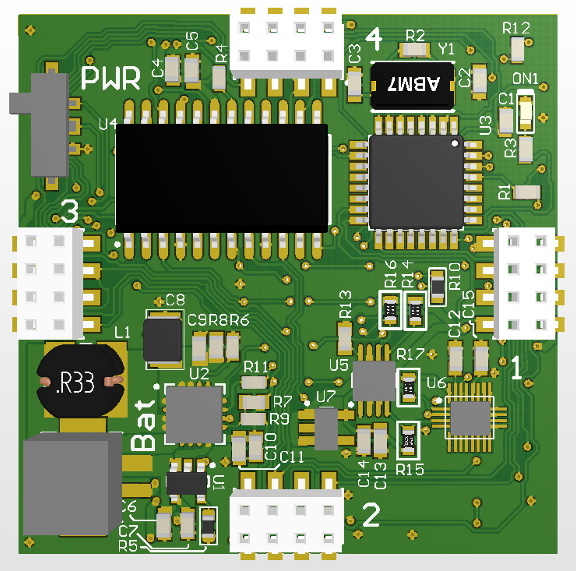
Just like a horde of orcs from Mordor, [kbob]’s cube is all about strength in numbers. Measuring 136 mm on each side, it’s constructed out of 64 x 64 P2 panels, packing 4096 LEDs per side, or 24,576 total. A Raspberry Pi is used to run the show, allowing a variety of animations to be run. Unfortunately, it lacks the raw horsepower to run this many LEDs at a decent frame rate. Instead, it’s teamed up with an ICEBreaker FPGA, which can churn out the required HUB75 signals for the panels without breaking a sweat.

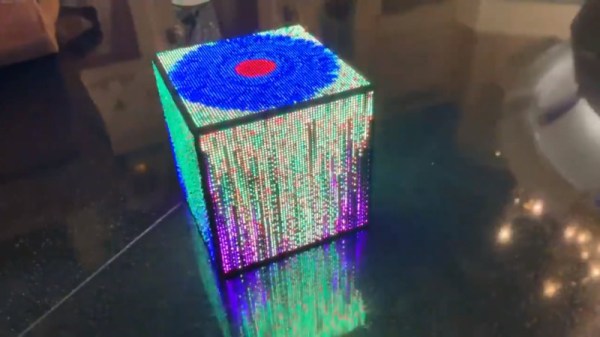
Thanks to the high density of tiny LEDs, and the smooth framerate of the animations, the final effect is rather gorgeous. [kbob] notes that there’s actually a lot of people working on similar projects with ICEBreaker muscle; a recent video from [Piotr] is particularly impressive.

The LED cube will likely remain a staple for sometime, and we can’t wait to see what comes out next from the community. You can even throw in some OpenGL if you wanna get fancy. Video after the break.

Continue reading “This LED Cube Is One Heck Of An ICEBreaker”

Lead Former Makes LED Cubes A Little Easier To Build

There’s no doubting the allure of a nicely crafted LED cube; likewise, there’s no doubting that they can be a tremendous pain to build. After all, the amount of work scales as the cube of the number of LEDs you want each side to have, and let’s face it – with LED cubes, the bigger, the better. What to do about all that tedious lead forming?

[TylerTimoJ]’s solution is a custom-designed lead-forming tool, and we have to say we’re mighty impressed by it. His LED cubes use discrete RGB LEDs, the kind with four leads, each suspended in space by soldering them to wires. For the neat appearance needed to make such a circuit sculpture work, the leads must be trimmed and bent at just the right angles, a tedious job indeed when done by hand. His tool has servo-controlled jaws that grip the leads, with solenoid-actuated lead formers coming in from below to bend each lead just the right amount. The lead former, along with its companion trimmer, obviously went through a lot of iterations before [TylerTimoJ] got everything right, but we’d say being able to process thousands of LEDs without all the tedium is probably worth the effort.

We’re looking forward to the huge LED cubes this tool will enable. Perhaps this CNC wire bender and an automated wire cutter would come in handy for the supporting wires?

Continue reading “Lead Former Makes LED Cubes A Little Easier To Build”

This Rubik’s Cube Lamp Has Some Serious Retro Style

The reassembly is handled with super glue and acrylic to diffuse the light.

There’s an easy way to signal to your friends and family that you’re a successful, urbane member of society – by decorating your home with tasteful references to popular culture. A classy oil painting of Yoda or a framed Tarantino movie poster is a great way to go. Alternatively, consider building yourself a swanky Rubik’s Cube lamp.

The build starts by disassembling the cube, as if you were going to cheat and reassemble it in the correct order. Instead, the cube is then gutted to make room for electronics. Inside, a ping pong ball covered in LEDs is installed, along with lithium batteries and a power board cribbed from a USB power bank. The whole assembly is laced back together with glue and frosted acrylic which acts as an retro-styled grid-like diffuser. The power button is even sneakily hidden in one of the squares!

It’s a sweet retro build that would make an excellent addition to any hip lounge room. We’re a big fan of self-contained glowing cubes here at Hackaday – we’ve covered nuclear powered and infinity designs before. Video after the break.

Continue reading “This Rubik’s Cube Lamp Has Some Serious Retro Style”

Epoxy LED Cube Looks Sleek, And Flashes To The Beat

If there’s one thing that’s universally popular in these polarizing times, it’s colorful glowing objects. LEDs reign supreme in this area, and we’re accustomed to seeing all manner of fun flashy devices hit the tips line. Today is no different, and we’ve been looking at [Modustrial Maker]’s stylish epoxy LED cube.

The build starts with the casting of a black epoxy cube, with a cutout near the top in which the LEDs will be installed. A melamine form is used, with aluminium foil tape, caulk and paste wax to help seal it up. After releasing the cast from the form, there were some unsightly voids which were swiftly dispatched, by trimming the block down with a table saw. With the block cut to size, LED strips were installed, and the light cavity sealed with hot glue before white epoxy was poured in as a diffuser. All that’s left was a simple matter of polishing the cube and installing electronics.

The cube runs from a single-cell LiPo battery, and there’s a wireless power receiver and charging module to keep the power flowing. The cube can be used on most wireless phone chargers, as well as its own dedicated charging base. The LEDs are controlled by an off-the-shelf module, which offers a variety of flashing displays as well as a music-reactive mode.

While the electronics side is done with off-the-shelf parts, the real art in this piece is in the build of the cube. Its glossy, attractive form would look stunning on any coffee table or bedside shelf.

LED cubes are a great rabbit hole to go down on your lunch break. This OpenGL-enabled build is particularly impressive. Video after the break.

Continue reading “Epoxy LED Cube Looks Sleek, And Flashes To The Beat”

OpenGL Shaders And An LED Cube

Back in February at the Hacker Hotel camp in the Netherlands, among the many pieces of work around the venue was a rather attractive LED cube. Very pretty, but LED cubes have been done many times before.

If a casual attendee had taken the time to ask though, they might have found something a little more interesting, for while the cube in question might have had the same hardware as the others it certainy didn’t have the same software. [Polyfloyd] had equipped his LED cube with OpenGL shaders to map arbitrary images to the cube’s pixels in 3D space.

Hardware-wise it’s the same collection of AliExpress LED panels and Raspberry Pi driver board that the other cubes use, in this case mounted on a custom laser-cut frame. Driver software comes from an open-source library round which he’s put a wrapper allowing input through a UNIX pipe. This can take the RGB output of an OpenGL shader, of which he has created both 2D to 3D and spherical projection versions. The must-see demo is a global map of light pollution, and the result is a rather impressive piece of work.

If LED cubes are your thing, don’t forget this recent Hackaday Prize entry.

Resistance Is Futile, You Want This LED Cube

We’re suckers for a good desk toy here at Hackaday, so this 2019 Hackaday Prize entry from [Jack Flynn] certainly caught our eye. The idea is that by using professionally manufactured dual layer PCBs and only surface mount components, you can create a cube that has an LED matrix on each face and all of the electronics hidden within. We’re not entirely sure if there’s any practical application for such a device, but we know we’d certainly like to have one blinking madly away on our shelf regardless.

Before having any of the PCBs manufactured, [Jack] is putting a considerable amount of thought into the design so he doesn’t end up painting himself info a corner (which is of course eight times as bad when you’re building a cube). By importing the PCB files into OnShape, he’s able to “assemble” a virtual representation of the final product to better understand how everything will fit together. He wants to limit the amount of times the cube will need to be pulled apart, so everything from how it will sit in its 3D printed cradle to the placement of breakaway tabs that ensure the internal power switch is accessible are being carefully planned out.

The current design puts the “brains” on the bottom board, with every other panel holding a daisy-chained MAX7219 to drive its own individual 64 LED matrix. Initially the dimensions of the ATmega328p powered cube will be 42 x 42 x 42 mm, with a total of 384 LEDs. Ultimately, [Jack] hopes the modular nature of the design could allow the size of the cube to be increased, or perhaps even take on a different shape entirely.

Generally the LED cubes we see are of the more wiry variety, so it’s particularly interesting when they take on solid forms like this one. Given the nearly universal popularity of blinking LED gadgets, we think this particular project is well positioned to make the leap from one-off hack to a commercial product.

Continue reading “Resistance Is Futile, You Want This LED Cube”

540 PCBs Make A Giant LED Cube

Just about anyone can make a simple LED cube. But what if you want to make a 1-meter cube using 512 LEDs? [Hari] wanted to do it, so he created two different kinds of LED boards using EasyEDA. There are 270  of each type of board, for a total of 540 (there are only 512 LEDs, so we guess he got some spares due to how the small boards panelized). The goal is to combine these boards to form a cube measuring over three feet on each side.

To simplify wiring, the boards are made to daisy chain like a cordwood module. However, to get things to line up, each column of LED boards have to rotate 90 degrees. You can see several videos about the project below.

Continue reading “540 PCBs Make A Giant LED Cube”