Robotic Light Painting In 3D

For the last few months, [Ben] has been building a 3D light painting robot. Instead of a couple Arduino-controlled LEDs that a person moves around the Lightplot, as [Ben] calls it, uses a robotic arm to move a LED in 3D space.

The build started with [Ben] testing his idea by putting a laser pointer on an altitude and azimuth mount made out of LEGO. Eventually [Ben] decided to build a 3D plotter rig for a more impressive show. The 3D plotter sits in on a tripod with three axes of motion – up and down, clockwise and counterclockwise, and ‘in’ and ‘out’. A small RGB LED at the end of the robotic arm is controlled along with the servos and motors, making it possible to plot vector lines in 3D space.

There are a whole bunch of demo videos after the break. They look fantastic, but we’d really like to see the Lightplot be used outside on a dark, starry night.

Continue reading “Robotic Light Painting In 3D”

Build A Rig To Make Orbs In Your Light Paintings

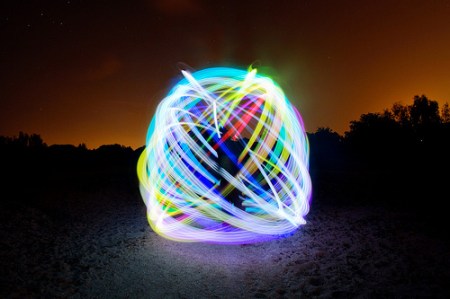
We’ve covered plenty of light painting projects here. People are always finding new ways to create interesting things in this fairly new medium. This project covers a method of creating orbs or spheres in your light paintings. The author points out that many people do this currently by putting the light source at the end of a string, swinging it in front of them like a propeller, and turning slowly in a circle. He wanted to automate the process a bit, so he combined his motorized telescope tripod, a power drill, a strip of RGB LEDs, and a few scraps of wood. He now has an automated system to make perfect orbs. Some of the examples he shows are quite stunning.

Light Painting With A String Plotter

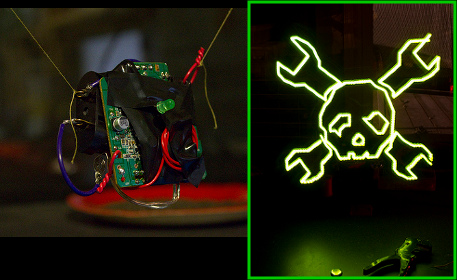
[Matt Bell] sends a shout-out to Hackaday by creating a light-painting of our logo with his string plotter. He starts off by setting up a pair of stepper motors which each have a spool to wind and unwind a string. The plotter is made by suspending a stylus between these two strings. In this case, he’s using a wireless LED board (seen above) built from the remote control receiver/transmitter from a toy car. The link above is part of a Flickr set from which you can get the whole story by reading the captions of each image.

After the break we’ve embedded a clip of an in-progress light painting. You can see there’s some oscillation of the LED unit that makes it a bit less precise than the CNC light painter we saw a couple of weeks ago. It seems like string plotters usually don’t have this issue if the stylus has something to help stabilize it. We wonder if a piece of acrylic would help get rid of the shakes? Continue reading “Light Painting With A String Plotter”

CNC Light Painting

Light painting is a technique where a shape is drawn with a light source while a camera is taking a very long exposure shot of it. To do this well by hand would take a lot of skill, so I naturally decided to make my “light art” with a CNC router.

Using this technique, the LED light is treated just like an engraving bit would be under normal circumstances. The difference is that the Y axis is swapped with the Z axis allowing for easy movement in the plane that you see displayed in the picture above. This allows the old Y axis to switch the light on and off in the same way that an engraving bit is lifted to stop engraving and lowered to start (explained here). Instead of a bit though, it’s a switch.

Be sure to check out the video of the router in action (with the lights on) after the break: Continue reading “CNC Light Painting”

Paint Your Pictures, No PC Needed

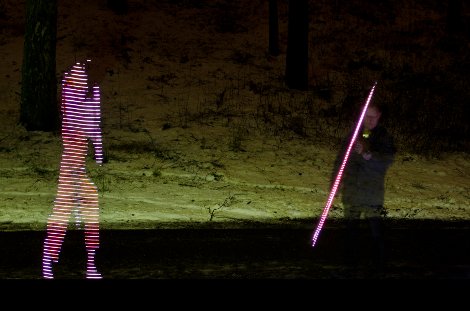
LEDs and and cameras always make a fun mixture, and its not all that hard to have quite a bit of fun as well. The Light Painting Stick is similar to other long exposure camera tricks like LightScythe and gets about the same reults. The difference is the Light Painting Stick is self contained meaning you don’t have to drag nearly as much stuff along with you to have fun.

Hardware used is HL1606 controlled RGB led strip commonly found at Adafruit, the brains are a Leaf Labs Maple micro controller board with an SD card and some human interfaces attached, and is powered by a 6 volt lantern battery.

Images are 64*infinity 24 bit BMP files which means there is not much fuss preparing your graphics other than doing a simple rotate. You can select which image is displayed by using a 2 way switch and the LEDs on the stick. Select your images, dial in your speed with the potentiometer, and you’re  ready to hit the fire button for some photo fun.

Rainbow Machine Livens Up Any Photograph

rainbow-machine

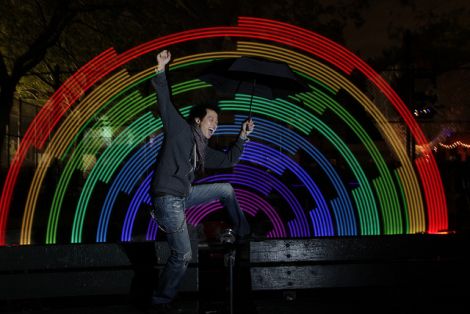
[Shameel Arafin, Sean McIntyre, and Reid Bingham] really dig rainbows. Going by the moniker the “RainBroz”, the trio built a portable display that can be used to add cool light painting effects to pictures.

The group brings their Rainbow Machine all over the place, including parties, gatherings, and random spots on the street. Anyone is welcome to have their picture taken with the Rainbow machine, and each subject is given a card with a URL on it, so that they can check out their picture whenever they please.

The display consists of addressable RGB LED strips and an Arduino from Adafruit, along with the associated support mechanisms for moving the LEDs. The real magic is carried out by the LPD8806 light painting library, also from Adafruit, which enables the RainBroz to create all sorts of images with little fuss.

As you can see in the video below, the Rainbow Machine seems to get a pretty warm reception from just about everyone, even people grabbed right off the street. It looks simple enough to build, so why not put one together for your next gathering?

Continue reading “Rainbow Machine Livens Up Any Photograph”

Light Painting Nyan Cat With An Arduino

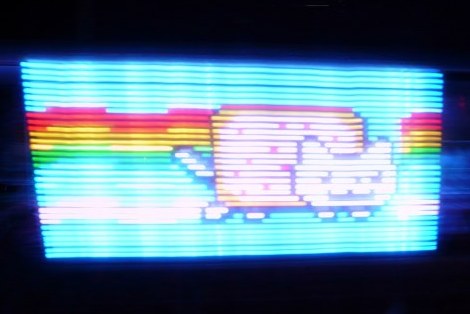
You too can paint your favorite meme in light with just a few tools. [Skywodd] brought together a couple of different projects to make this happen. He had already built a large POV display and now uses a DSLR with long exposure to create light paintings (translated).

The Arduino-powered display is built from a strip of 35 RGB LEDs. Now, that’s four pins per LED but one of is ground, leaving just 105 pins that need to be addressable. A couple of things make this manageable. First, he etched his own circuit boards for the LED strips. This breaks out the contacts to the edge of the boards and simplifies the soldering a bit by taking care of the ground bus. Secondly, he’s using M5450 LED display drivers for addressing. After the break you can see the video of the prototype hardware (in French but blinky action starts at about 2:30).

If you’re looking for an easier way to do this, check out the light painting that uses manufactured LED strips.

Continue reading “Light Painting Nyan Cat With An Arduino”