Atomic Pi Gets A 3D-Printed Mac Makeover

The Atomic Pi is a pretty impressive piece of kit for the price, but it’s not exactly a turn-key kind of product. Even to a greater extent than what you might normally expect with a “dev” board like this, the user is responsible for putting together the rest of the pieces required to actually utilize it. But with this design by [Renri Nakano], you can turn the Atomic Pi into something that’s dangerously close to being a practical computer, and a trendy one at that.

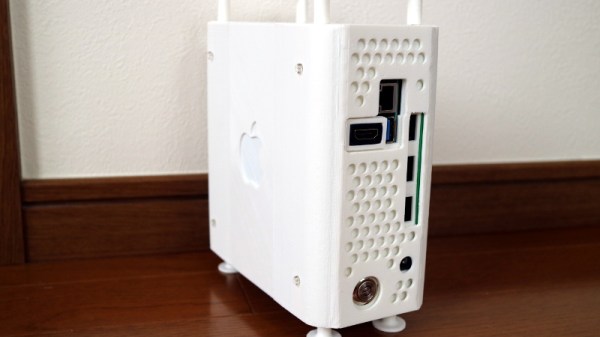
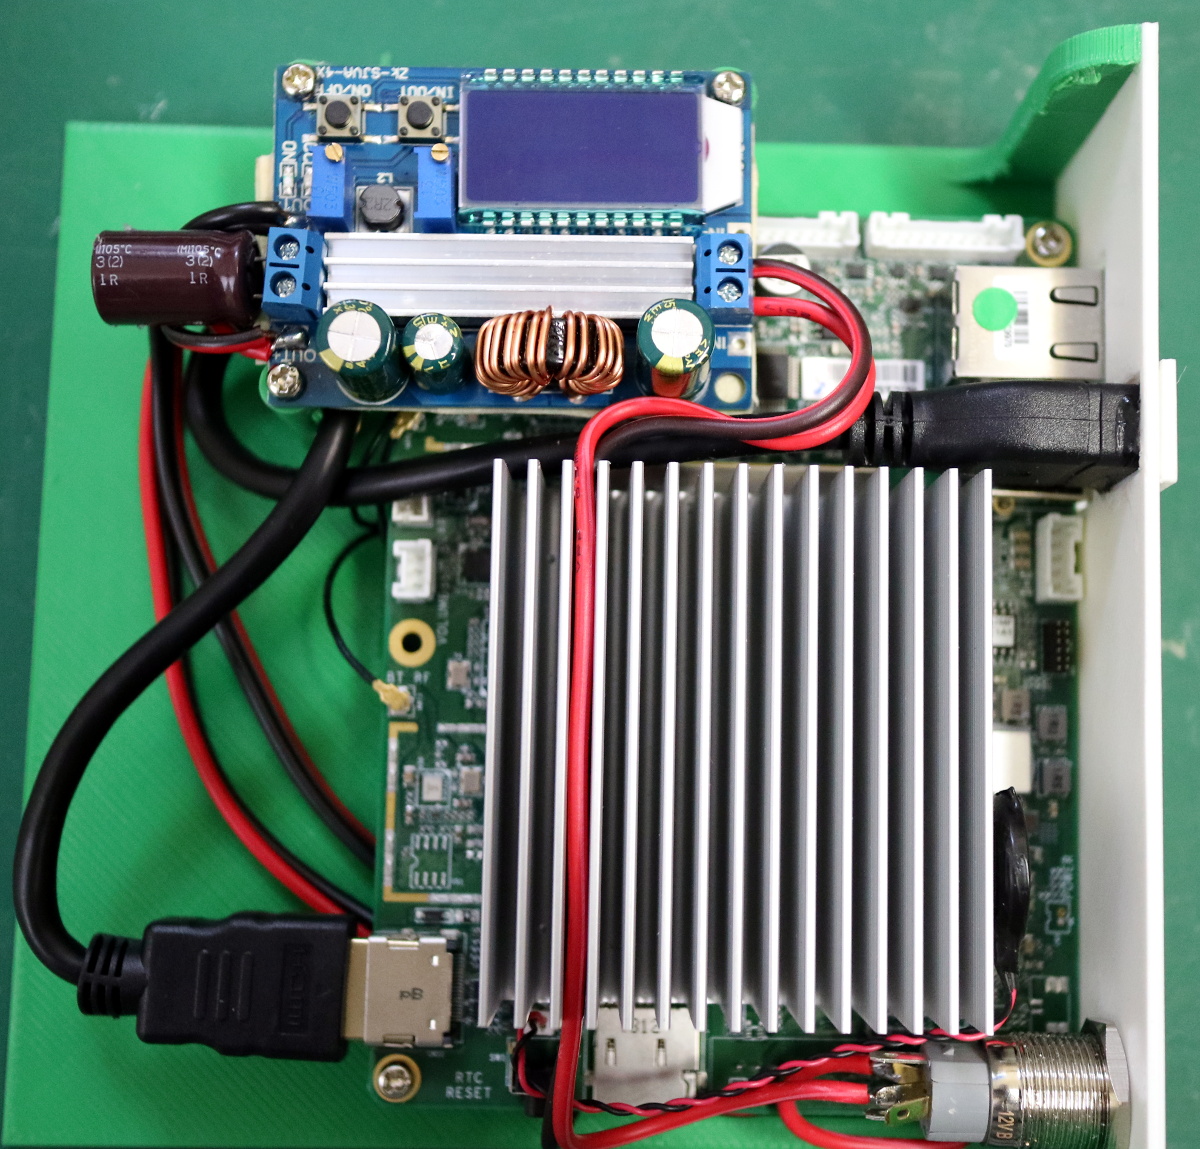
Inspired by the 2019 Apple Mac Pro “Cheese Grater”, this 3D printable enclosure for the Atomic Pi is equal parts form and function. It integrates the necessary power supply to get things up and running without the need for the official breakout board or power module, which is good, since at the time of this writing they don’t seem to be available anyway. Plus it has a cool looking power button, so that’s got to count for something.

There’s also an integrated USB hub to give the Atomic Pi a bit more expandability, and a short HDMI extension cable that puts a video port on the back of the case. [Renri] even thought to leave an opening so you could run the wires for your wireless antennas.

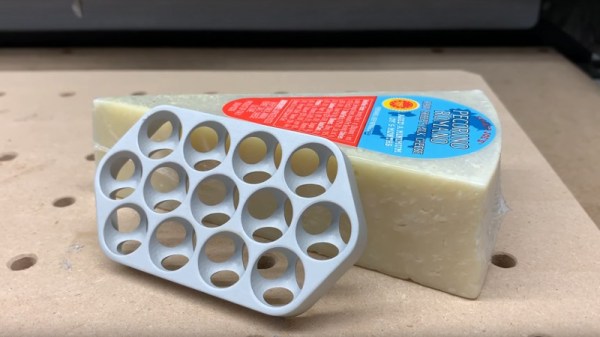
At this point, we’ve seen several projects that mimic the unique case design of the 2019 Mac Pro. The level commitment ranges from recreating the design in CAD and milling it out of aluminum to just sticking a Raspberry Pi inside of a literal cheese grater from the kitchen. Naturally we enjoy a well executed Internet meme as much as the next hacker, but all the same, we were glad to see [Renri] put in the effort to make sure this case was more than just a pretty face.

[Thanks to baldpower for the tip.]

The Cheese Grater In Fusion 360

By now you will all have heard so much about the grille on Apple’s new “Cheese grater” Mac Pro that you might think there was nothing more to say. Before we move on though there’s one final piece of work to bring to your attention, and it comes from [Andy Pugh]. He’s replicated the design in Fusion 360, and used it to produce rather an attractive Raspberry Pi case.

It seems that for Fusion 360 users the problem lies in that package’s method of placing spheres which differs from that of some other CAD software. Using the page linked in our previous coverage of the grille he’s taken its geometry information and produced a video detailing every step in recreating it for Fusion 360. This is where following someone who really knows your CAD package pays dividends, because we suspect it would take us days to figure out some of the tricks he shows us.

The result is the Raspberry Pi case, which is for the Pi 3 and others like it. Sadly we couldn’t break our embargo and tell him about the Pi 4 and its different connector layout, but we’re guessing a halfway competent CAD operator could put together a Pi 4 case. Andy’s files can be found on Thingiverse, so you can all make one for yourselves.

Andy’s appeared here before a few times, not least for his Ner-A-Car motorcycle, and for designing a Robot Wars robot.

Continue reading “The Cheese Grater In Fusion 360”

Does The Cheese Grater Do A Great Grate Of Cheese?

Apple’s newest Mac Pro with its distinctive machined grille continues to excite interest, but until now there has been one question on the lips of nobody. It’s acquired the moniker “Cheese grater”, but can it grate cheese? [Winston Moy] set out to test its effectiveness in the kitchen with a piece of Pecorino Romano, a great cheese.

Of course, the video is not really about cheese grating, but about the machining process to create that distinctive pattern of intersecting spherical holes. He doesn’t have a real Mac Pro because nobody does as yet, so like others his approach was to reverse engineer the manufacturing process. He takes us through the entire thing and the rationale behind his decisions as he makes a 13-hole piece of Mac Pro-like grill from a billet of aluminium. It’s first roughly cut with a pair of decreasing-size end mills, then finished with a ball mill. He’s added an extra cut to round off the sharp edge of the hole that isn’t there on the Mac.

An unexpected problem came when he machined the bottom and the holes began to intersect, it was clear that they were doing so wrongly. Turning the piece over must be done in the correct orientation, one to note for any other would-be cheese-grater manufacturers. Finally the piece is blasted for a satin finish, and then anodised for scratch-resistance.

So, the important question must be answered: does it grate? The answer’s no, the best it can manage is something close to a crumble. He doesn’t seem bothered though, we get the impression he likes eating cheese whatever its form. The whole process is in the video below the break.

For more Apple grille examination, take a look at this mathematical analysis.

Continue reading “Does The Cheese Grater Do A Great Grate Of Cheese?”

Grate Design On This Cutting Edge Raspberry Pi Case

Love ’em or hate ’em, you’ve got to hand it to Apple: they really know how to push people’s buttons with design. Their industrial designers can make a product so irresistible – and their marketing team can cannonball the hype train sufficiently – that people will stand in line for days to buy a new product, and shell out unfathomable amounts of money for the privilege.

But what if you’re a poor college student without the budget for such treasures of industrial design? Simple – you take matters into your own hands and stuff a Raspberry Pi into a cheese grater. That’s what a group of engineering students from the University of Aveiro in Portugal called [NeRD-AETTUA] did, in obvious homage to the world’s most expensive cheese grater. The video below for the aptly named RasPro is somewhat less slick that Apple’s promos for the Mac Pro, but it still gets the basics across. Like the painstakingly machined brushed aluminum housing on the Mac, the IKEA cheese grater on the RasPro is just a skin. It covers a 3D-printed chassis that houses a beefy power supply and fan to go along with the Raspberry Pi 3. There’s also a speaker for blasting the tunes, which seems to be the primary use for the RasPro.

All things considered, the cheese grater design isn’t really that bad a form factor for a Pi case. If that doesn’t appeal, though, take your pick: laser-cut plywood, an Altoids tin, or even inside your PC.

Continue reading “Grate Design On This Cutting Edge Raspberry Pi Case”

The Process Behind Manufacturing That Mac Pro Grille

Apple released a monitor stand not so long ago with an eye-watering price tag, and in the resulting fuss you might almost be forgiven for missing the news that they also released a new computer. The distinctive grille on the new Mac Pro caused some interest among Hackaday editors, with speculation rife as to how it had been machined. It seems we’re not alone in this, because [J. Peterson] sent us a link to his own detailed analysis.

The key to the pattern lies in hemispherical holes milled part-way-through a piece of metal on a triangular tessellation, and intersecting with an identical set of holes milled at an offset from the other side. The analysis was done purely from online information as he doesn’t have a real Mac Pro, but using some clever trigonometry he is able to calculate the required offset as well as the hole depth. There are some STL files on Thingiverse, for the curious.

Should you wish to make your own copy of a Mac Pro grille you should therefore be able to use this information in programming a CNC mill to carve it from a piece of alloy plate. The interesting side of it from a manufacturing perspective though is that this is a complex shape that would be difficult to produce in numbers without either CNC or a very specialist one-off machine tool for this single purpose, and neither is a normal expenditure for a mere grille. Perhaps you might come close by rolling alloy plate between rollers whose profile matched the hole pattern, but in that event you would not equal the finish that they have achieved. Apple’s choice to use a relatively time-intensive CNC process in mass-production of a cosmetic part is probably in a large part a quality statement for their particular brand of consumer, but also sets a high bar to any would-be imitators. We applaud it for its engineering, even if we won’t be shelling out for that monitor stand.

Apple Just Killed The VESA Mount And We Couldn’t Be Happier

After the immense failure of the 2013-era Apple Pro trash can Mac, Apple has been hard at work at the next generation of workstation desktops. This week, the new Mac Pro has been announced, and the specs are amazing: We finally can buy a professional, desktop Mac with half the storage of an iPhone. The big story isn’t the next generation of cheese-grater Macs, though: the new display, the Pro Display XDR, has killed the venerable VESA mount and we couldn’t be happier.

The VESA mount, or more correctly, the VESA Mounting Interface Standard, was created in 1997 as a mounting standard for flat panel monitors and televisions. Look on the back of your monitor, and you’ll probably find a pattern of M4 threaded inserts laid out on a 75mm or 100mm square. Larger sizes, with respectively larger thread sizes, are used for gigantic wall-mounted televisions. For the last two decades, this has been the standard for mounting monitors to stands. Now this standard faces a challenger thanks to the brave designers at Apple. Continue reading “Apple Just Killed The VESA Mount And We Couldn’t Be Happier”

Hackaday Links: Leap Eve, 2016

The current Mac Pro is a masterpiece of design that looks like a trash can. We’ve been waiting for someone to take one of these computers and stuff a MiniITX board in there, but seeing as how the Mac Pro costs $3000, that probably won’t happen anytime soon. Here’s the solution. It’s a trash can computer case that is also too expensive for what it is. Now all we need is someone to put a big fan inside one and turn this computer into a wacky waving inflatable arm flailing tube man.

[Mike Harrison] recently got his hands on a $20,000 SPARC CPU module. This is an enormously thick board that must be dozens of layers thick. How many layers was an open question until he put the board in a CNC milling machine. The setup is pretty much what you would expect with a few lines of g-code repeated over and over. The real trick comes from using one of the outputs for lubricant to trigger the shutter release on a camera. How many layers were in the CPU module? About 30, or something like that.

Almost a year ago, we saw the latest advances in perfboard. It was a perfboard with each hole connected to rows and columns on a selectively solderable orthogonal busses. Something like that. Actually, we still can’t wrap our head around it. Now, it’s a crowdfunding campaign with a few new and useful features. There’s also a layout tool that will show you where to place your components and where to make solder bridges.

[Ray Wilson] started Music From Outer Spacethe place to learn about DIY analog synthesizers. Ray now has cancer, and as you can imagine, being a self-employed engineer specializing in analog synthesizers doesn’t provide great health coverage. [Ray]’s family set up a GoFundMe page to pay for the medical expenses.

We haven’t seen much in the land of 3D scanners, and we’re betting most of that is because they’re so expensive. The guys from CowTech have a kickstarter up for a 3D scanner that’s just $99. It’s based on the Ciclop scanner but designed around a custom Arduino shield and remains fully open source.

Remember the screen printed electroluminescent displays that were printed directly onto t-shirts from a few months ago? Now that company is working on a much cooler design: the Hackaday Jolly Wrencher. It works, but there are still a few problems: they’re setting the shirt on fire a little. Don’t worry, if these are ever reasonably safe and somewhat affordable, an EL Jolly Wrencher shirt will be in the Hackaday Store.

Need a rechargeable multimeter? It’s actually pretty easy. With an 18650 Lithium Ion cell and a 9V boost converter, this circuit will fit in most devices that need a 9V battery. To do this right, you’ll also need a USB charging port, to be used once every couple of years when the battery needs charging.