Chainsaw Cuts More Than Timber

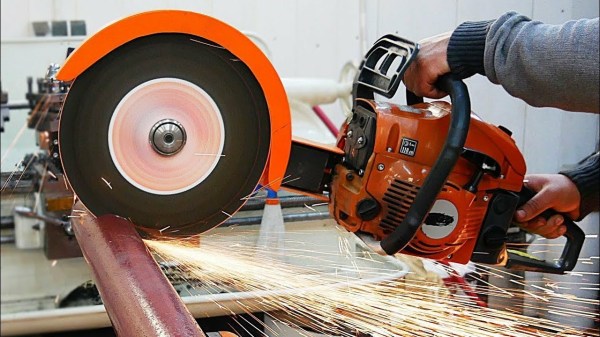
We often take electricity for granted, to the point of walking into a room during a power outage and still habitually flipping the light switch. On the other hand, there are plenty of places where electricity isn’t a given, either due to poor infrastructure or an otherwise remote location. To get common electric power tools to work in areas like these requires some ingenuity like that seen in this build which converts a chainsaw to a gas-driven grinder that can be used for cutting steel or concrete. (Video, embedded below.)

All of the parts needed for the conversion were built in the machine shop of [Workshop from scratch]. A non-cutting chain was fitted to it first to drive the cutting wheel rather than cut directly, so a new bar had to be fabricated. After that, the build shows the methods for attaching bearings and securing the entire assembly back to the gas-powered motor. Of course there is also a custom shield for the grinding wheel and also a protective housing for the chain to somewhat limit the danger of operating a device like this.

Even though some consideration was paid to safety in this build, we would like to reiterate that all the required safety gear should be worn. That being said, it’s not the first time we’ve seen a chainsaw modified to be more useful than its default timber-cutting configuration, like this build which turns a chainsaw into a metal cutting chop saw.

Continue reading “Chainsaw Cuts More Than Timber”

Adjustable, Piston-Damped Hammer

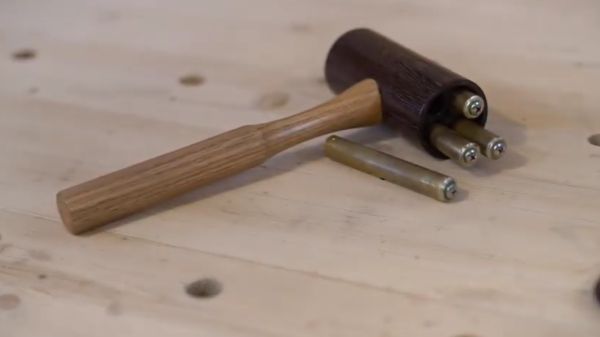
When all you have is a hammer, every problem is a constant quest for an even better hammer, as the popular saying goes. At least, that seems to be [Ebenisterie Éloïse]’s situation. She wanted a deadblow hammer that not only had an aesthetically pleasing wood and brass construction, but also one that included adjustable dampers to make sure that each hammer swing is as efficient as possible.

For those unfamiliar with specialty hammers, dead blow hammers typically have some movable mass such as sand or lead shot within the hammer head. This mass shifts forward when the hammer strikes an object, reducing rebound of the hammer off of the object and transferring more energy into each strike. This hammer omits a passive mass in favor of four custom-machined brass tubes, each of which holds a weighted fluid, a spring, and brass weight. Each piston acts as a damper in a similar way to a shock absorber on a vehicle, and a screw and o-ring at the top of each one allows them to be adjustable by adding different weight fluids as needed. Some detailed testing of the pistons shows a marked improvement over any of the passive mass varieties as well.

Not only is this an incredible amount of detail and precision for a tool that is often wielded in a non-precise way (at least among those of us for who aren’t skilled craftspeople), but it is also made out of wood, leather, and brass which gives it an improved look and feel over a plastic and fiberglass hammer that is typical of most modern deadblow hammers. It even rivals this engineer’s hammer with its intricate custom engraving in craftsmanship alone.

Continue reading “Adjustable, Piston-Damped Hammer”

Balanced Design And How To Know When To Quit Optimizing

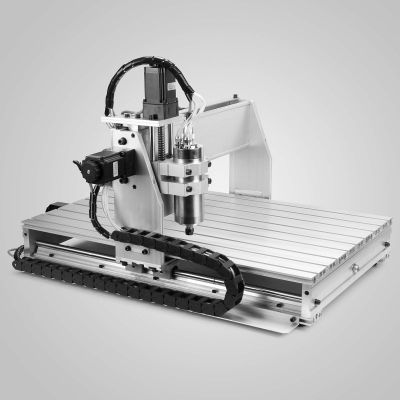
I got a relatively inexpensive 6040 CNC machine, and have been spending most weekends making the thing work, and then cutting stuff, learning the toolchain, and making subsequent improvements. Probably 90% of my machine time has been on making improvements. It’s not that the machine was bad — I got the version with ballscrews and a decently solid frame — but it’s that it somehow didn’t work together as a whole. It’s just an incredibly unbalanced design.

Let’s start with the spindle motor. It’s a 2.2 kW water-cooled beast that is capable of putting tons of work into a piece and spinning at very high speed. Yet to keep up with the high speed spindle, the motors that move it around would have to be capable of high speeds as well — it’s a feeds and speeds thing if you’re not a CNC geek. And they can’t. Instead, the stepper motors that came with the kit are designed for maximum force at low speeds. Which can make sense for some machines, but for one with a slightly flexible X-axis like this one, that’s wasted as well. The frame just can’t handle the low-end grunt that the motors are capable of, so it can’t take advantage of the spindle’s power either. The design is all over the place.
Over the last two months’ of weekends, I’ve been going through this iterative procedure of asking “what is my limiting factor right now?”, working on fixing that thing up, running it some, and then asking the question again. And it’s a good general procedure, and I believe that it’s getting me to the machine I want at the minimum cost of time, money, and effort.

At first, it was the driver hardware/software with its emulated USB parallel port, so I swapped out the controller for an Arduino running GRBL, soldered directly to the DB-25 that comes out of the back. At least it can put out pulses fast enough to order the motors around, but they would still stall out at high speeds. Swapping the stepper motors out for a high-speed pair only cost me €40, which makes you wonder why they didn’t just put the right motors on in the first place. The machine now travels fast enough to make use of the high-speed spindle, and I’m flying through plywood and plastics without leaving burn marks. It’s a huge win for not much money.

The final frontier is taking big bites out of aluminum. The spindle can do it, but I fear I’m up against the frame’s rigidity on the X-axis. For whatever reason, they went with unsupported rods on the X, which are significantly more flexible than an axis that’s backed up by more metal. And this is where the limiting factor may actually be my time and patience, rather than money. I just can’t bear to disassemble and reassemble the thing again. So for now, it’s going to be small nibbles, taking advantage of the machine’s speed, if not yet the spindle’s full horsepower.

But it’s odd, because this machine is a bundle of good parts. It’s just that they haven’t been chosen to work together optimally; the frame doesn’t work with the stepper motors, which don’t work with the spindle. If they went through my procedure of saying “what’s the limiting factor?” they could have saved themselves €100 by just shipping it with a wimpier spindle, which would have been a balanced, if anemic, machine. Or they could have built it with the right motors for more speed. Or supported rails for more grunt. Or both!

I’ll never know why they quit optimizing their design when they did. Maybe they never got past the slow USB/parallel port speed? But I’m near the end of my path, and I can tell because the limiting ingredient isn’t a simple upgrade, or even mere money anymore, but my own willpower.

How can you tell when you’re at the top of a mountain in a dense fog? A step you take in any direction would lead you downhill. How can you tell when you’re satisfied with a project’s state? When you don’t have the need, or desire, to undertake the next most obvious improvement.

Waterjet-Cut Precision Pastry

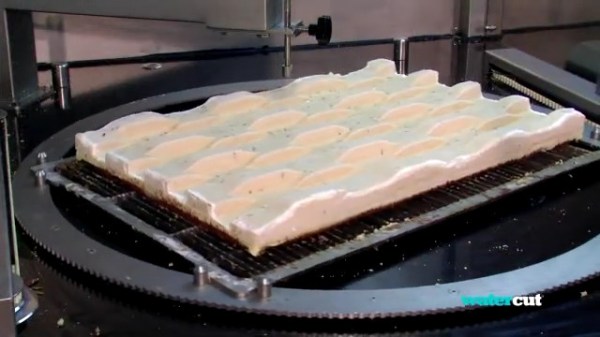
We need more high-end, geometric pastry in our lives. This insight is courtesy of a fairly old video, embedded below, demonstrating an extremely clever 2D CNC mechanism that cuts out shapes on a cake pan, opening up a universe of arbitrary cake topologies.

The coolest thing about this machine for us is the drive mechanism. A huge circular gear is trapped between two toothed belts. When the two belts move together the entire thing translates, but when they move in opposite directions, it turns. It seems to be floating on a plastic platform, and because the design allows the water-jet cutting head to remain entirely fixed, only a small hole underneath is necessary, which doubtless simplifies high-pressure water delivery and collection. Rounding the machine out are cake pans make up of vertical slats, like on a laser- or plasma-cutter table, that slip into registration pins and let the water pass through.

The kinematics of this machine are a dream, or perhaps a nightmare. To cut a straight line, it does a cycloid-shaped dance of translation and turning that you simply have to see in motion. Because of this intricate path, the cake-feed speed varies along the way, so this machine won’t be perfect for all applications and relies on a thin kerf. And we can’t help thinking how dizzy the cake must get in the process.

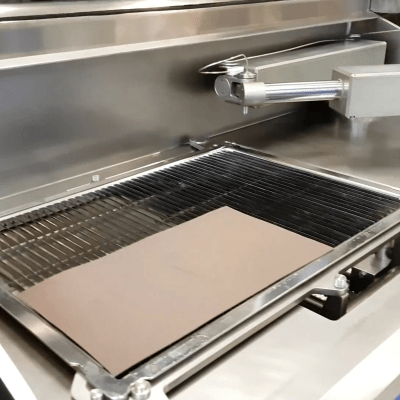
Indeed, the same company put out a relatively pedestrian two-arm motion cutter (another video!) that poses different kinematic problems. It’s essentially a two-arm plotter with a moving table underneath that helps increase the working area. Details are scarce, but it looks like they’re minimizing motion of the moving table, doing the high frequency small stuff with the stiff arms. Presumably someone turned the speed on the previous machine up to 11 and spun a cake off into the room, causing them to rethink the whole move-the-cake-around design.

Of course, watercut pastry isn’t limited to exotic CNC mechanisms. This (third!) video demonstrates that a simple Cartesian XY bot can do the job as well.

If you think about it, using high-pressure pure water to cut foodstuffs is a win on many levels. We’d just miss out on licking the knife. Thanks [Adam G DeMuri] for the awesome comment that lead us to a new world of watercut edibles.

Continue reading “Waterjet-Cut Precision Pastry”

Machining Without Machines

It’s a luxury to be able to access a modern machine shop, complete with its array of lathes, mills, and presses. These tools are expensive though, and take up a lot of space, so if you want to be able to machine hard or thick metals without an incredible amount of overhead you’ll need a different solution. Luckily you can bypass the machines in some situations and use electricity to do the machining directly.

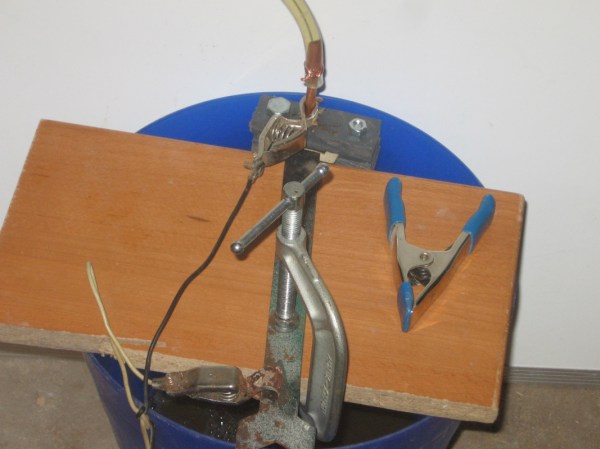
This project makes use of a process known as electrochemical machining and works on the principle that electricity passed through an electrolyte solution will erode the metal that it comes in contact with. With a well-designed setup, this can be used to precisely machine metal in various ways. For [bob]’s use this was pretty straightforward, since he needed to enlarge an existing hole in a piece of plate steel, so he forced electrolyte through this hole while applying around half an amp of current in order to make this precise “cut” in the metal, avoiding the use of an expensive drill press.

There are some downsides to the use of this process as [bob] notes in his build, namely that any piece of the working material that comes in contact with the electrolyte will be eroded to some extent. This can be mitigated with good design but can easily become impractical. It’s still a good way to avoid the expense of some expensive machining equipment, though, and similar processes can be used for other types of machine work as well.

Arduino Bobbin Winding Machine Is Freaky Fast

One of the worst things about sewing is finding out that your bobbin — that’s the smaller spool that works together with the needle and the larger spool to make a complete stitch — ran out of thread several stitches ago. If you’re lucky, the machine has a viewing window on the bobbin so you can easily tell when it’s getting dangerously close to running out, but many machines (ours included) must be taken halfway apart and the bobbin removed before it can be checked.

Having spare bobbins ready to go is definitely the answer. We would venture to guess that most (if not all) machines have a built-in bobbin winder, but using them involves de-threading the machine and setting it up to wind bobbins instead of sew. If you have a whole lot of sewing to do and can afford it, an automatic bobbin winder is a godsend. If you’re [Mr. Innovative], you build one yourself out of acrylic, aluminium, and Arduinos.

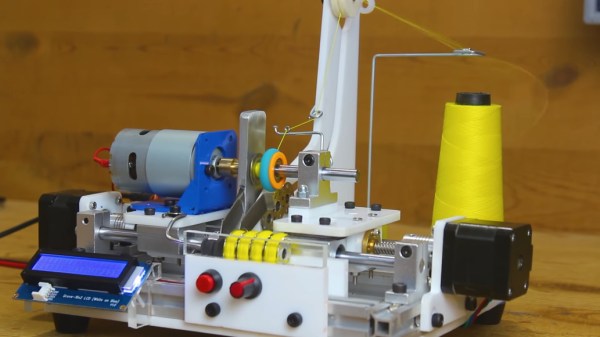
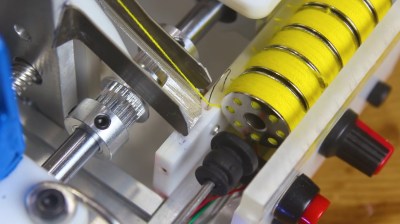
Here’s how it works: load up the clever little acrylic slide with up to twelve empty bobbins, then dial in the speed percentage and press the start button. The bobbins load one at a time onto a drill chuck that’s on the output shaft of a beefy 775 DC motor. The motor spins ridiculously fast, loading up the bobbin in a few seconds. Then the bobbin falls down a ramp and into a rack, and the thread is severed by a piece of nichrome wire.

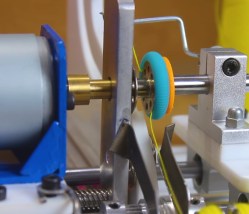
An important part of winding bobbins is making sure the thread stays in place at the start of the wind. We love the way [Mr. Innovative] handled this part of the problem — a little foam doughnut around a bearing holds the thread in place just long enough to get the winding started. The schematic, BOM, and CAD files are available if you’d like to make one of these amazing machines for yourself. In the meantime, check out the demo/build video after the break.

Still not convinced that sewing is cool enough to learn? Our own [Jenny List] may be able to convert you. If that doesn’t get you, you might like to know that some sewing machines are hackable — this old girl has a second life as a computerized embroidery machine. If those don’t do it, consider that sewing machines can give you a second life, too.

Continue reading “Arduino Bobbin Winding Machine Is Freaky Fast”

Machine Builds Rise From The Ashes

I was enchanted by a failed project this week. [Andrew Consroe]’s CNC scroll saw doesn’t work yet, but the emphasis is on the word “yet”. Heck, even when it does work, it might not make sense, but that’s not the point anyway.

cncsaw_thumb.jpg?w=250

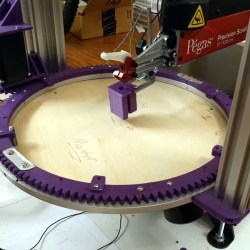
A scroll saw table has a vertical reciprocating blade perpendicular to a table, a lot like a band saw but with a shorter blade. You push the wood sheet to be cut into the blade, and because it’s thin, you can twist and turn all sorts of interesting jigsaw-puzzle shapes. [Andrew] automated this with an X-Y gantry and an innovative geared rotating ring, needed to keep the wood fed into the cutting edge of the blade.

It’s a crazy contraption, and a difficult and unique movement planning problem, and watching it move in the video is a joy. But it’s not working either: errors in the motion add up over a cut, and he’s ended up snapping a blade on every piece. And this is version three of the device!

But here comes the inspiration. First, the only reason he’s filming this is to keep a log of how the project looked at this phase — he’s already planning out the next one. Second, this is the soul of learning by doing. You don’t learn anything unless you’re trying something new.

And finally, [Andrew]’s project reminds me of why I love machine builds in the age of rapid prototyping. Blazing through three entirely different machines cost him essentially nothing. Tearing apart version one left him with the same stepper motors, aluminum extrusions, and electronics as when he started out. Except that he now knew so much more about his particular problem space. Now he’s ready to go again.

So if you’re at all robotically inclined, but you’re looking at the cost of motors, belts, bearings, and steel, don’t think of it as an expense for this project, but for years’ worth of iterations, and maybe even fully different machines.

Just be sure to take [Andrew]’s lead and get it down and documented before you take it apart! Heck, send it in to Hackaday and it’ll live forever.