The ESP32 Doesn’t Need Much

For those looking to add wireless connectivity to embedded projects or to build IoT devices, there is perhaps no more popular module than the ESP32. A dual-core option exists for processor intensive applications, the built-in WiFi and Bluetooth simplify designs, and it has plenty of I/O, memory, and interoperability for most applications. With so much built into the chip itself, [atomic14] wondered how much support circuitry it really needed and set about building the most minimalist ESP32 development board possible.

Starting with the recommended schematic for the ESP32, the most obvious things to remove are a number of the interfacing components like the USB to UART chip and the JTAG interface. The ESP32 has USB capabilities built in, so the data lines from a USB port can be directly soldered to the chip instead of using a go-between. A 3.3V regulator eliminates the need for many of the decoupling capacitors, and the external oscillator support circuitry can also be eliminated when using the internal oscillator. The only thing [atomic14] adds that isn’t strictly necessary is an LED connected to one of the GPIO pins, but he figures the bare minimum required to show the dev board can receive and run programs is blinking an LED.

Building the circuit on a breadboard shows that this minimalist design works, but instead of building a tiny PCB to solder the ESP32 module to he attempted to build a sort of dead-bug support circuit on the back of the ESP32. This didn’t work particularly well so a tiny dev board was eventually created to host this small number of components. But with that, the ESP32 is up and running. These modules are small and compact enough that it’s actually possible to build an entire dev board setup inside a USB module for a Framework laptop, too.

Continue reading “The ESP32 Doesn’t Need Much”

A Mega-Tiny Arduino

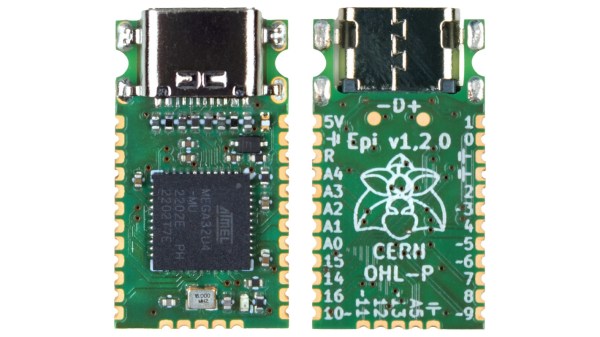
Integrated circuits, chipsets, memory modules, and all kinds of other transistor-based technology continues to get smaller, cheaper, and more energy efficient as time moves on. Not only are the components themselves smaller, but their supporting infrastructure is as well. Computers like the Raspberry Pi are about the size of a credit card and have computing power on the order of full-sized PCs from a few decades ago. The Arduino is no exception to this trend, either, and this new dev board called the Epi 32U4 might be the smallest ATmega platform we’ve seen so far.

As the name suggests, the board is based around the ATmega32U4 which is somewhat unique among Atmel chips in that it includes support for USB within the chip itself rather than relying on external translating circuitry. This makes it an excellent choice for any project which involves sending keyboard, mouse, or other peripheral information to a computer. This goes a few steps further with eliminating “bloat” compared to other boards, too — there’s no on-board voltage regulator, and just a single LEDs on pin 13.

One of the other features this board boasts over other small form factor boards is on-board USB-C, which is definitely a perk as more and more devices switch away from the various forms of older USB-type plugs. The project’s specifications are also available on this GitHub page for anyone that wants to produce their own. And, if you don’t have a 32U4 on hand and still want to build a keyboard project, it’s possible to get some other Arduinos to support these features but it’ll take a little more work.

Thanks to [Rasmus L] for the tip!

Minimalist Robot Arm Really Stacks Up

There’s nothing like a little weekend project, especially one that ends up better than you expected. And when you literally build a robotic arm out of workshop scraps, so much the better.

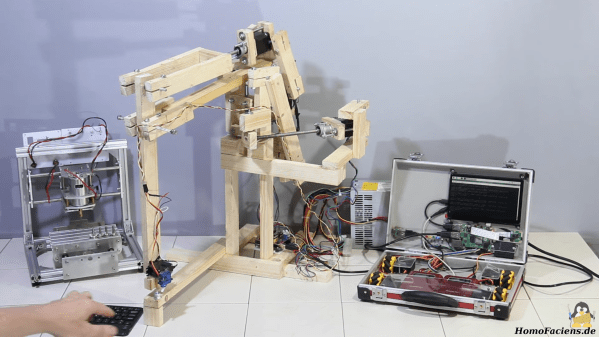
Longtime readers will no doubt recognize the build style used here as that of [Norbert Heinz], aka “Homofaciens” on YouTube. [Norbert] has a way of making trash do his bidding, and has shown us all kinds of seemingly impossible feats of mechatronics with just what’s lying around. In this case, his robot arm is made from scrap wooden roofing battens, or what we’d call furring strips here in the US. The softwood isn’t something you’d think would make a great material for building robots, but [Norbert] makes its characteristics work for him, like using wax-lubricated holes for hinge points. Steppers and lead screws cannibalized from an old CNC build, along with the drive electronics, provide the motion. It’s a bit — compliant — but precise enough to pick up nuts and stack them nicely. The video below gives an overview of the build, and detailed instructions are available too.

We always appreciated [Norbert]’s minimalist builds, and seeing what can be accomplished with almost nothing is always inspirational. If you’re not familiar with his work, check out his cardboard and paperclip CNC plotter, his tin can encoders, or his plasma-powered printer.

Continue reading “Minimalist Robot Arm Really Stacks Up”

Someone Get This Minimalist Wooden PC A Martini

It’s interesting to imagine what computers may have looked like throughout different time periods that precede their portability or even their existence altogether. In the 1950s and ’60s, computers still filled entire rooms, but if the age of the PC had arrived earlier one is left to wonder what might a minimalist mid-century PC might look like.

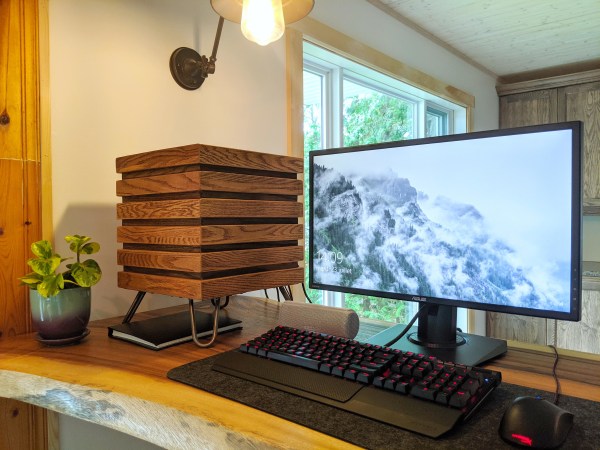
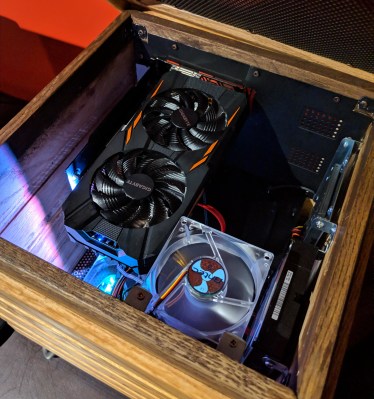
Well, if we were lucky, it would have looked something like [xmorneau]’s cubical computing creation. This DIY beauty is made of scrap oak and a sexy set of hairpin legs. As hot as it looks, [xmorneau] shouldn’t have to worry about overheating — the bottom is completely open except for an intake fan, there’s another fan at the top that exhausts hot air through a mesh grille, and those lovely little legs elevate it four inches off the desk. Our favorite part (after the legs) has to be the secret lid that blends in beautifully.

The cube measures 32cm³ (~12.6in³), so [xmorneau] went with a mini-ATX motherboard, but was able to fit in a full-size graphics card. Everything is mounted internally to wood except for the mobo, which is mounted on a panel of sheet metal that makes up the back wall.

We love the way this looks and are glad to see that this build changed [xmorneau]’s opinion of RGB a little bit, because we can’t help but like it both ways.

Too sophisticated for your taste? Check out this LEGO-Minecraft mashup.

Attack Of The Flying 18650s

When somebody builds a quadcopter with the express purpose of flying it as fast and aggressively as possible, it’s not exactly a surprise when they eventually run it into an immovable object hard enough to break something. In fact, it’s more like a rite of passage. Which is why many serious fliers will have a 3D printer at home to rapidly run off replacement parts.

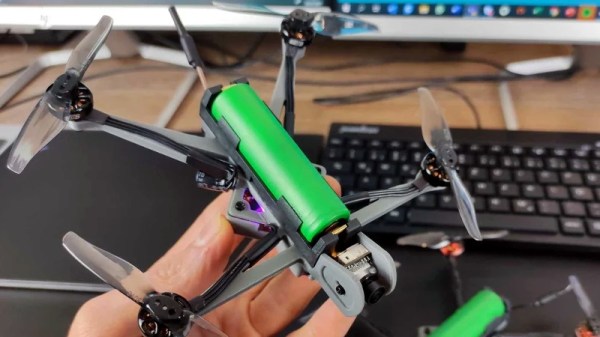
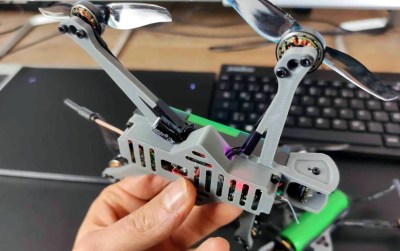
Avid first person view (FPV) flier [David Cledon] has taken this concept to its ultimate extreme by designing a 3D printable quadcopter that’s little more than an 18650 cell with some motors attached. Since the two-piece frame can be produced on a standard desktop 3D printer in a little over two hours with less than $1 USD of filament, crashes promise to be far less stressful. Spend a few hours during the week printing out frames, and you’ll have plenty to destroy for the weekend.

While [David] says the overall performance of this diminutive quadcopter isn’t exactly stellar, we think the 10 minutes of flight time he’s reporting on a single 18650 battery is more than respectable. While there’s still considerable expense in the radio and video gear, this design looks like it could be an exceptionally affordable way to get into FPV flying.

Of course, the argument could be made that such a wispy quadcopter is more likely to be obliterated on impact than something larger and commercially produced. There’s also a decent amount of close-quarters soldering involved given the cramped nature of the frame. So while the total cost of building one of these birds might be appealing to the newbie, it’s probably a project best left to those who’ve clocked a few hours in on the sticks.

We’ve seen quite a few 3D printed quadcopter frames over the years, but certainly none as elegant as what [David] has created here. It’s an experiment in minimalism that really embraces the possibilities afforded by low-cost desktop 3D printing, and we wouldn’t be surprised to see it become the standard by which future designs are measured.

Super-Simple VGA Adapter Sports Low-Res Output With Only Four TTL Chips

Here at Hackaday we cast a wary eye at tips that come in with superlative claims. Generally, if we post something that claims to be the fastest or the smallest of all time, we immediately get slapped down in the comments by someone who has done it faster or smaller. So we present the simplest TTL video card ever knowing the same thing will happen, but eager to see how anyone might scale things down.

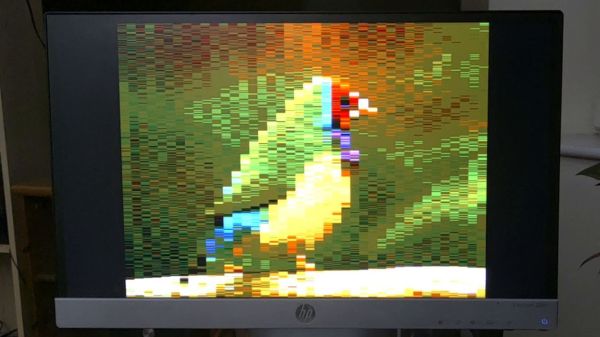
To be fair, [George Foot] does qualify his claim to the simplest usable VGA adapter, and he does note that it descends from [Ben Eater]’s “world’s worst video card”, which he uses for his 6502 breadboard computer. But where [Ben]’s VGA adapter uses about 20 TTL chips and an EEPROM, [George] has managed to decrease the BOM to just four TTL chips along with the memory and a crystal oscillator. This required a fair number of compromises, of course; the color depth is fairly low, as is the resolution. Each pixel appears as a thin horizontal bar rather than a small square, leading the images to be smeared out across the screen. They’re still surprisingly viewable, though, which probably says more about the quality of the pattern-recognition wetware between our ears than anything about the quality of the adapter. [George] gives a tour of the circuit in the brief video below.

It looks like [George] has posted a few improvements to the project since we first spotted it, so we’re looking forward to seeing how much the parts count went up. We’re also keen to see if anyone can outdo the simplicity of this effort — be sure to let us know if you give it a shot.

Continue reading “Super-Simple VGA Adapter Sports Low-Res Output With Only Four TTL Chips”

Tiny Game System Is An Experiment In Minimalism

Many people assumed the smartphone revolution would kill the dedicated handheld game system, and really, it’s not hard to see why. What’s the point of buying the latest Nintendo or Sony handheld when the phone you’re already carrying around with you is capable of high-definition 3D graphics and online connectivity? Software developers got the hint quickly, and as predicted, mobile gaming has absolutely exploded over the last few years.

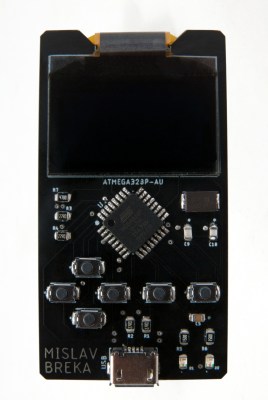
But at the same time, we’ve noticed something of a return to the simplistic handheld systems of yore. Perhaps it’s little more than nostalgia, but small bare-bones systems like the one [Mislav Breka] has entered into the 2019 Hackaday Prize show that not everyone is satisfied with the direction modern gaming has gone in. His system is specifically designed as an experiment to build the most minimal gaming system possible.

In terms of the overall design, this ATMega328 powered system is similar to a scaled-down Arduboy. But while the visual similarities are obvious, the BOM that [Mislav] has provided seems to indicate a considerably more spartan device. Currently there doesn’t seem to be any provision for audio, nor is there a battery and the associated circuitry to charge it. As promised, there’s little here other than the bare essentials.

Unfortunately, the project is off to something of a rocky start. As [Mislav] explains in his writeup on Hackaday.io, there’s a mistake somewhere in either the board design or the component selection that’s keeping the device from accepting a firmware. He won’t have the equipment to debug the device until he returns to school, and is actively looking for volunteers who might be interested in helping him get the kinks worked out on the design.