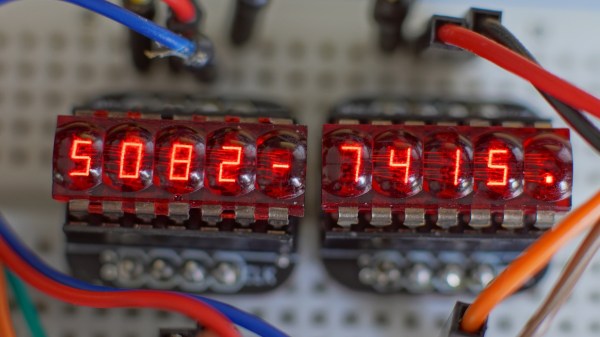
For those of us who remember LED calculators, the HP 5082-7400 series red “bubble” displays hold a special charm. Available in 3, 4, or 5-digit varieties, these multiplexed 7-segment displays provided countless hours of entertainment to those who would spell upside-down words on their pocket calculators. In case you happen to be lucky enough to have access to a few of these beautiful vintage display sticks, [Gigawipf] has designed a small driver PCB that lets you easily interface them to a modern microcontroller.
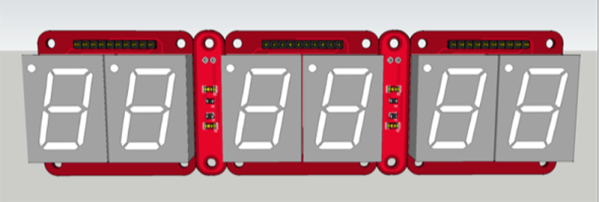
At the heart of the board, aimed at either the 5082-7405 or 5082-7415 5-digit modules, are a pair of 74HC595 shift registers in tiny QFN packages. Five lines from one register drive one of the common cathodes for the selected digit, while the other register drives the eight anode lines through 330-Ohm resistors. The boards are slightly smaller than the width of the displays allowing you to stack them seamlessly for more digits, and eight header pins on each allow you to plug them into solderless breadboards for prototyping. The result is easy to drive with some simple code, and [Gigawipf] provides an example for Arduino as part of the project. The Eagle design files are supplied, as well as Gerbers for those who just want to have some boards made. This sounds like a great way to get some of these vintage displays going again.
If you can’t find any of these displays to play, with, you can try making some larger digits from individual surface-mount LEDs.