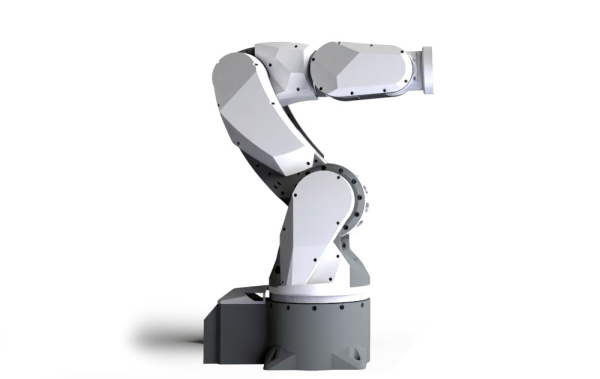
ARCTOS is a 6-DOF robot arm based upon 3D printed mechanics running a modified version of GRBL firmware. Let’s get this straight now, the firmware is open source, but the hardware plans are a paid download, but for less than forty euros, we reckon the investment would be well worth it, judging from the quality of the build instructions and the software support already in place. Continue reading “Arctos Robotics: Build A Robot Arm Out Of 3D Printer Spares?”→
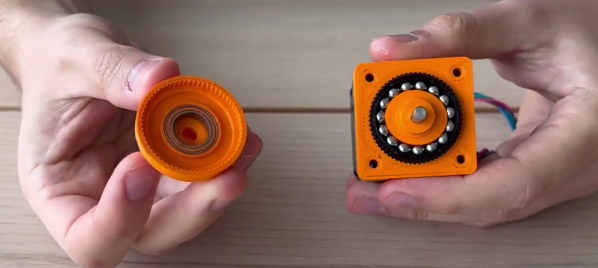
3D-printed gearboxes are always an interesting design challenge, especially if you want to make them compact. [ZeroBacklash] created a little strain wave gearbox (harmonic drive) for when you want to trade speed for torque on NEMA 17 stepper motors.
Strain wave gears work by deforming a stationary flexible spline into an ellipse so the teeth engage the internal teeth of the output spline. Add a couple of extra teeth on the output side, and you get a high-reduction gearbox with fewer parts and reduced volume than equivalent spur gearing. Keeping the flexible spline stationery is achieved by making half of it engage with a stationary spline with the same number of teeth.
In this case, there are 60 teeth on the input side and 62 on the output, giving a gear ratio of 30:1. The flexible spline is deformed using a set of bearing balls and an elliptical plug on the shaft of the motor. It makes for a compact design that matches the frontal size of the stepper motor and is only about 27 mm long. [ZeroBacklash] has not released any design files, but the idea should be simple to replicate.
We’ve featured a couple of 3D printed harmonic drives of different sizes, but they usually use a pair of ball bearings as the wave generators, which doesn’t lend itself well to smaller designs.
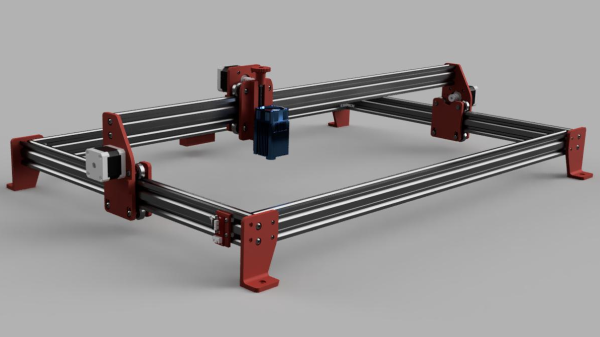
[Mark aka Mokey] borrowed his friend’s open-frame laser engraver for a while, and found it somewhat lacking in features and a bit too pricey for what it was. Naturally, he thought he could do better (video, embedded below.) After a spot of modelling in Fusion 360, and some online shopping at the usual places, he had all the parts needed to construct an X-Y bot, and we reckon it looks like a pretty good starting point. [Mark] had a Sainsmart FL55 5.5W laser module kicking around, so that was dropped into the build, together with the usual Arduino plus CNC shield combo running GRBL.
[Mark] has provided the full F360 source (see the mokeylaser GitHub) and a comprehensive bill-of-materials, weighing in at about $400, and based upon the usual 2040 aluminium extrusions. This makes MokeyLaser a reasonable starting point for further development. Future plans include upgrading the controller to something a bit more modern (and 32-bits) as well as a more powerful laser (we do hope he’s got some proper laser glasses!) and adding air assist. In our experience, air assist will definitely improve matters, clearing out the smoke from the beam path and increasing the penetration of the laser significantly. We think there is no need for more optical power (and greater risk) for this application. [Mark] says in the video that he’s working on an additional build video, so maybe come by later and check that out?
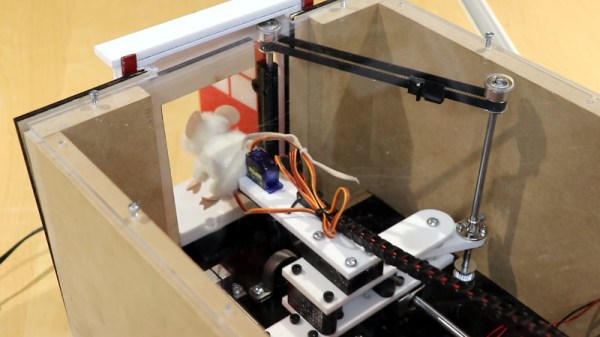
At first glance, this little animatronic mouse might seem like a fairly simple affair. A door opens, our rodent friend pops its head out, looks around, and goes back in. But just like in The Wizard of Oz, a strategically placed curtain is hiding the impressive array of gadgetry that makes the trick possible.
Creator [Will Donaldson] has put together a fantastic write-up of just what went into creating this little fellow, and we think you’ll be surprised at just how serious the mechanics involved are. Take for example the rig that provides horizontal motion with a NEMA 17 stepper motor mated to a 200 mm leadscrew and dual 8 mm rail assembly that would like right at home as part of a 3D printer.
The star of the show rides atop a beefy sliding carriage assembly made of printed components and acrylic, which is linked to the door via a GT2 timing belt and pulley in such a way that it automatically opens and closes at the appropriate time. To inject some life into the puppet, [Will] stuffed it with a pair of SG90 servos in a sort of pan-and-tilt arrangement: the rear servo turns the mouse’s body left and right, while the forward one moves the head up and down.
An Arduino Uno controls the servos, as well as the stepper motor by way of a TB6600 controller, and optical limit switches are used to make sure nothing moves out bounds. [Will] is keeping the CAD files and source code to himself for the time being, though we imagine a sufficiently dedicated mouseketeer could recreate the installation based on the available information.
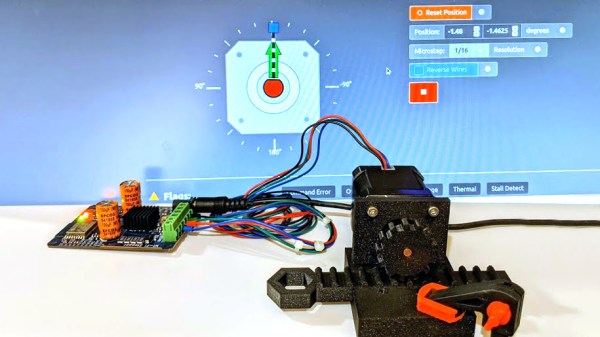
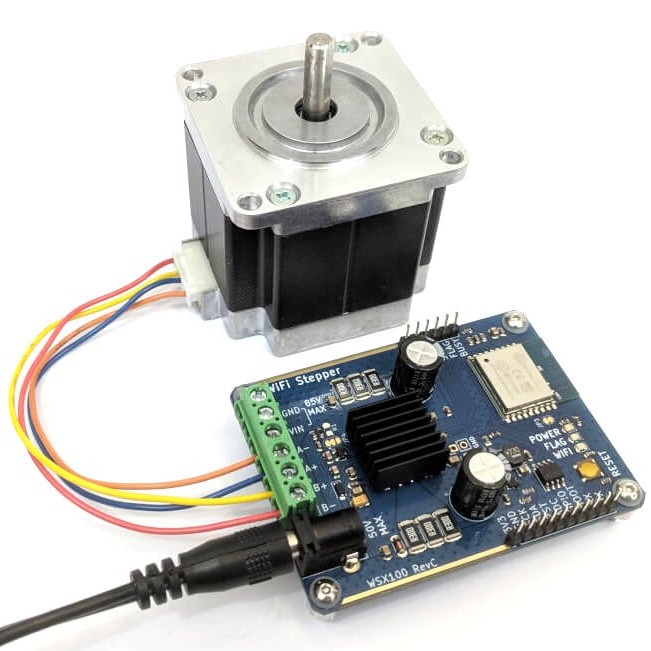
Like most of us, I sometimes indulge in buying a part for its potential or anticipated utility rather than for a specific project or purpose. That’s exactly how I ended up with the WSX100 Wi-Fi Stepper, a single board device intended to be one of the fastest and easiest ways to get a stepper motor integrated into a project. Mine came from their Crowd Supply campaign, which raised money for production and continues to accept orders.
What’s It For?
The WSX100 Wi-Fi Stepper Driver (with motor), by Good Robotics
The main reason the Wi-Fi Stepper exists is to make getting a stepper motor up and running fast and simple, in a way that doesn’t paint a design into a corner. The device can certainly be used outside of prototyping, but I think one of its best features is the ability to help quickly turn an idea into something physical. When prototyping, it’s always better to spend less time on basic bits like driving motors.
In a way, stepper motors are a bit like RGB LEDs or LCD displays were before integrated drivers and easy interfaces became common for them. Steppers require work (and suitable power supplies) to get up and running, and that effort can be a barrier to getting an idea off the ground. With the Wi-Fi Stepper, a motor can be fired up and given positional commands (or set to a speed and direction) in no time at all. By sending commands over WiFi, there isn’t even the need to wire up any control logic.
Right now, you can get a diode laser engraver on eBay for around $100 USD. That sounds like a deal, but it’ll probably use some arcane proprietary software, won’t be terribly accurate, and the laser itself will almost certainly be fully exposed. Of course there’s no shortage of DIY builds which improve upon this situation greatly, but unfortunately the documentation and instructions to replicate them yourself often leave a lot to be desired.
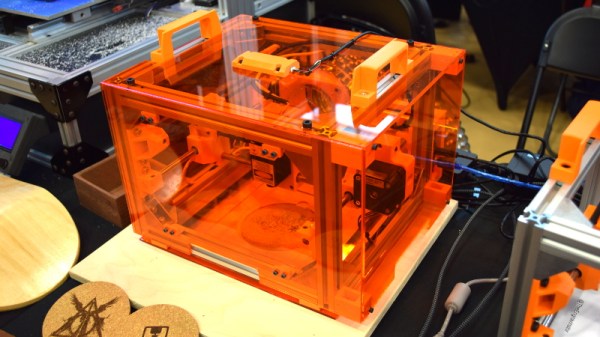
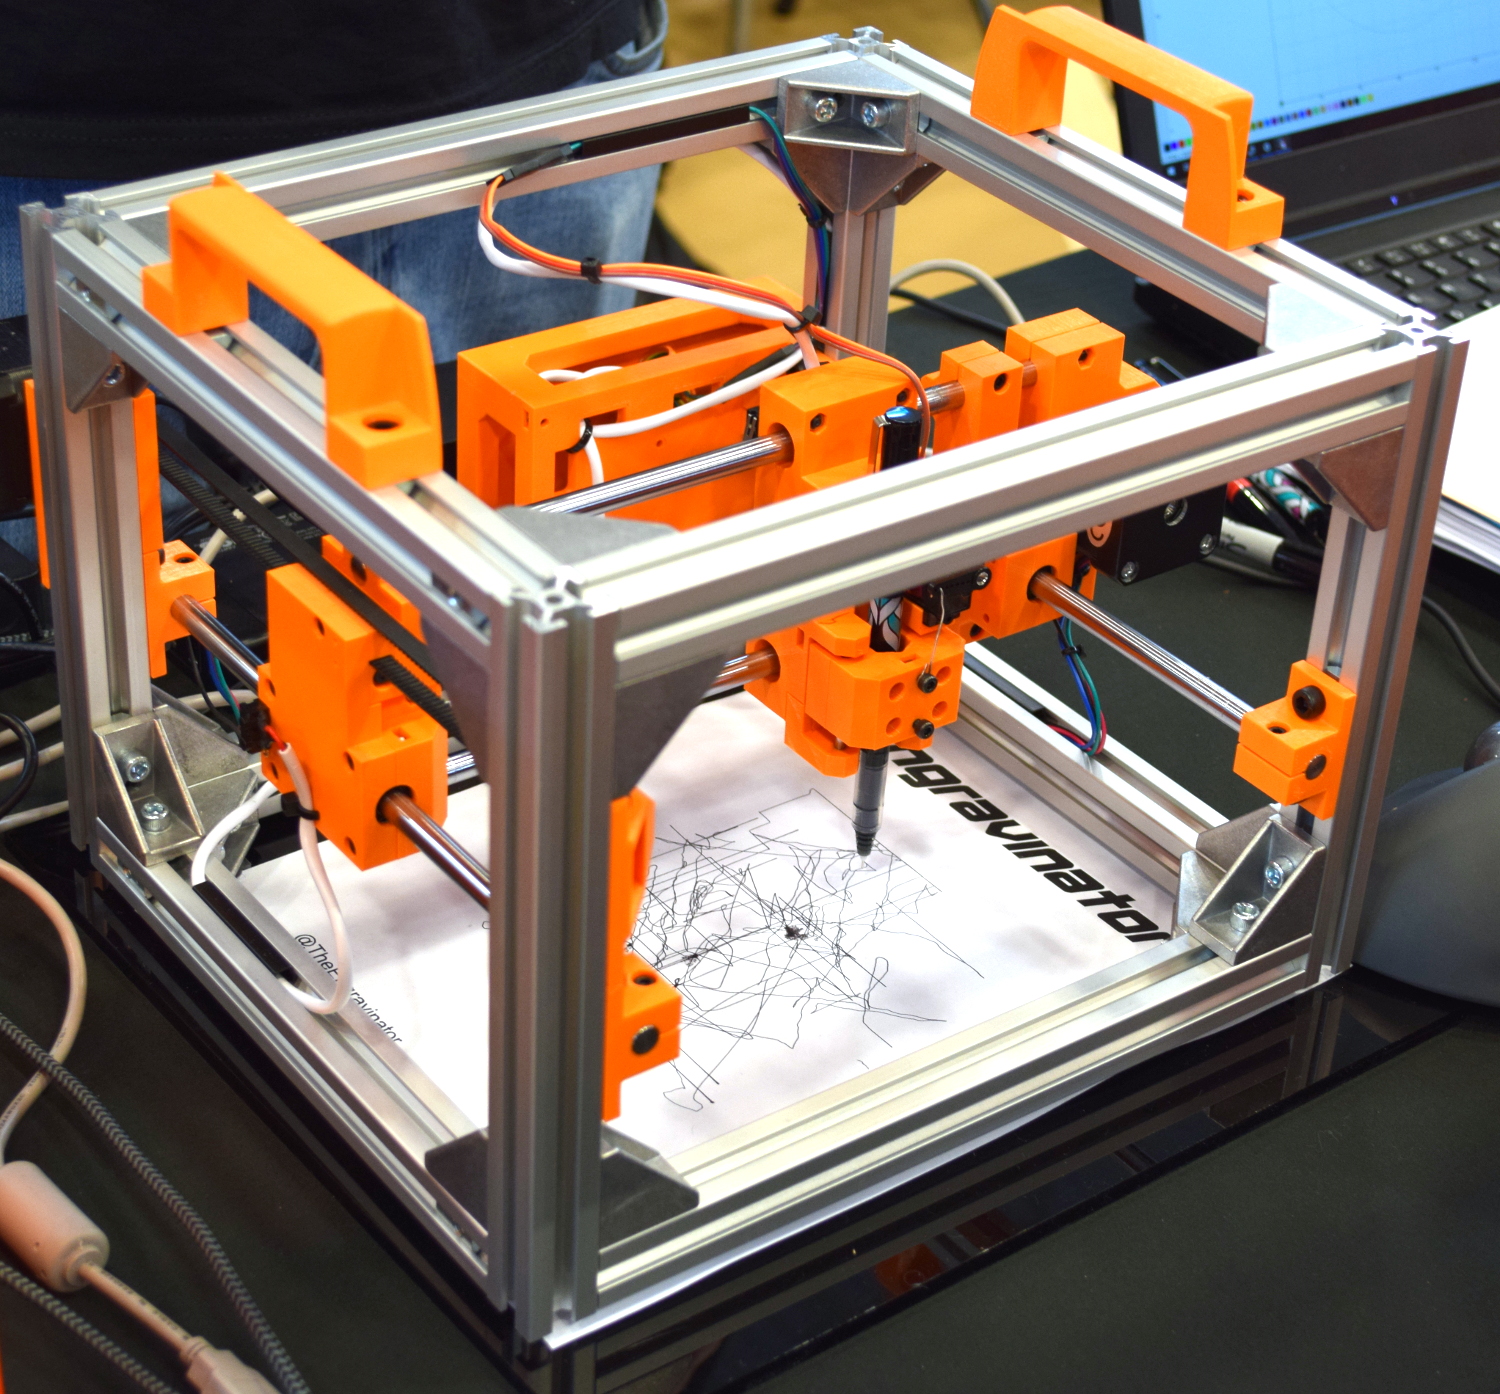
To get a safe and accurate laser platform into the hands of hackers everywhere, we need more well documented open source designs that are actually built with community in mind. Projects like the Engravinator from [Adam Haile]. This isn’t a one-off design with documentation thrown together after the fact, it’s a fully open hardware engraver with a concise assembly guide that’s built from 3D printed parts and readily available components. You’re free to source and print the parts yourself or, eventually, purchase everything as a kit.
Pen-equipped Engravinator
The microwave-sized Engravinator is built from standard 2020 aluminum extrusion, and offers a workable area of 130mm x 130mm. There’s a hatch on the front of the enclosure for objects that are small enough to fit inside the machine, but the open bottom and handles on the top also allow the user to place the Engravinator directly onto the work surface. [Adam] says this feature can be especially useful if you’re looking to burn a design into a tabletop or other large object.
Outside of the aluminum extrusion and miscellaneous hardware that make up the frame, most of the other parts are 3D printed. Released under the CERN Open Hardware License v1.2 and distributed as both STL and STEP files, the printable parts for the Engravinator are ripe for modification should you be so inclined. The same goes for the DXF files for the enclosure panels, which will need to be cut out of orange acrylic with a CNC or (ironically) a laser.
Curtains are about as simple as household devices get, but they can be remarkably troublesome to automate. Everyone’s window treatments are slightly different, which frustrates a standardized solution. [dfrenkel] has a passion for DIY and wanted his mornings flooded with sunlight for more peaceful awakenings, so the MorningRod Smart Curtain Rod was born.
Replacing the curtain rod with aluminum extrusion and 3D printed fixtures goes a long way towards standardizing for automation.
MorningRod’s design takes advantage of affordable hardware like aluminum extrusions and 3D printed parts to create a system that attempts to allow users to keep their existing curtains as much as possible.
The curtain rod is replaced with aluminum extrusion. MorningRod borrows ideas from CNC projects to turn the curtain rod into a kind of double-ended linear actuator, upon which the curtains are just along for the ride. An ESP32 serves as the brains while a NEMA17 stepper motor provides the brawn. The result is a motorized curtain opening and closing with a wireless interface that can be easily integrated into home automation projects.
[dfrenkel] is offering a kit, but those who would prefer to roll their own should check out the project page on Thingiverse.